If you’re looking for the BrickPi3 instructions, go here.
BrickPi3 is our latest version of the BrickPi. If you have recently purchased your BrickPi, it most likely is a BrickPi3. If you are in doubt, check the following:
- If your BrickPi has a power switch, it is a BrickPi3. Please see here for tutorials and documentation.
- If your BrickPi does NOT have a power switch, it is a BrickPi+. Please proceed to the directions below!
If you have an older version of the BrickPi, such as the BrickPi+, please click below to open.
If you’re looking for the BrickPi3 instructions, go here.
If you have an older version of the BrickPi, such as the BrickPi+, please click below to open.
BrickPi+ Documentation
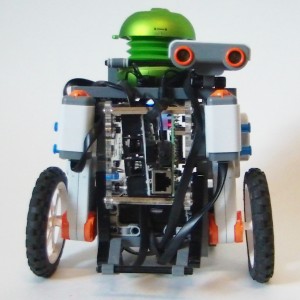
Welcome to the BrickPi+ Getting Started guide! We’ll walk you through getting it setup and started with these step-by-step instructions. We recommend you go through each step below, in the following order:
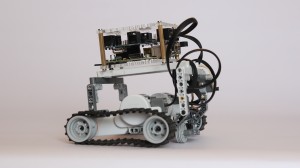
- Assemble the Case
- Assemble the Basic Case: 2-sided BrickPi case (works with all versions of Raspberry Pi)
- Assemble the Upgraded Case: 6-sided BrickPi B+ case (works with Raspberry Pi B+ & 2)
- Set up the SD Card
- Power up
- Set up your BrickPi
- Build your robot: Attach LEGO MINDSTORMS (NXT/EV3) sensors, motors & TECHNIC parts
- Control the BrickPi
- Program your Robot
- Troubleshoot Common Issues With the BrickPi.
You can also watch the video tutorial on Youtube:
BrickPi+ Documentation
Welcome to the BrickPi+ Getting Started guide! We’ll walk you through getting it setup and started with these step-by-step instructions. We recommend you go through each step below, in the following order:
- Assemble the Case
- Assemble the Basic Case: 2-sided BrickPi case (works with all versions of Raspberry Pi)
- Assemble the Upgraded Case: 6-sided BrickPi B+ case (works with Raspberry Pi B+ & 2)
- Set up the SD Card
- Power up
- Set up your BrickPi
- Build your robot: Attach LEGO MINDSTORMS (NXT/EV3) sensors, motors & TECHNIC parts
- Control the BrickPi
- Program your Robot
- Troubleshoot Common Issues With the BrickPi.
You can also watch the video tutorial on Youtube:
This section has information about programming the BrickPi. At this point, we assume you’ve gotten your BrickPi setup, the case built, and you’re ready to program the BrickPi to tell some sensors and motors what to do! If not, please start with the Getting Started guide above.
Before moving forward, please be sure to enable BrickPi communications over serial. We have a guide on how to do this with Raspbian for Robots here.
Programming Options
Choose one of the languages below:
- C
 Python
 Scratch
 Windows 10 IoT Core
- BlockyTalky
- Java (Github) (ev3Dev)
- NodeJs
- Ruby
- Erlang
- Wyliodrin
General Points About Programming the BrickPi
- All of our examples and drivers are on Github. If you think your version is out of date, update with the latest version via Github. If you’re ahead of us, please send us a pull request! (If you don’t know what that means, don’t worry, you will eventually!)
- The BrickPi uses serial communications from the Raspberry Pi to communicate with the BrickPi. Again, unless you’re an advanced user, this isn’t very important to understand. However, you should make sure that your serial is enabled on the Raspberry Pi (we have a guide here).
- If you need help learning how to use Github, check out our tutorial on Github and the Raspberry Pi here.
- BrickPi does not use USB. We have some examples that control or use USB devices, but these are programmed and accessed through the Raspberry Pi.
- Sensors and motors need to be initialized. You can see how that’s done in our examples.
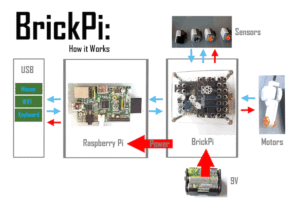
How the BrickPi Works
- The Raspberry Pi (which is where you’re writing and executing these programs) sends orders to the BrickPi. The BrickPi processes these orders, and sends commands to the motors and sensors, and sends back information to the Raspberry Pi. (See the diagram below)
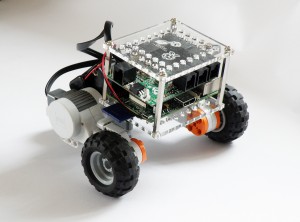
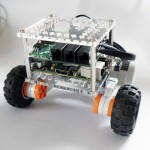
Here are a few cool projects for the BrickPi that we’ve done in Python. Each one comes with building instructions, a bill of material, as well as the code to get it going!
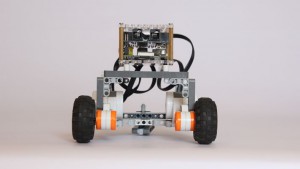
SimpleBot: The Easiest Robot to Build!
Rolly Robot: A Rolling Alarm Clock
“Rigraptor” Model Tank
“SriShooter” Turret Shooter
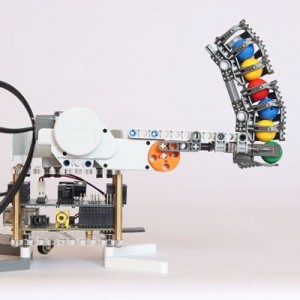
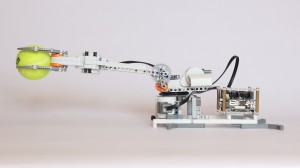
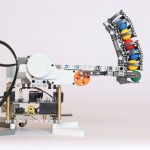
“APL Picker” Robotic Arm
“JJ” Model WIFI Car
TwitterWeather Station
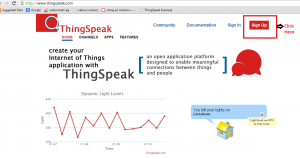
ThingSpeak Temperature with Raspberry Pi
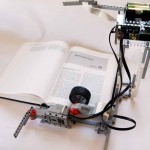
BrickPi Bookreader
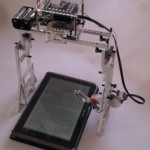
BrickPi Bookreader 2
Browser Controlled Robot
MouseShooter
Space Program

Links to coverage by different media on the BrickPi:

Ars Technica: Raspberry Pi add-on will help you build Lego Mindstorm robot
$45 BrickPi connects Pi to motors, sensors, and Lego bricks.

Tech Crunch: BrickPi Is A Robotics Hacking Platform That Combines Raspberry Pi And LEGO Mindstorms

Mashable: Make a LEGO Robot With a Raspberry Pi
 Humans Invent: Supercharging Lego with the Raspberry Pi
Make Magazine: BrickPi Controls Mindstorms Bots With a RasPi
 CNN (mention, not feature): This Raspberry Pi robot will make you coffee

Tech Hive: BrickPi marries Lego Mindstorms and Raspberry Pi; baby robots imminent
 Element14 Community: ‘Brick Pi’ Lego Bricks, With A Raspberry Pi Brain

EETimes: 10 Amazing Kickstarter Projects Based on the Raspberry Pi