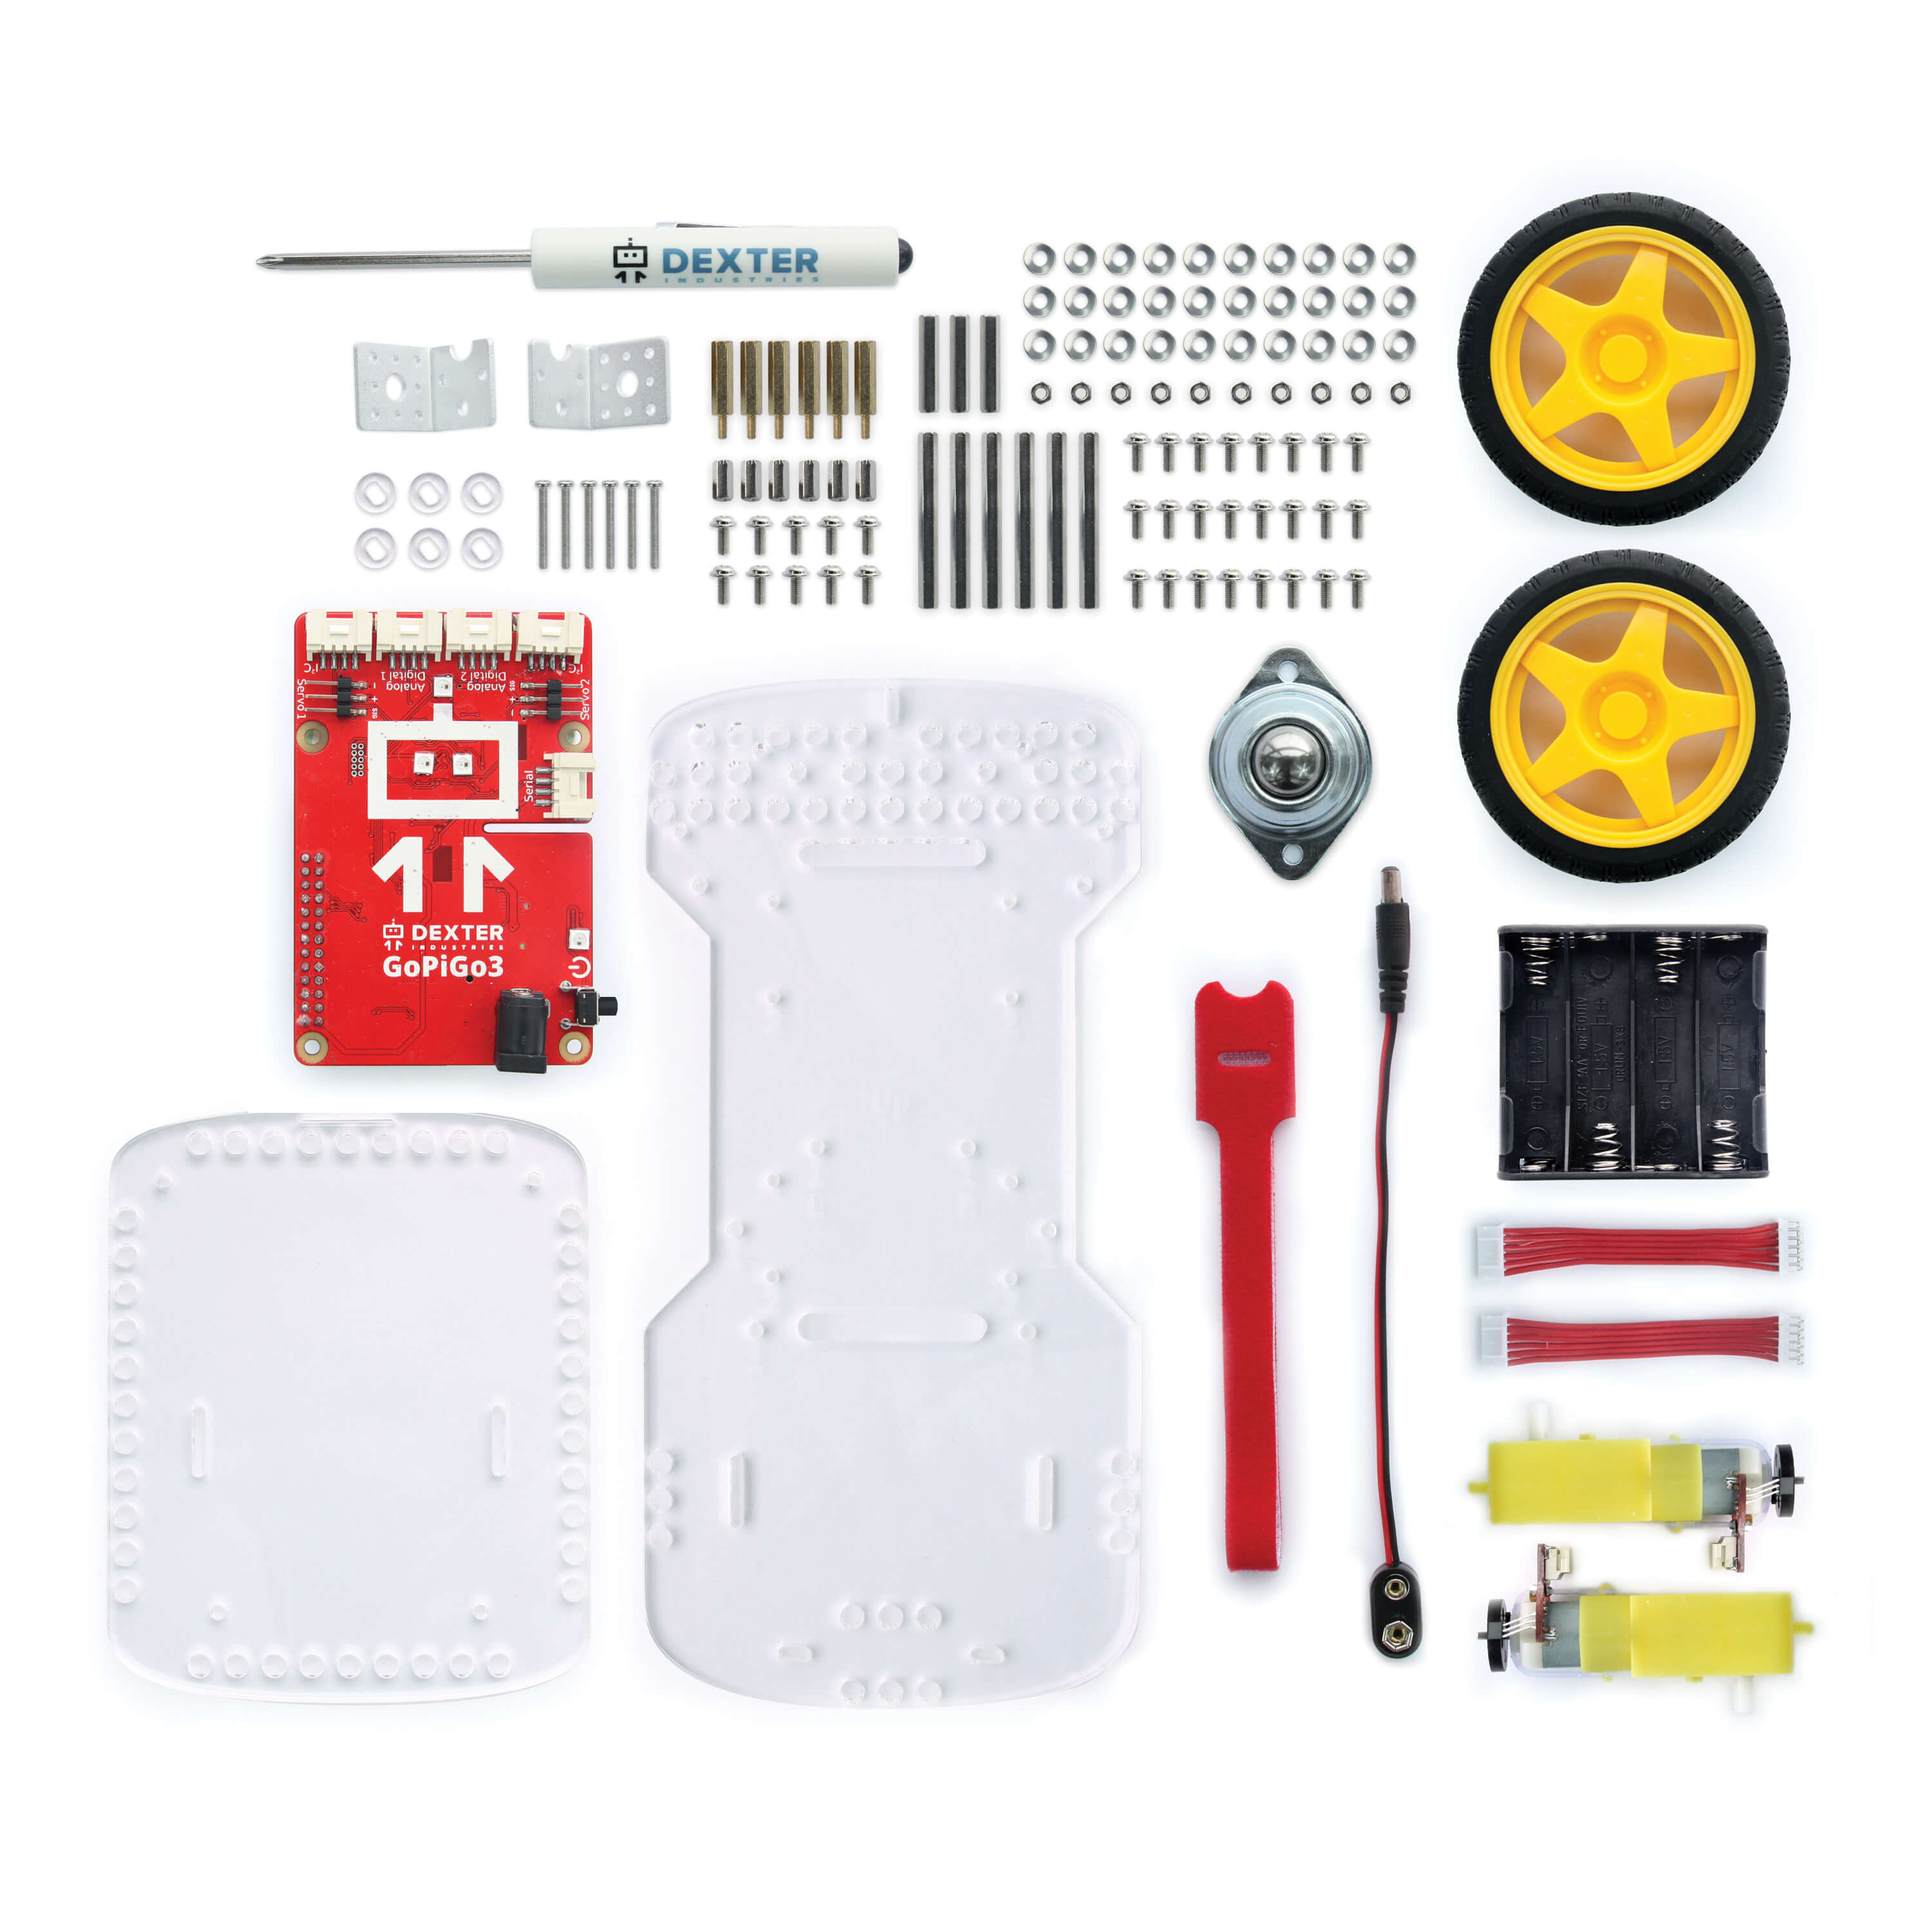
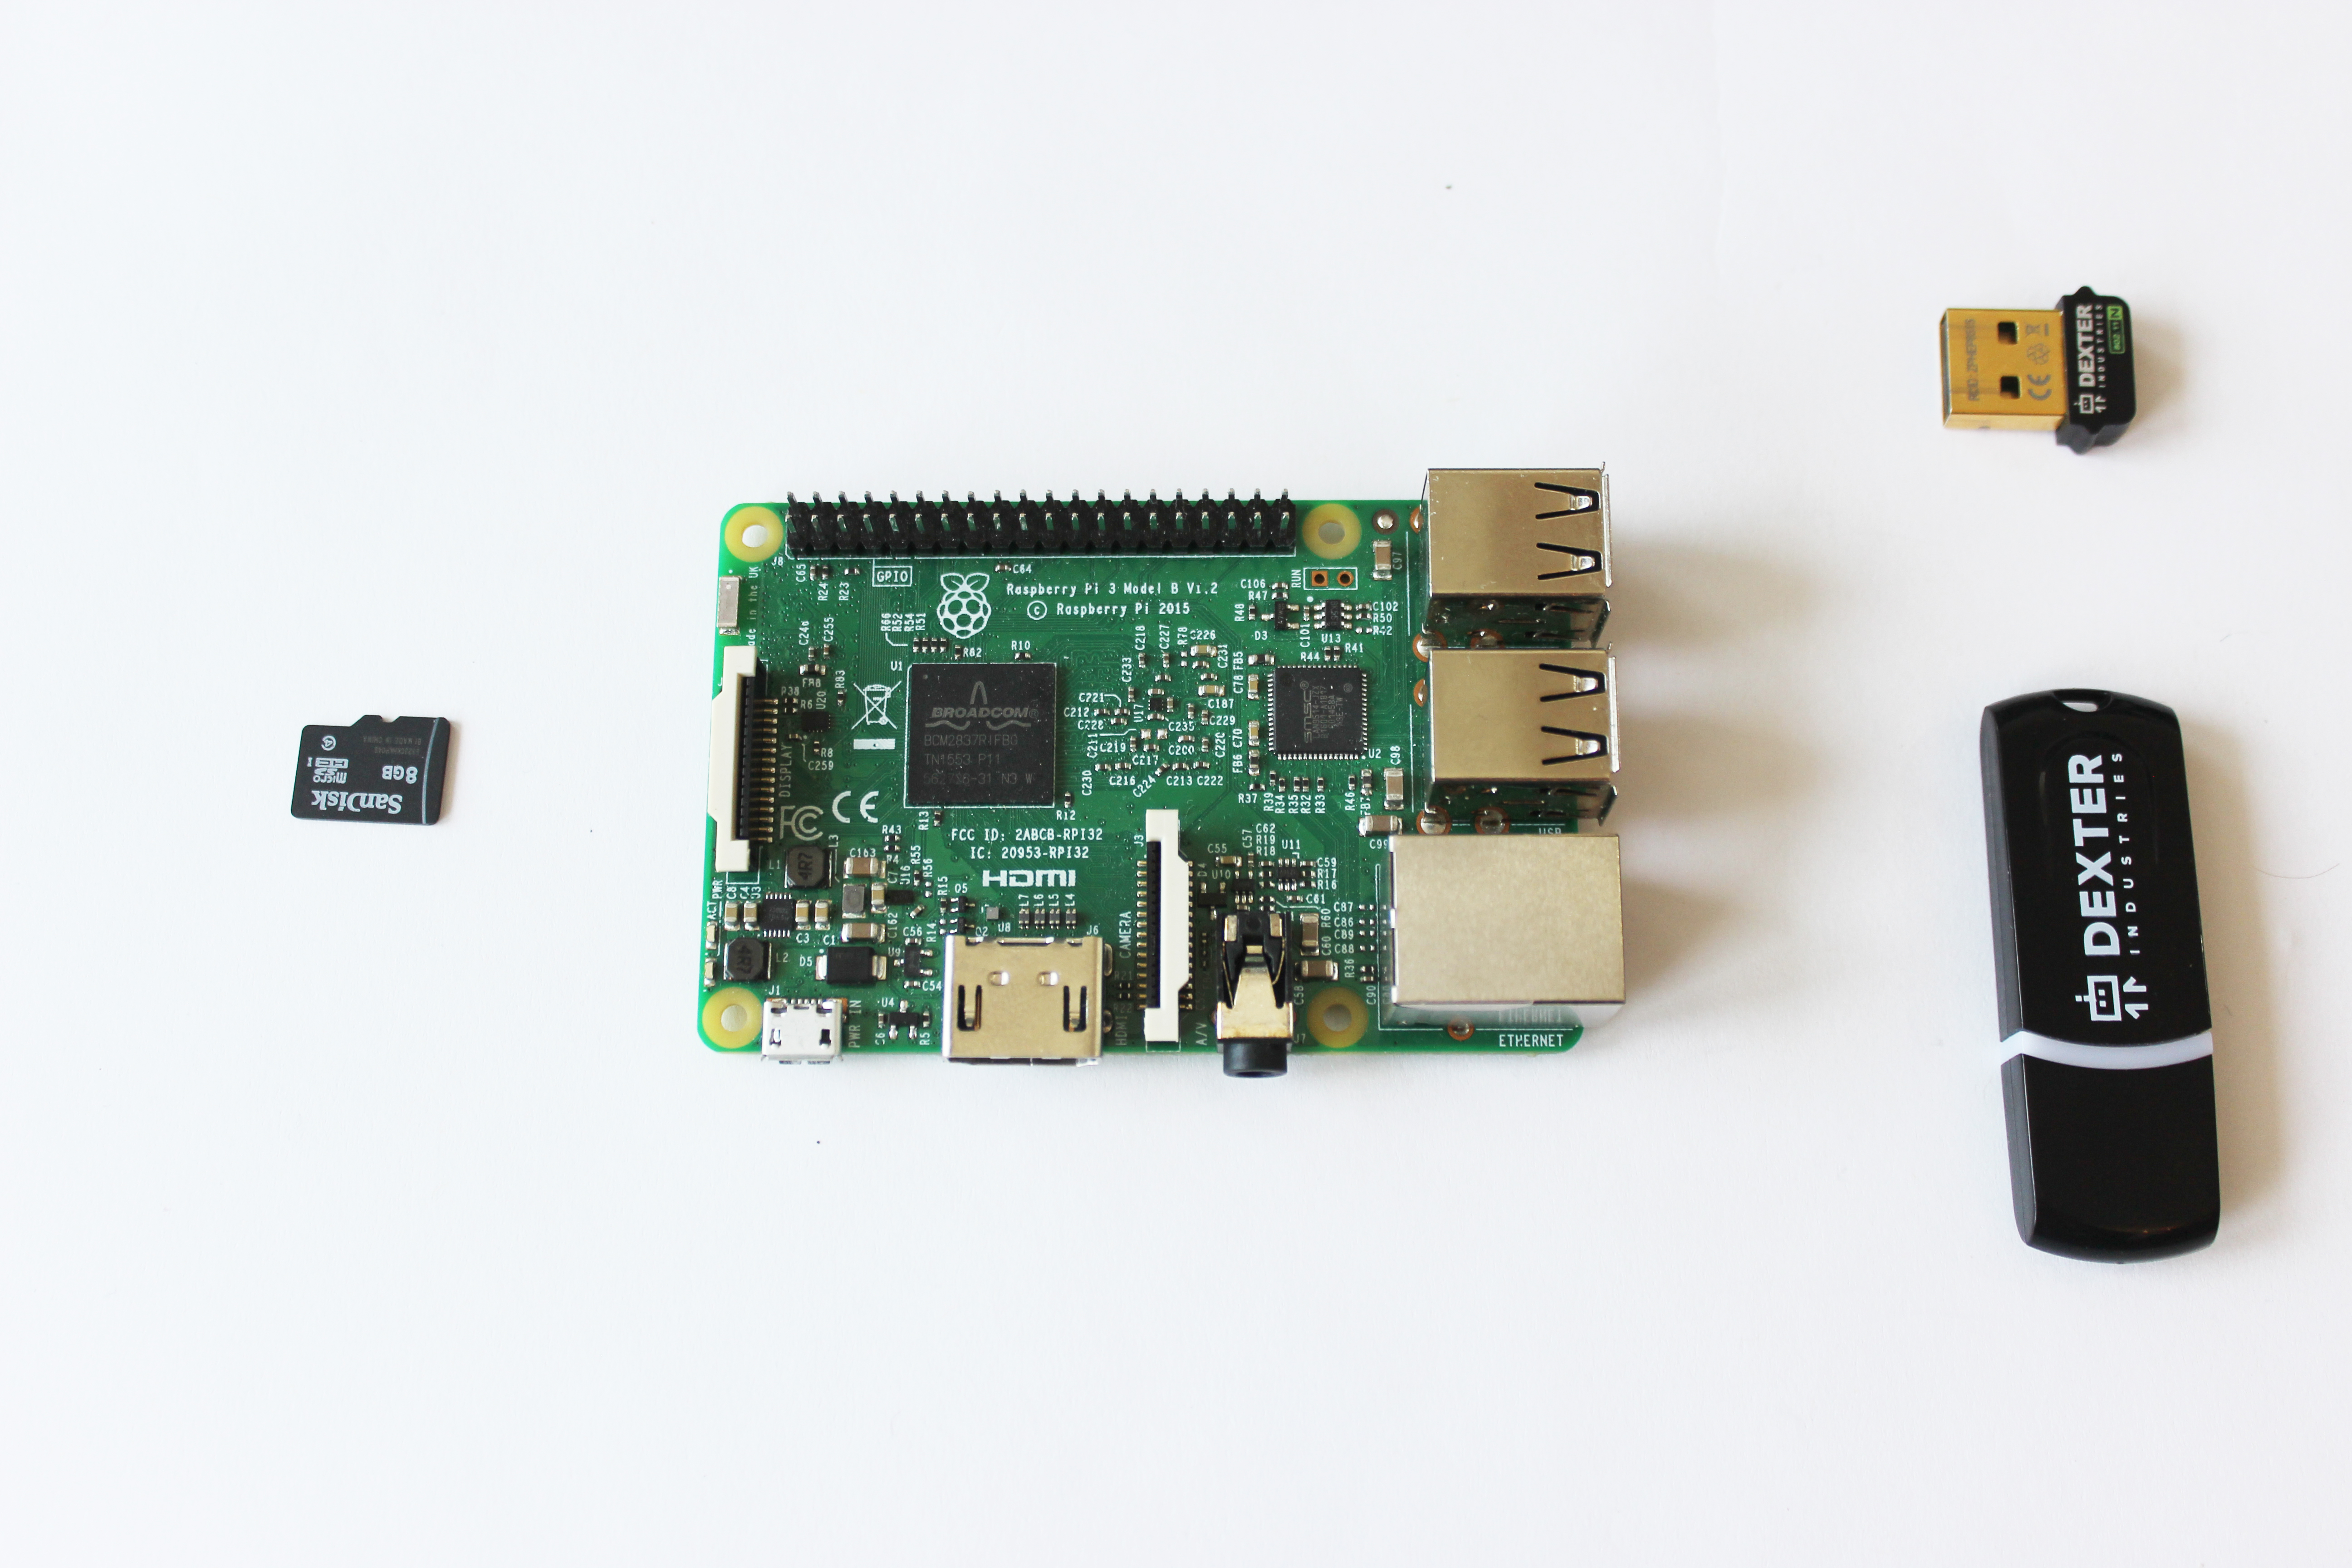
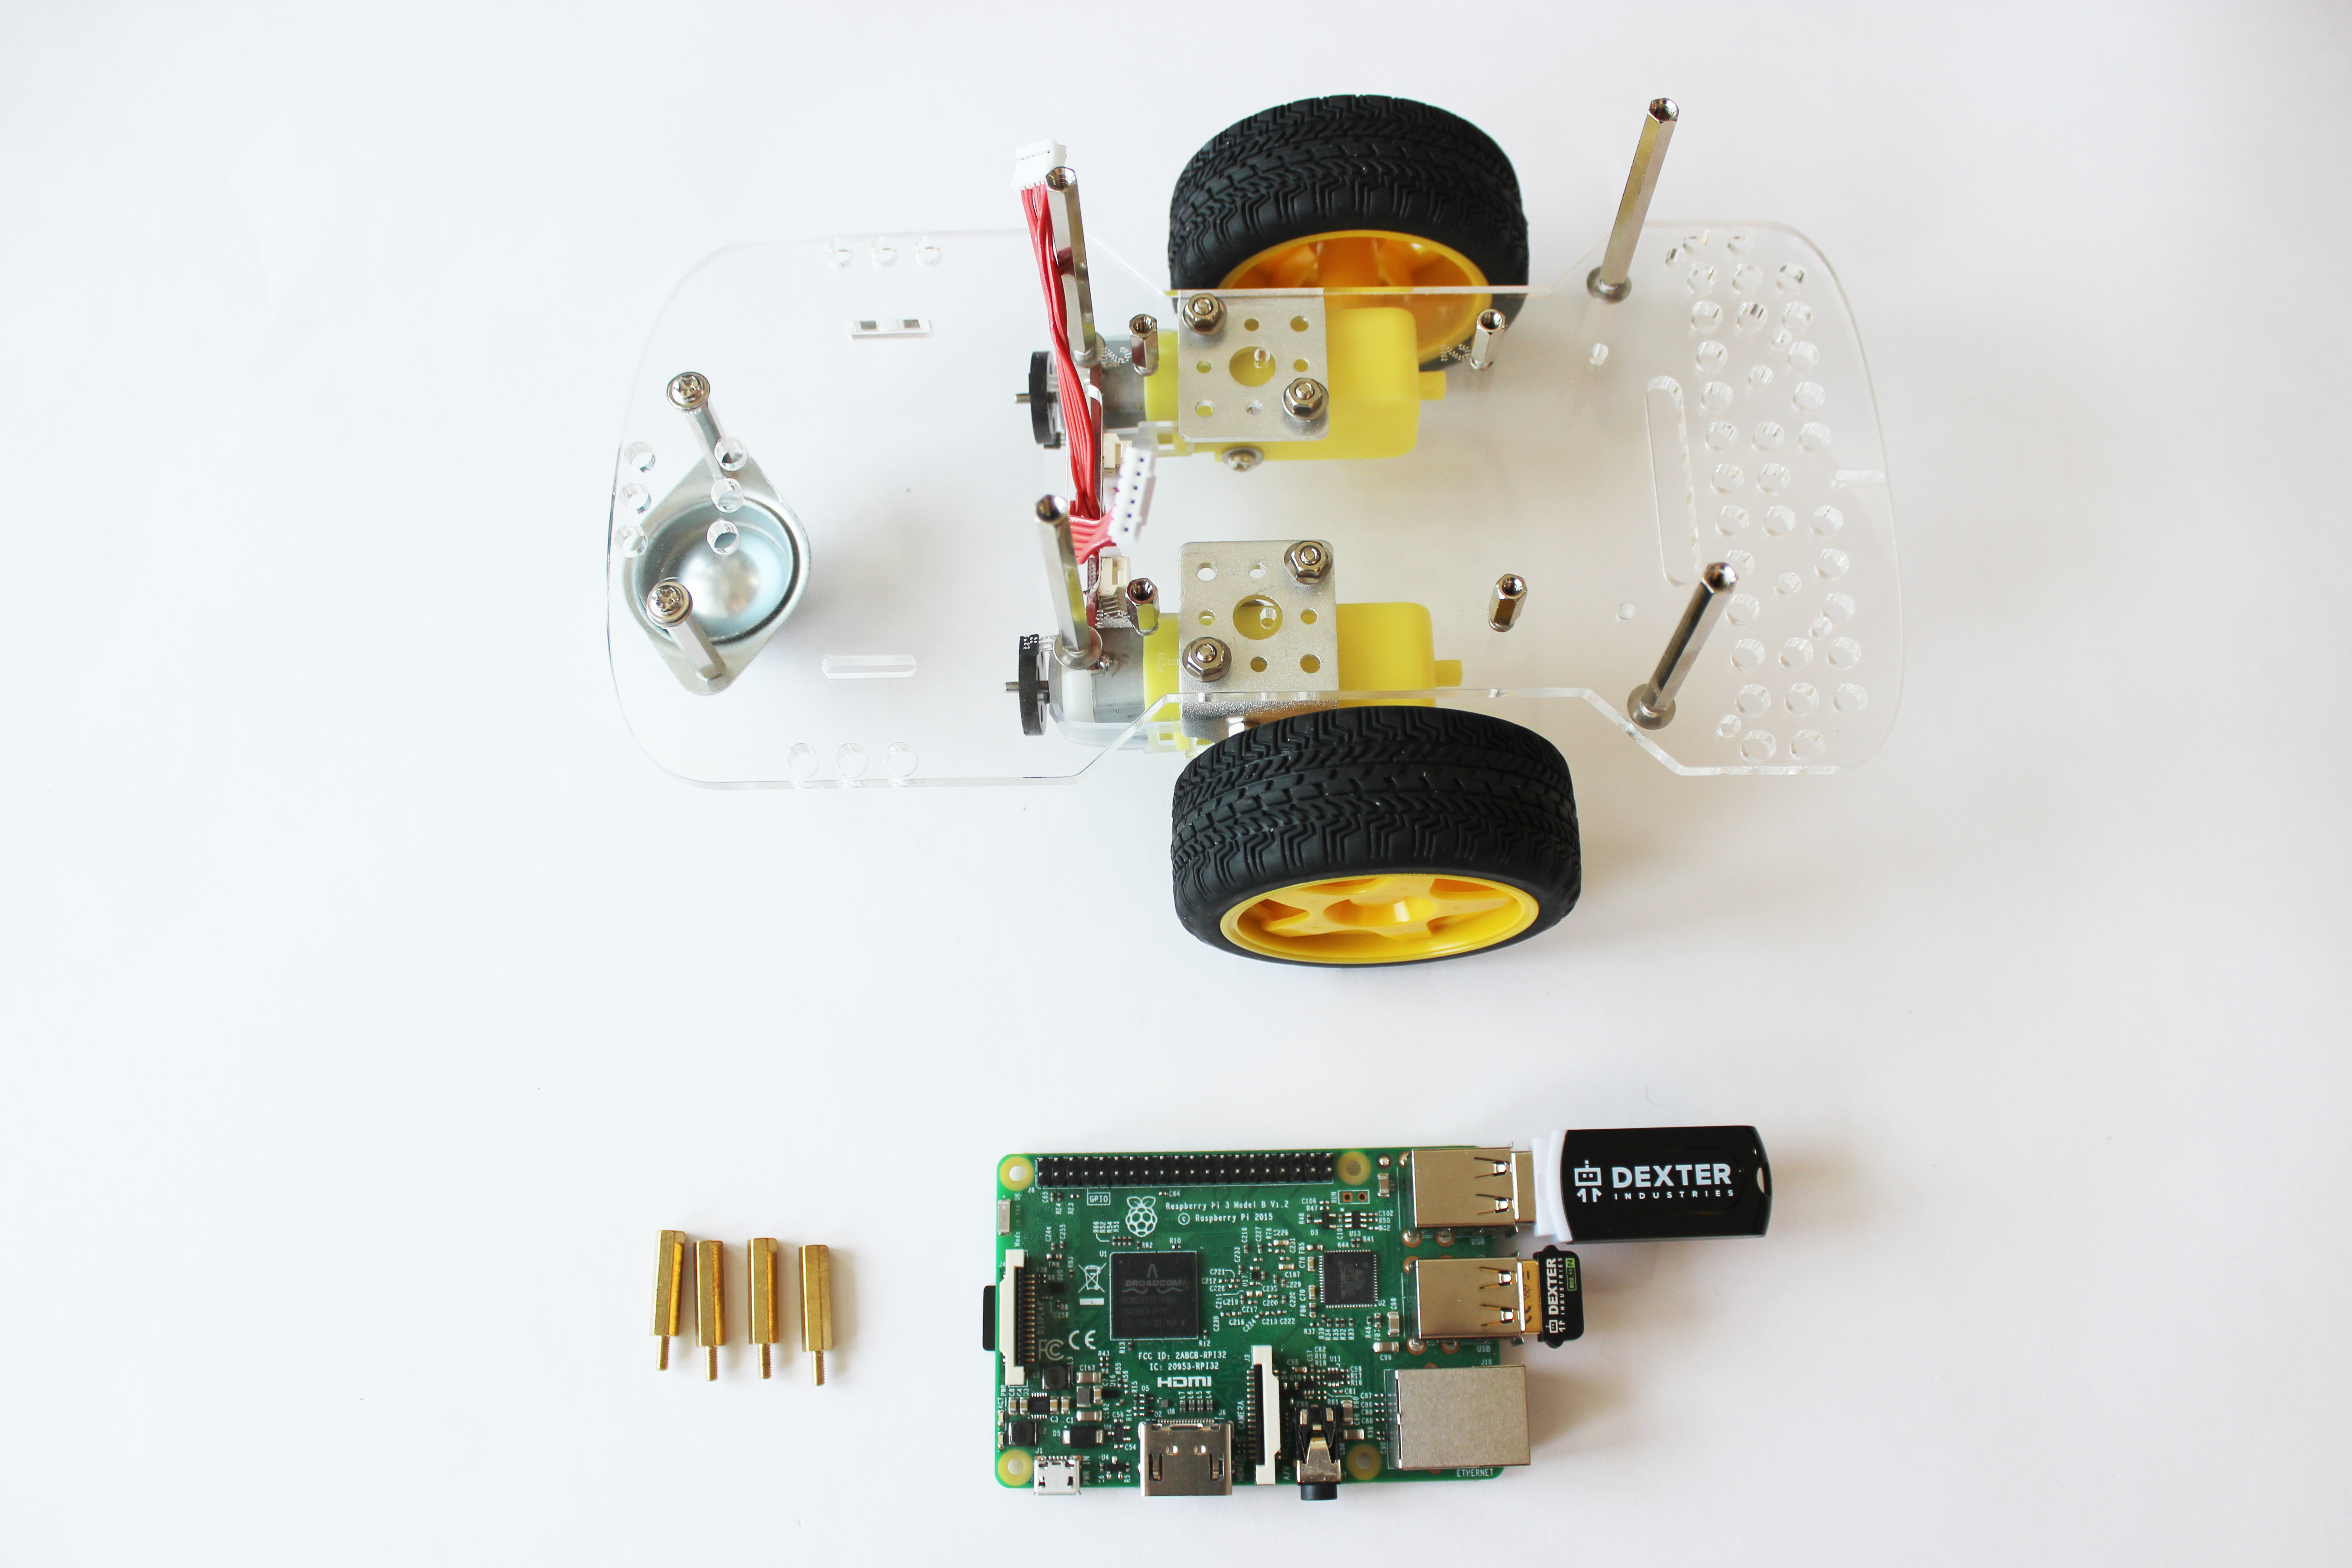
GoPiGo3 Raspberry Pi Robot Kit Components – Click on the image to see a closeup.
Items You’ll Need
- GoPiGo3 Base Kit
- Raspberry Pi (green computer board)
- SD Card with Dexter Industries software
- USB Drive (if using DexterOS SD card)
- Dexter Industries Wifi Dongle (not needed if you have the Raspberry Pi 3)
- 8 AA Batteries
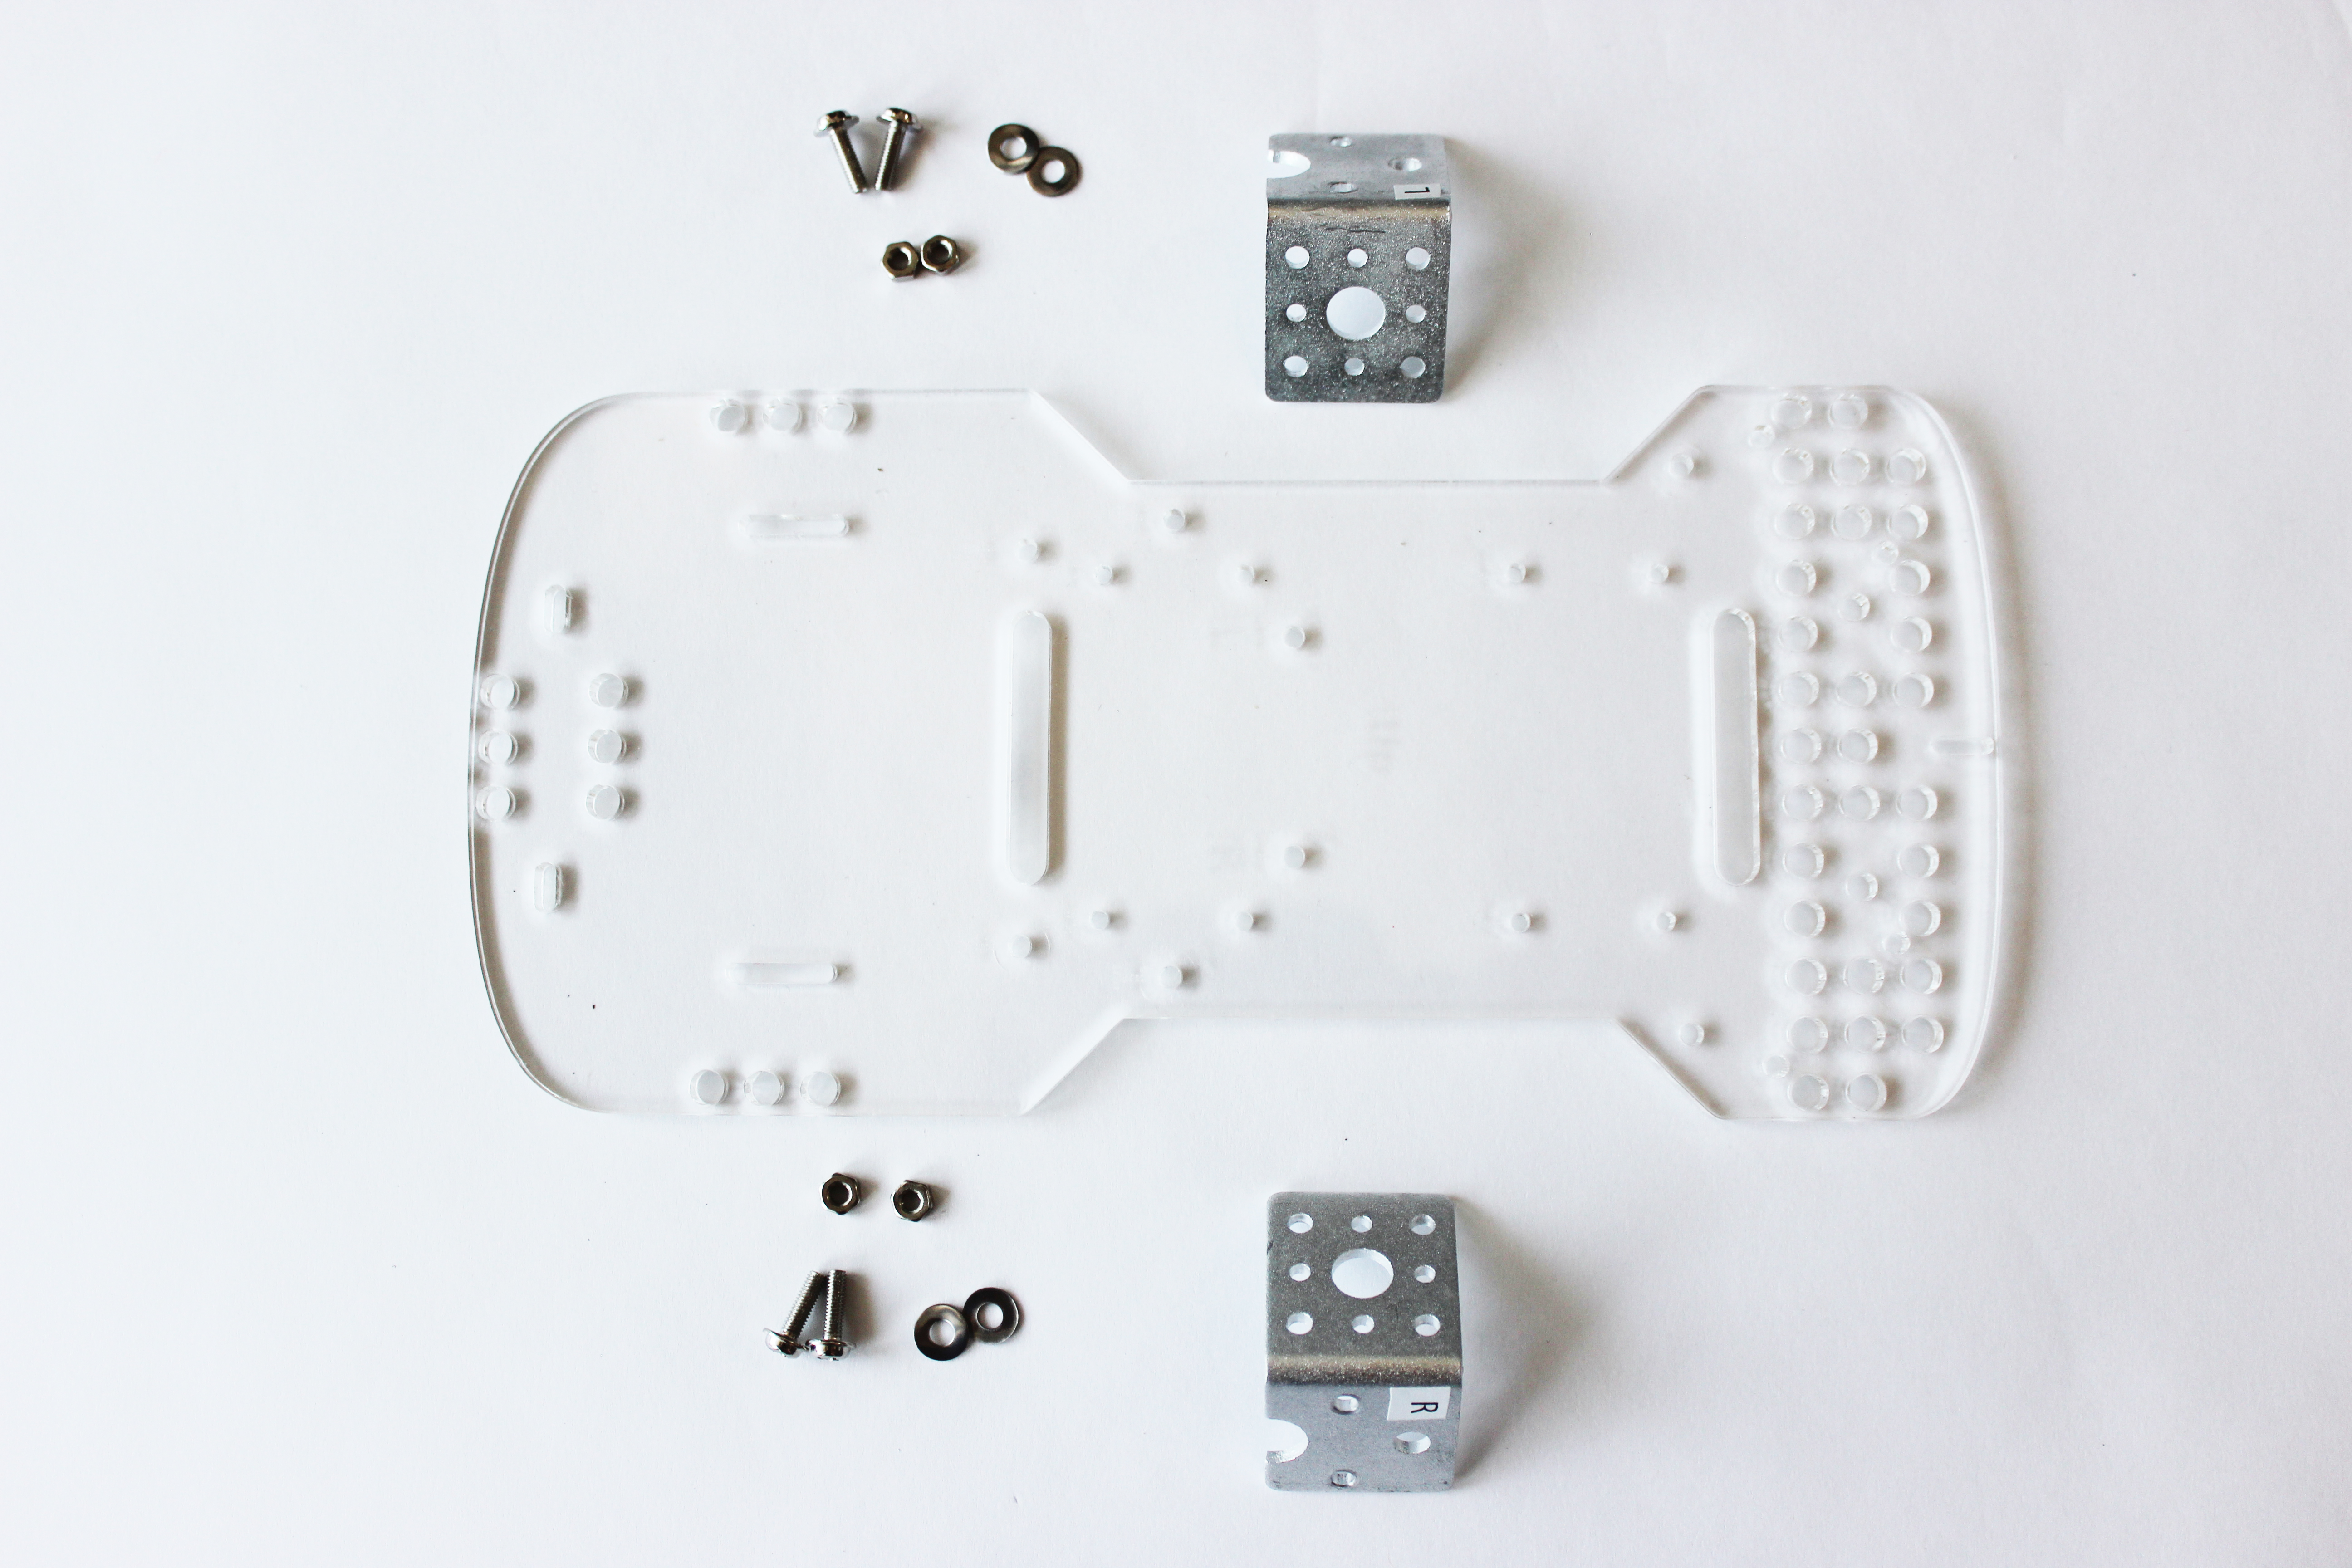
Part 1. Unpack the GoPiGo3 Box
In the GoPiGo3 Base Kit box you should find the following:
- 2 Yellow Wheels
- 2 Motors
- 2 Motor Cables
- GoPiGo3 Board (red)
- 2 Metal Motor Brackets
- 1 Metal Caster Wheel
- 2 Large Acrylic Pieces (body and canopy)
- 1 Battery Box
- 1 Battery Cable
- 1 Velcro Strap
- 1 Small Screwdriver
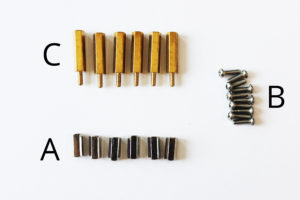
You should have one small bag of hardware that contains:
- (A) 6 Short Silver Posts
- (B) 10 Mini Screws
- (C) 6 Gold Posts
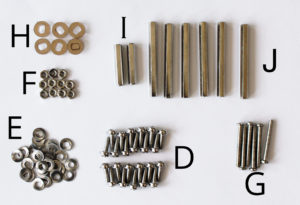
You should have one large bag of hardware that contains:
- (D) 24 Short Screws
- (E) 30 Washers
- (F) 10 Nuts
- (G) 6 Long Screws
- (H) 6 Round Acrylic Spacers
- (I) 3 Medium Silver Posts
- (J) 6 Long Silver Posts
Part 2. Find the Acrylic Parts
The clear acrylic pieces of the GoPiGo3 may come in a protective covering. If yours shipped with this coating, you should be able to peel them off easily. Peel the protective coating away from the 2 large acrylic pieces. You may also want to peel the protective coating from the 2 small round acrylic spacers; they are in the large bag of hardware.
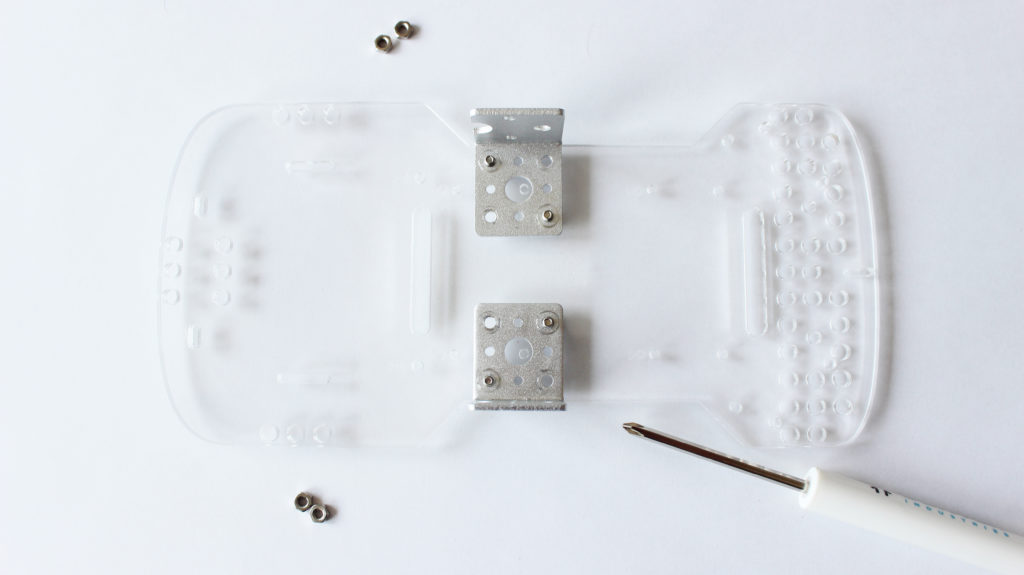
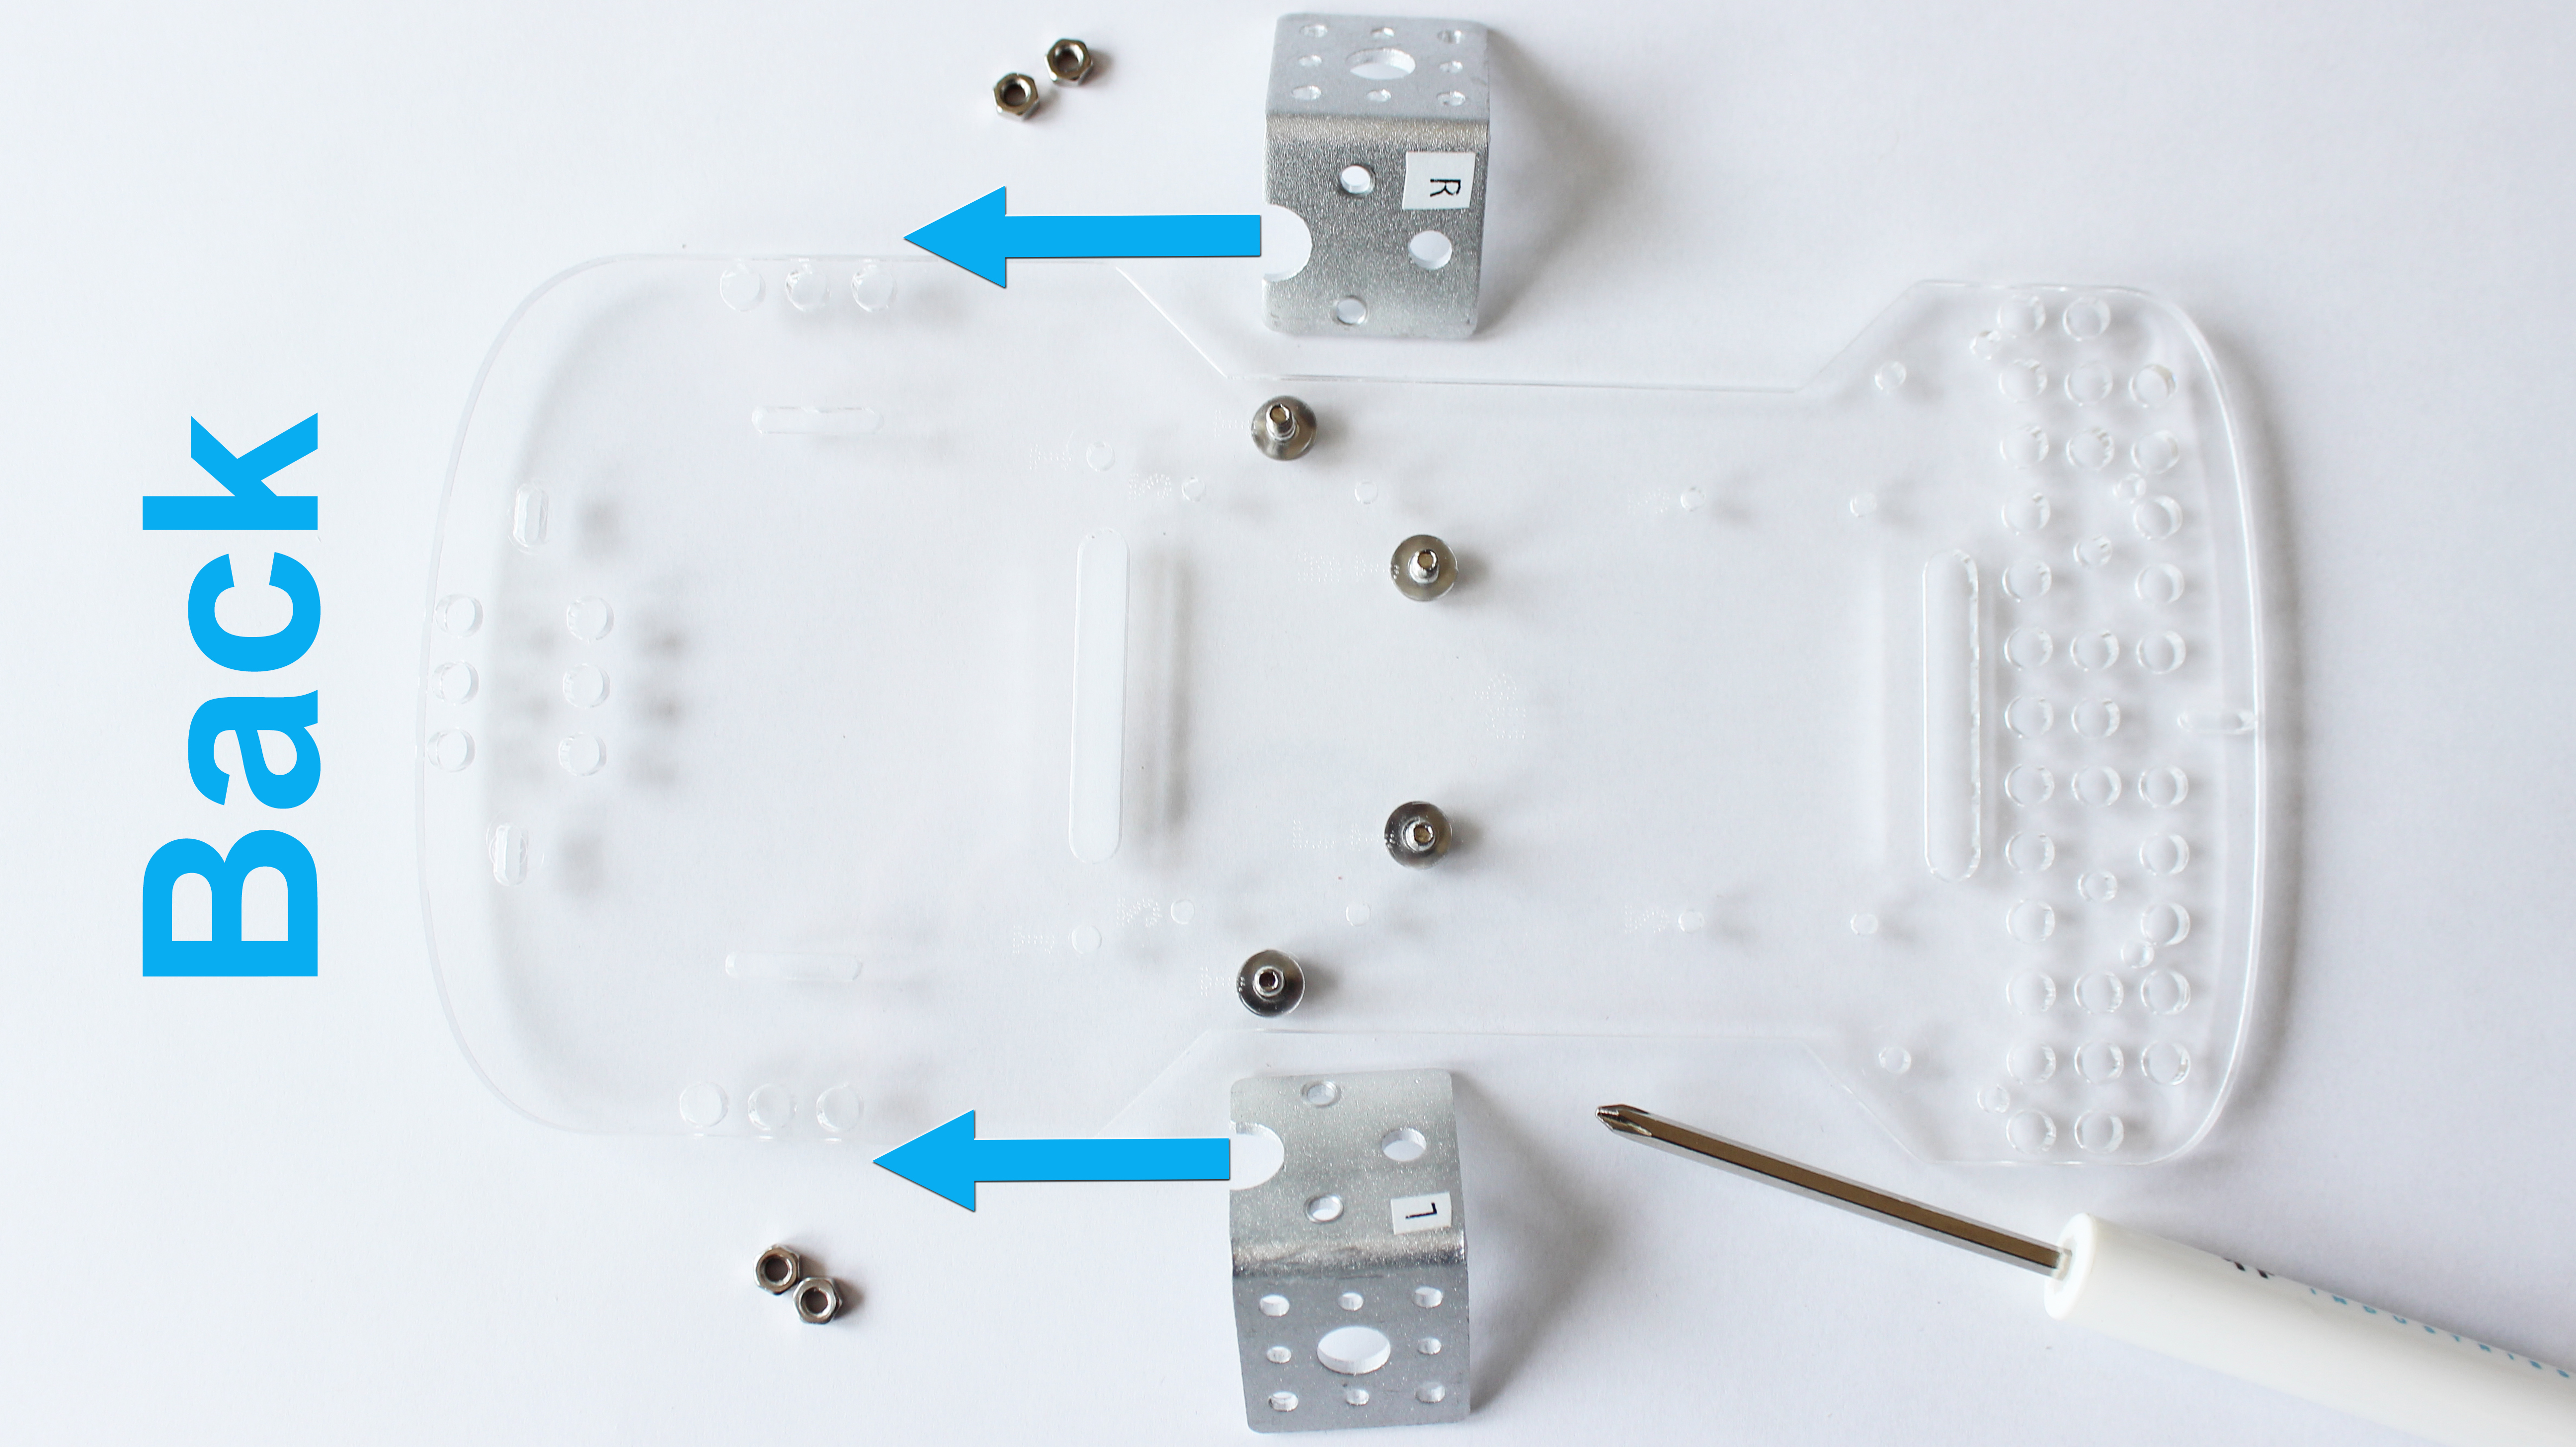
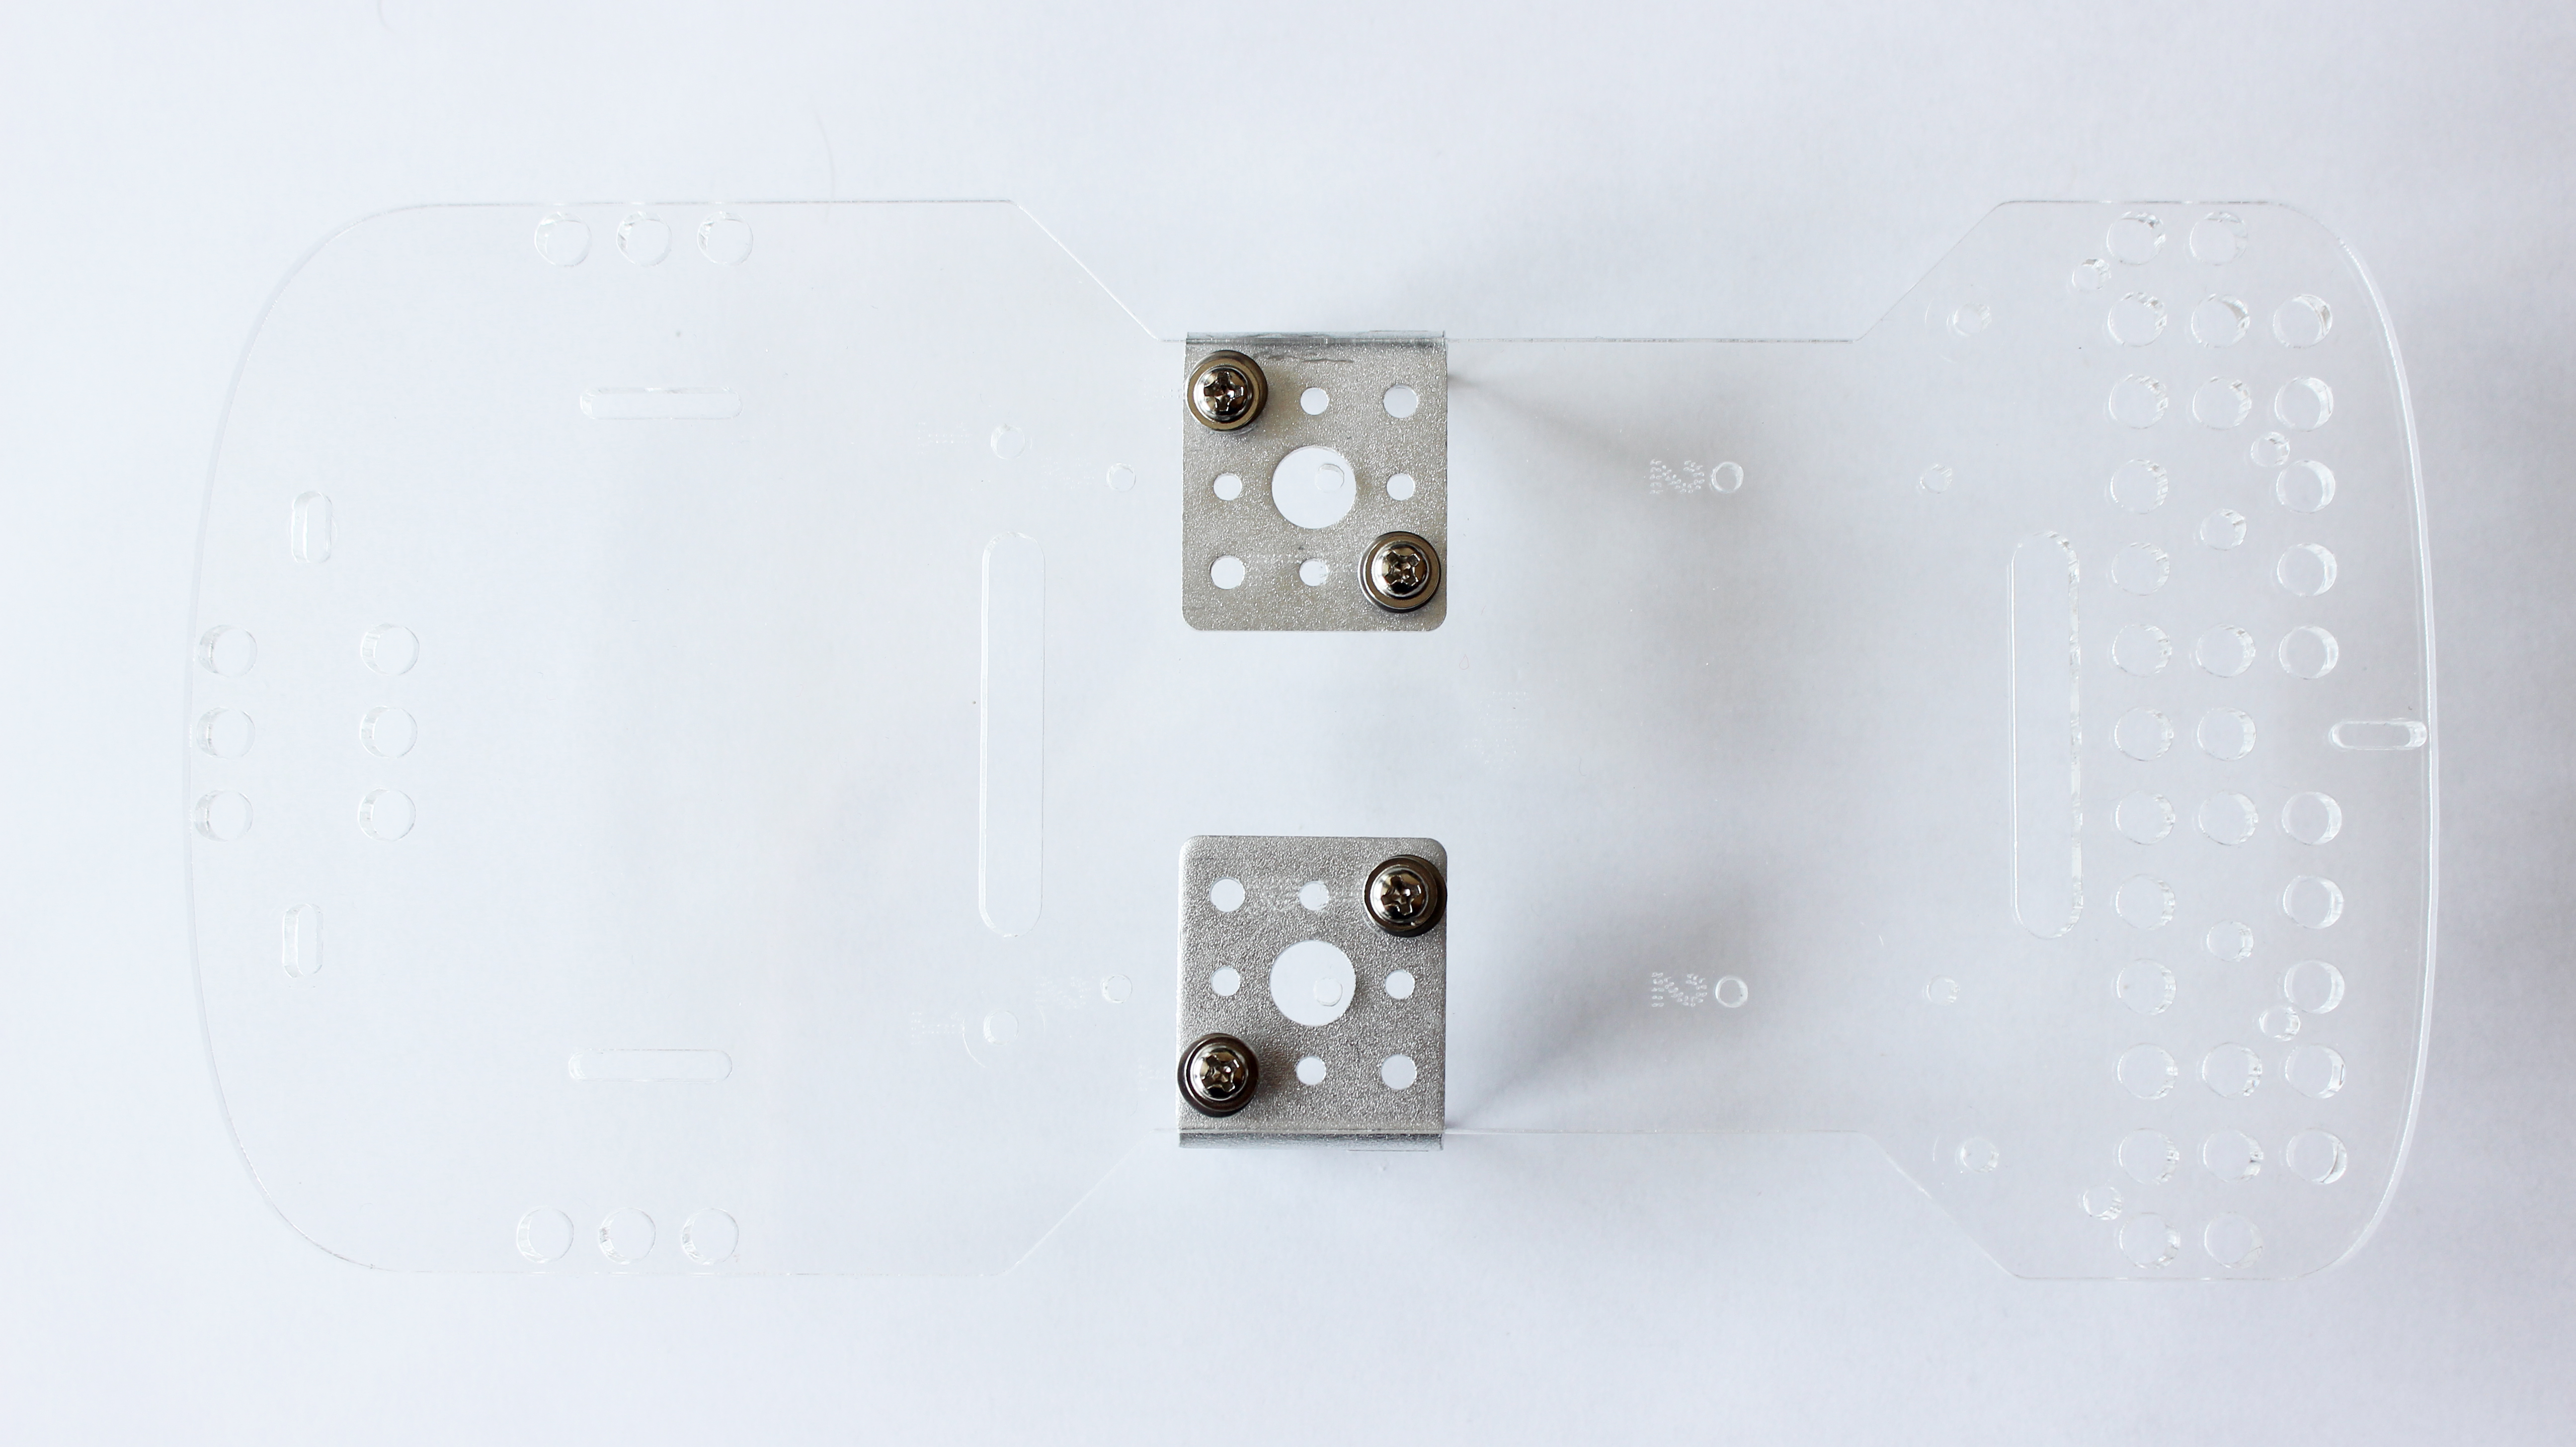
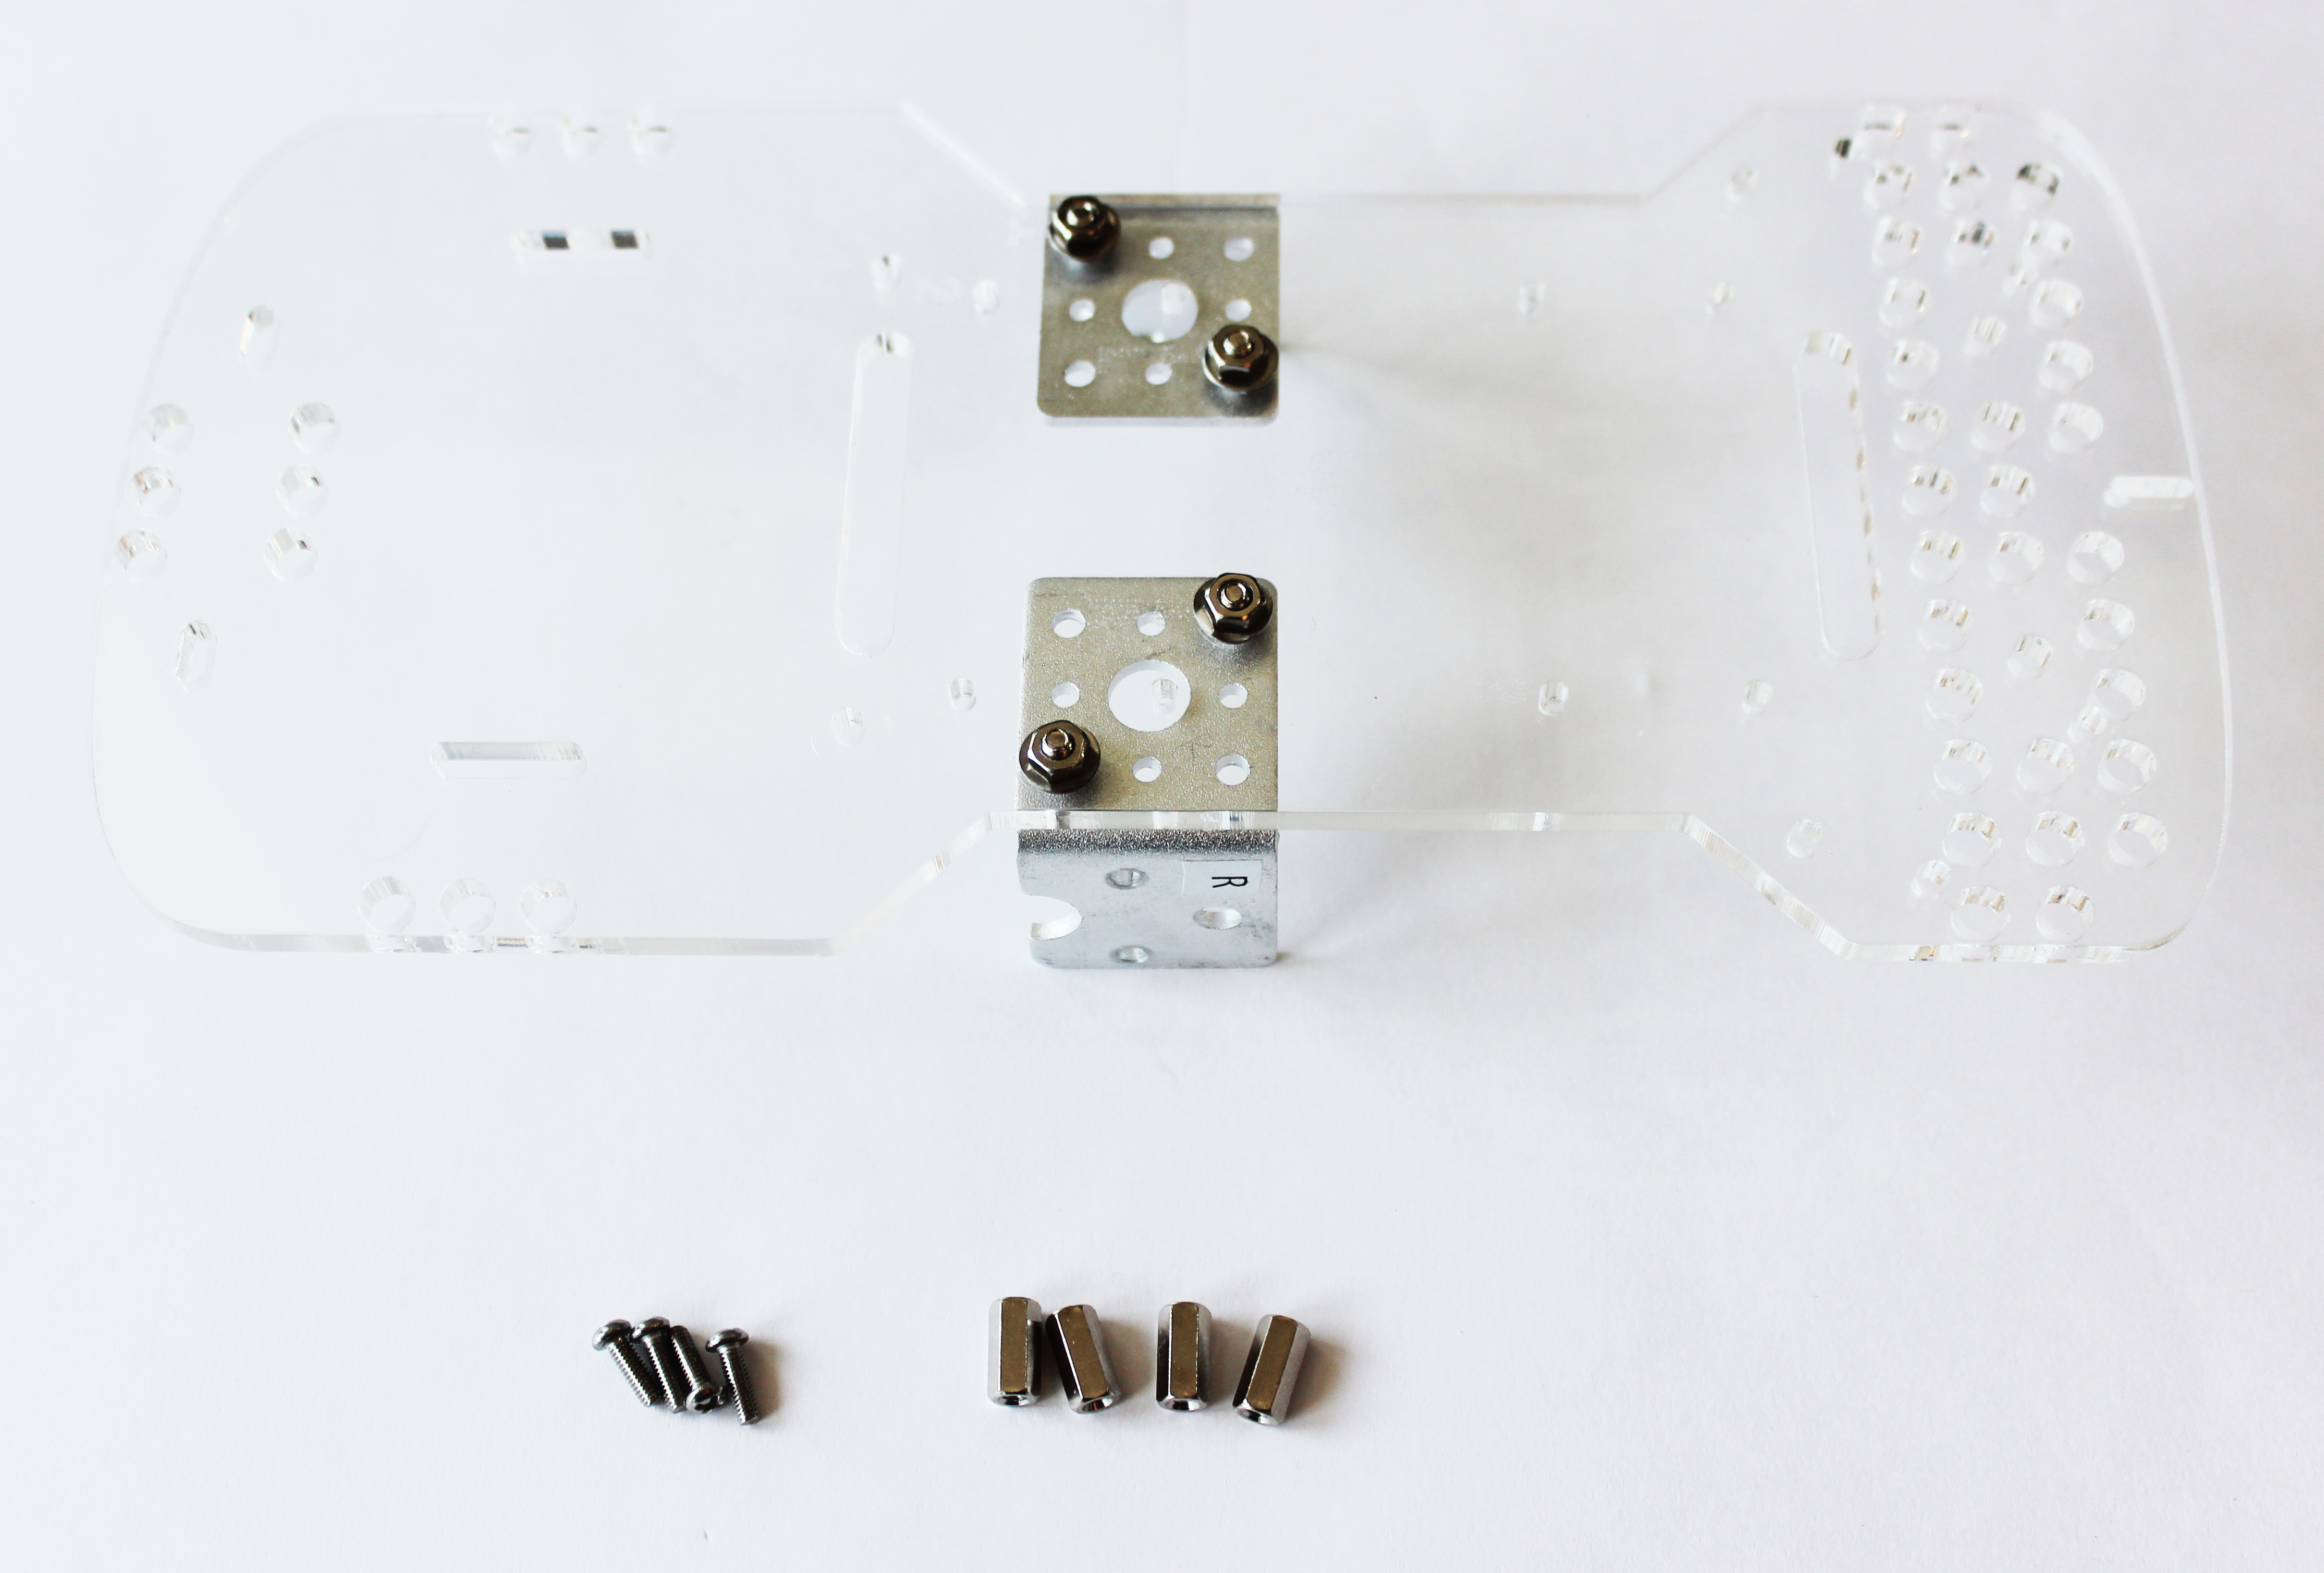
Part 3. Attach the Motor Brackets to the GoPiGo3 Acrylic Body
What you’ll need:
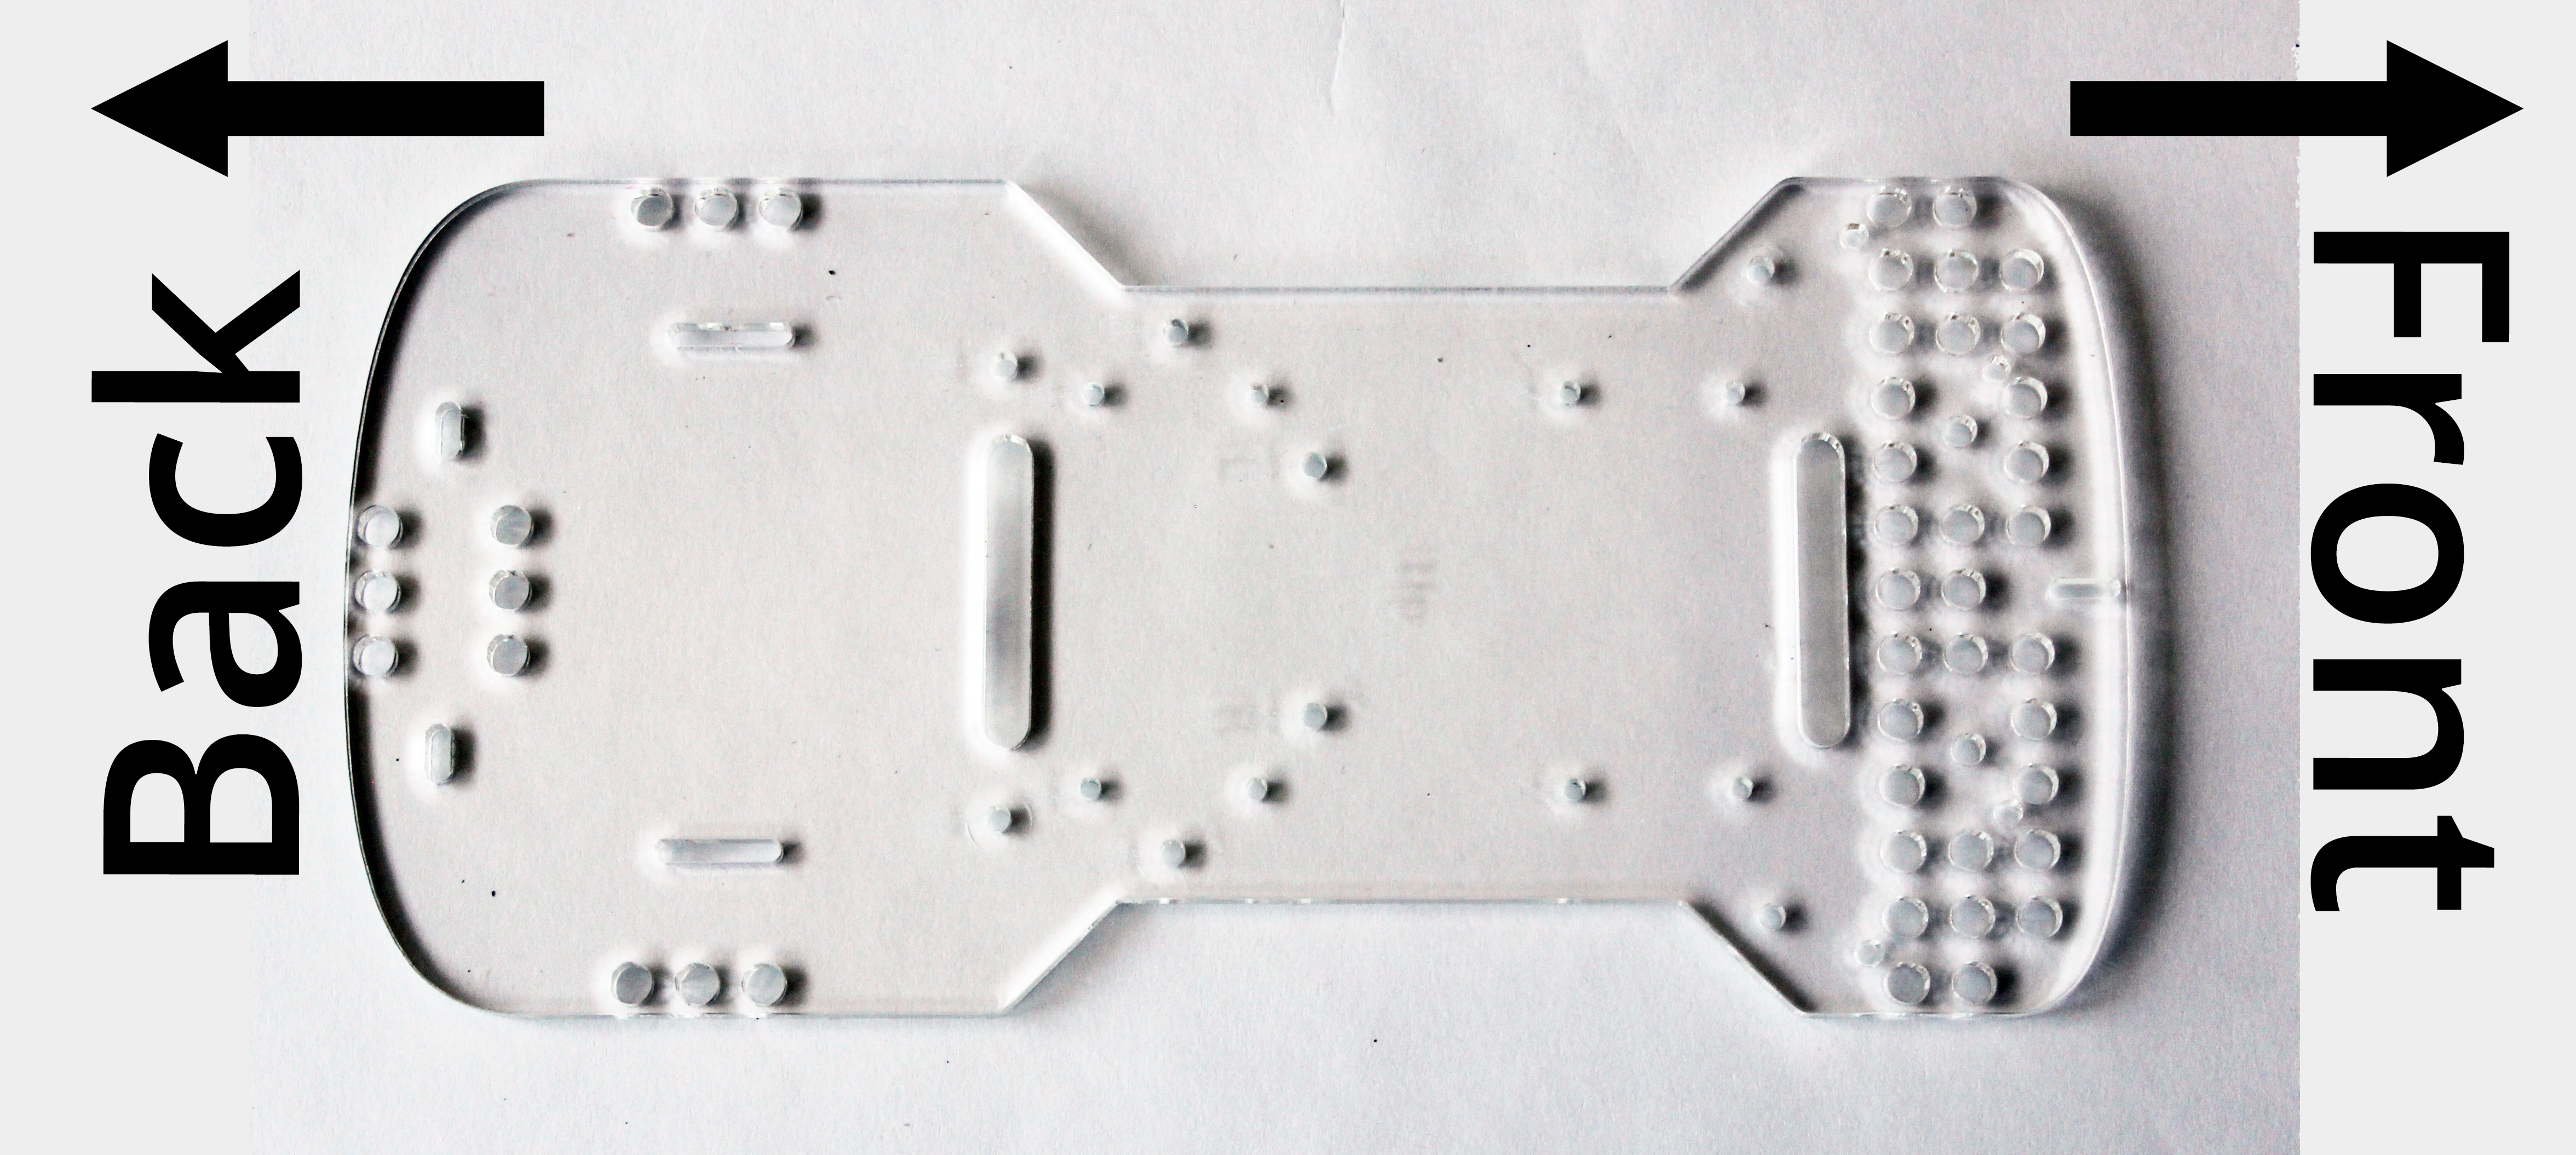
- The GoPiGo3 body – The largest piece of acrylic in your kit.
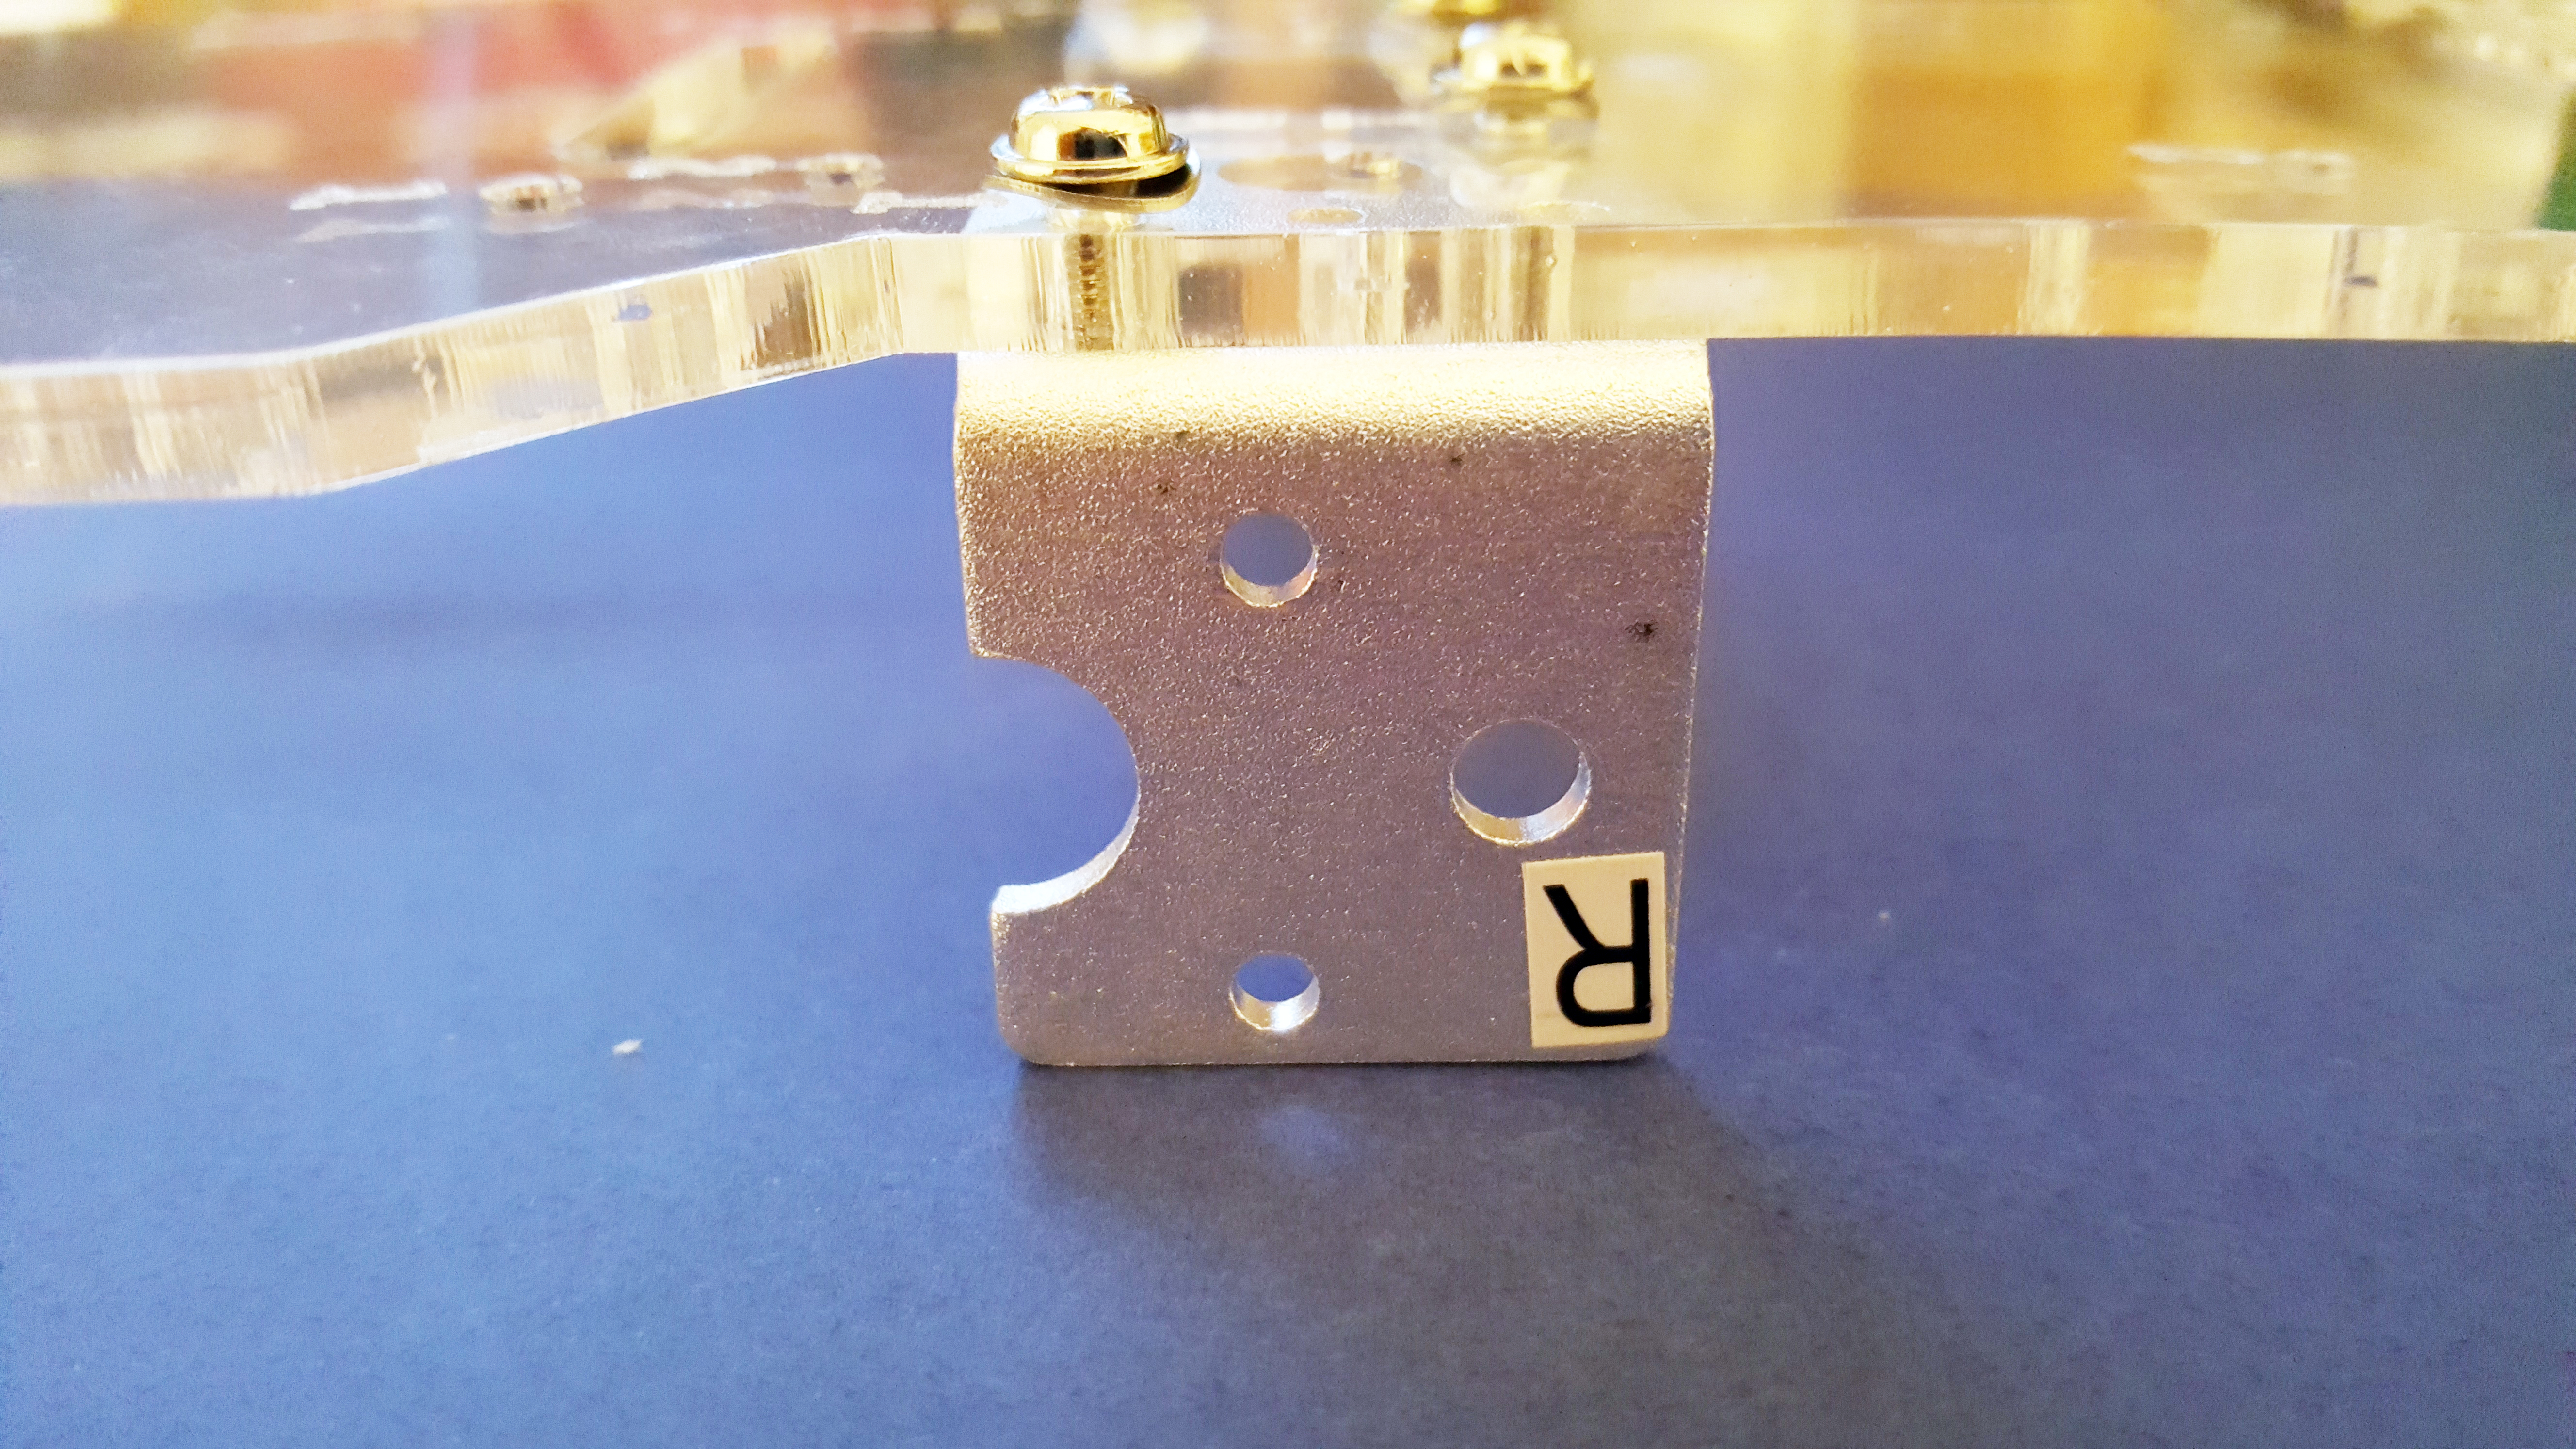
- 2 Metal Motor Brackets – These come labeled with a “L” and “R”, meaning Left and Right.
- Hardware from the large bag – (D) 4 short screws, (E) 4 washers, and (F) 4 nuts.
Attaching the motor brackets:
- You’ll assemble the brackets on the bottom, because they will hold motors which attach to the wheels, all on the underside of the GoPiGo3 robot.
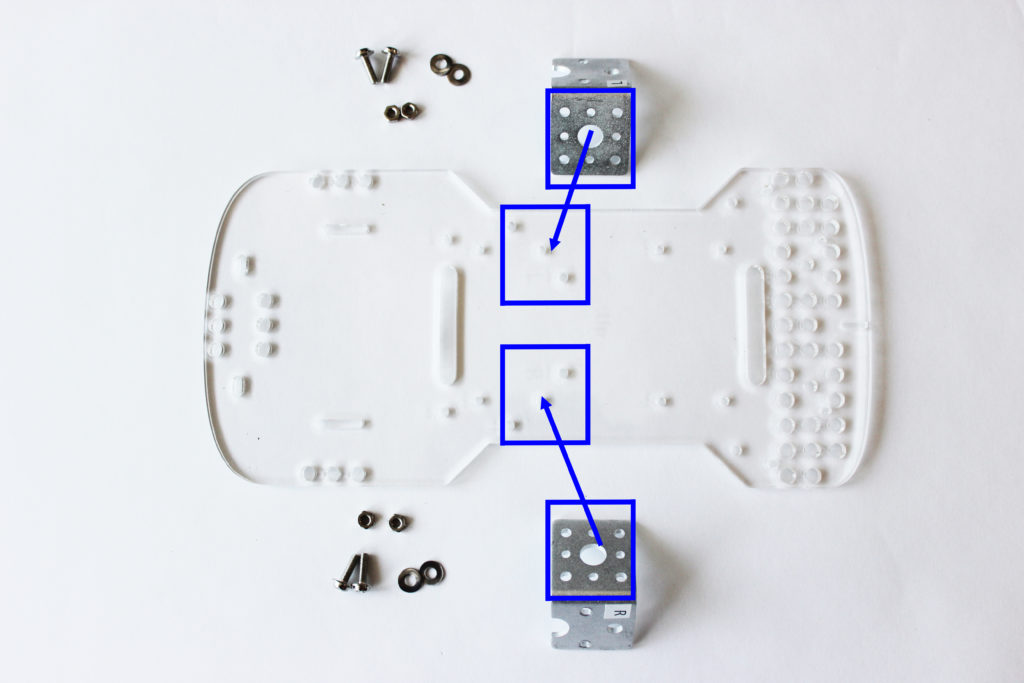
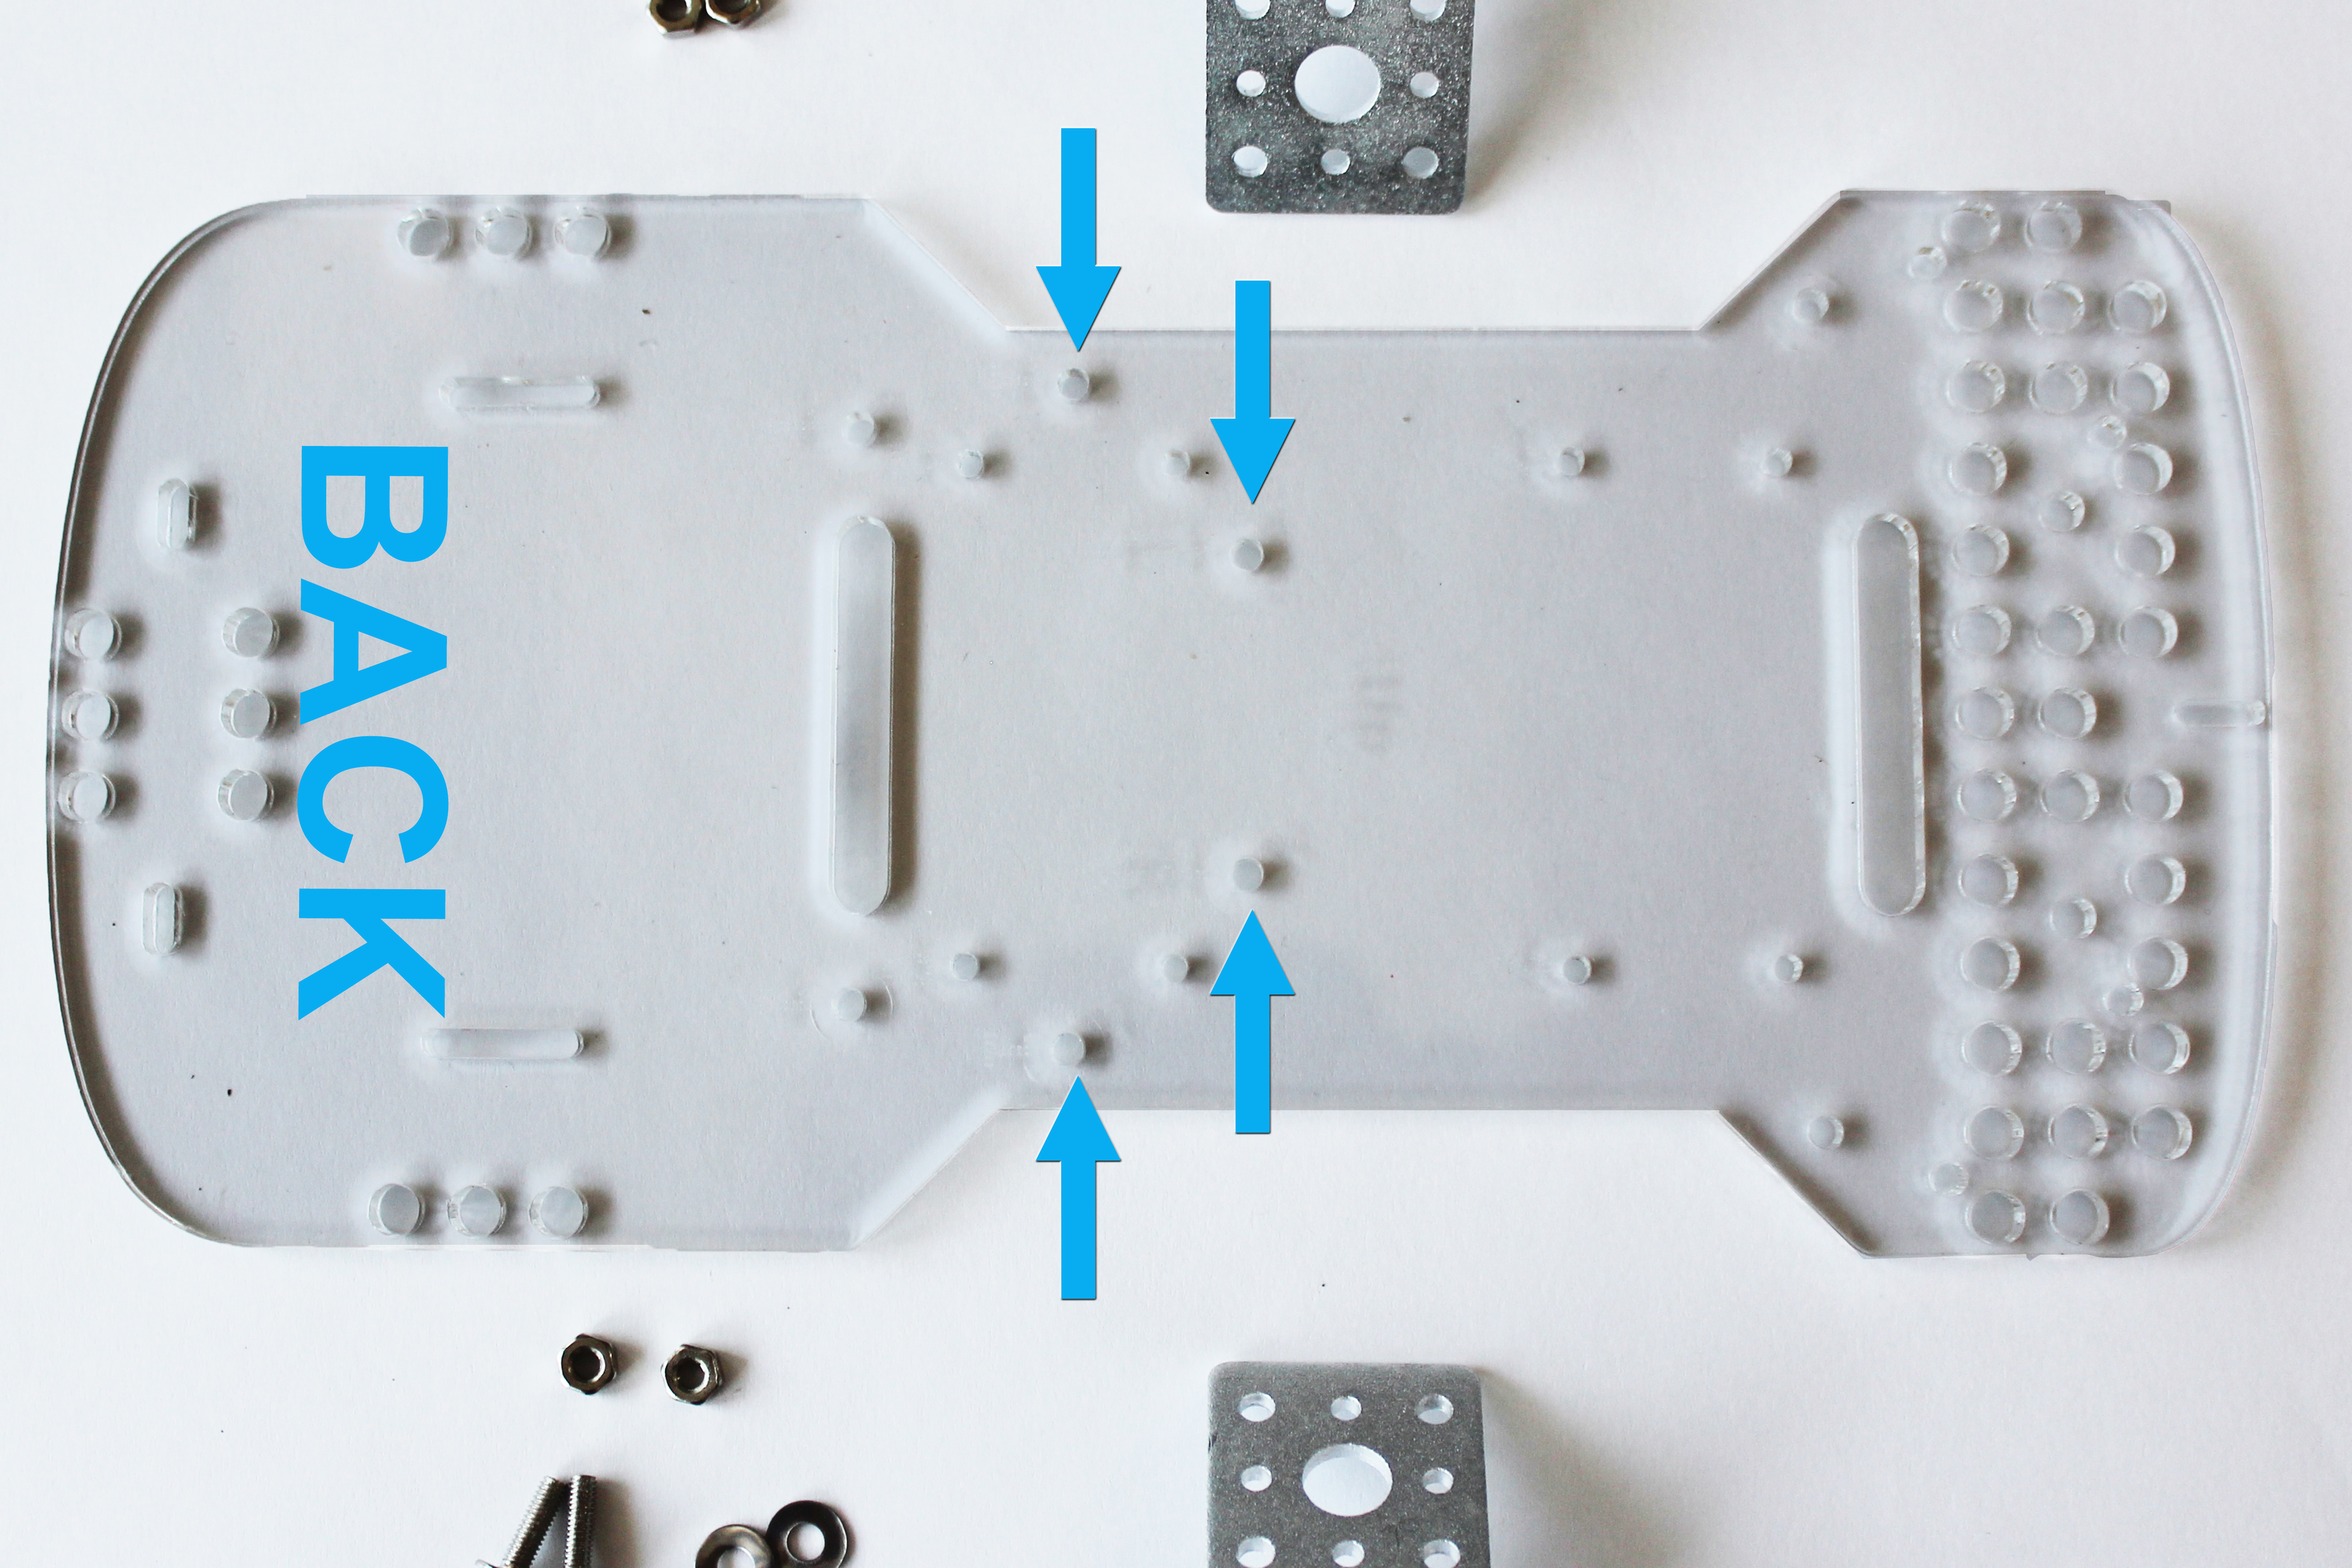
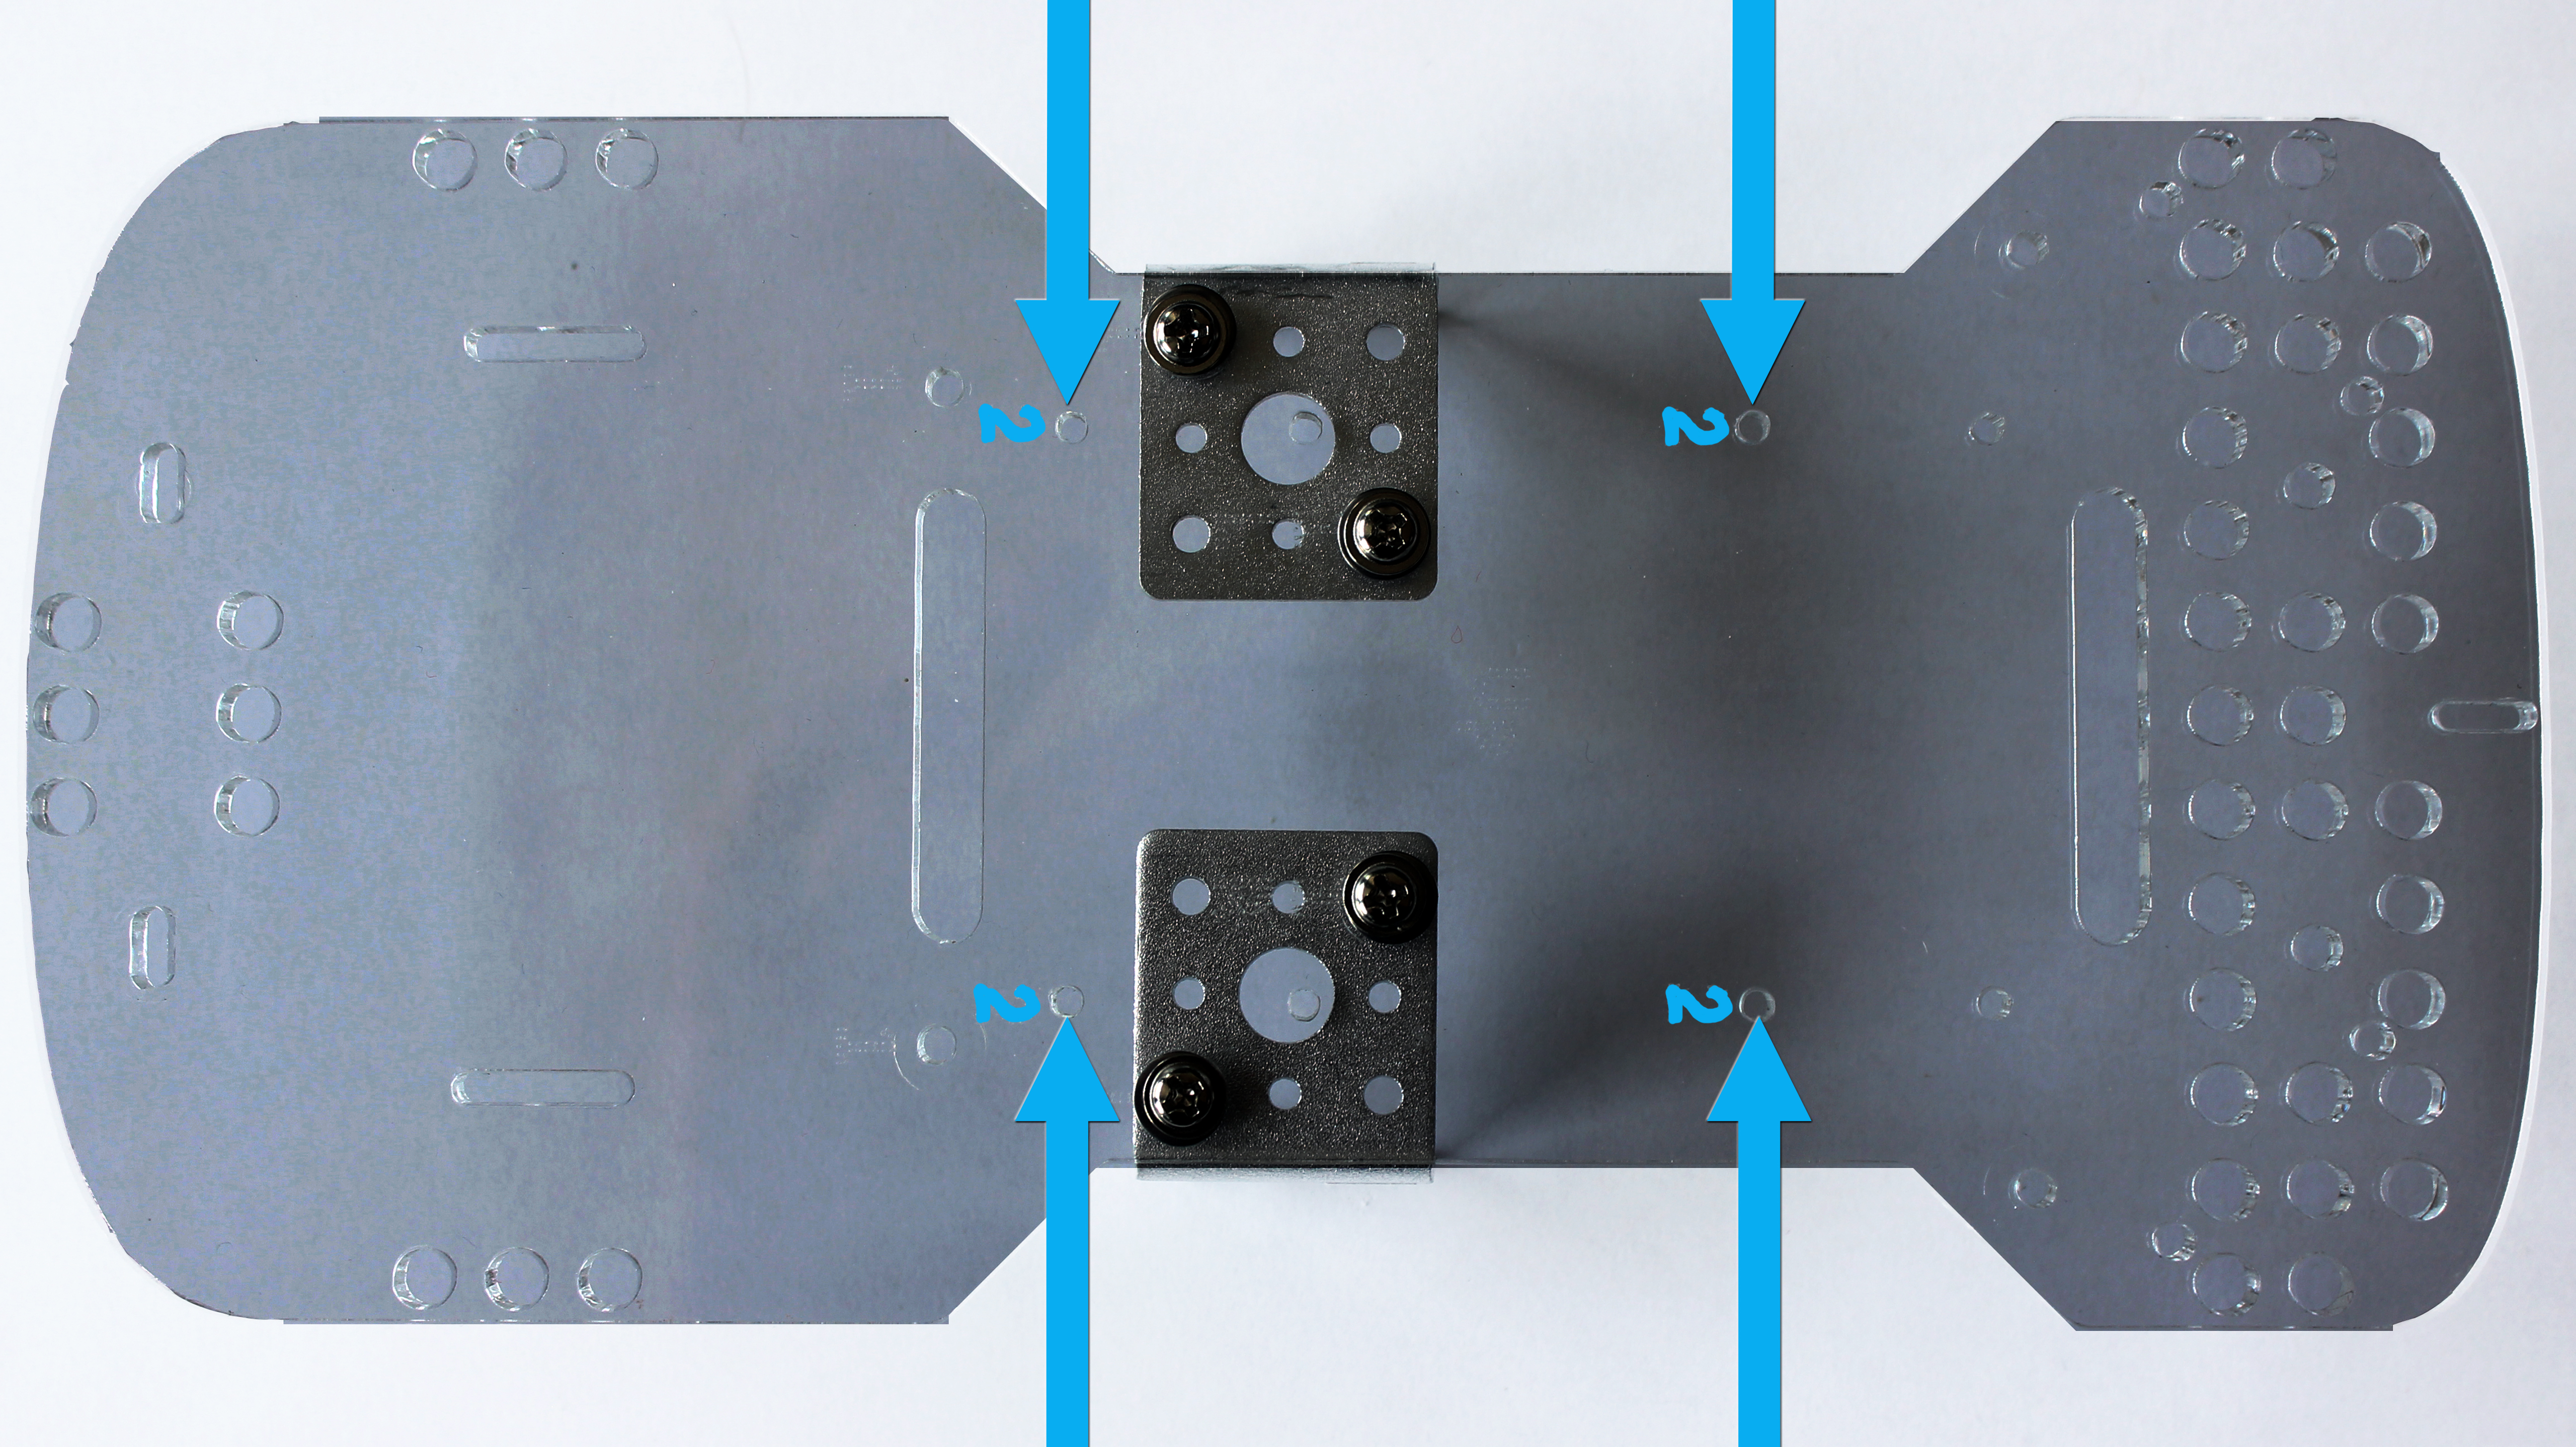
- Find the 4 holes labeled “1” on the acrylic body as shown in the picture below. These are the holes you will use to assemble the metal motor brackets.

- Place washers on all four screws.
- Insert two short screws (on each side) into the “1” holes through the acrylic body. The holes are tight, so you may need to screw the screws through the acrylic.
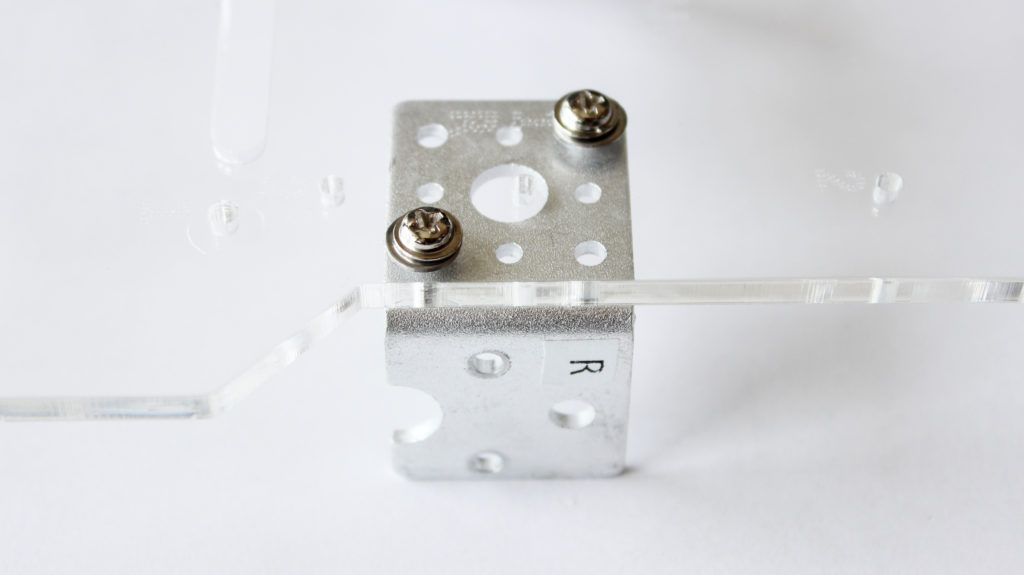
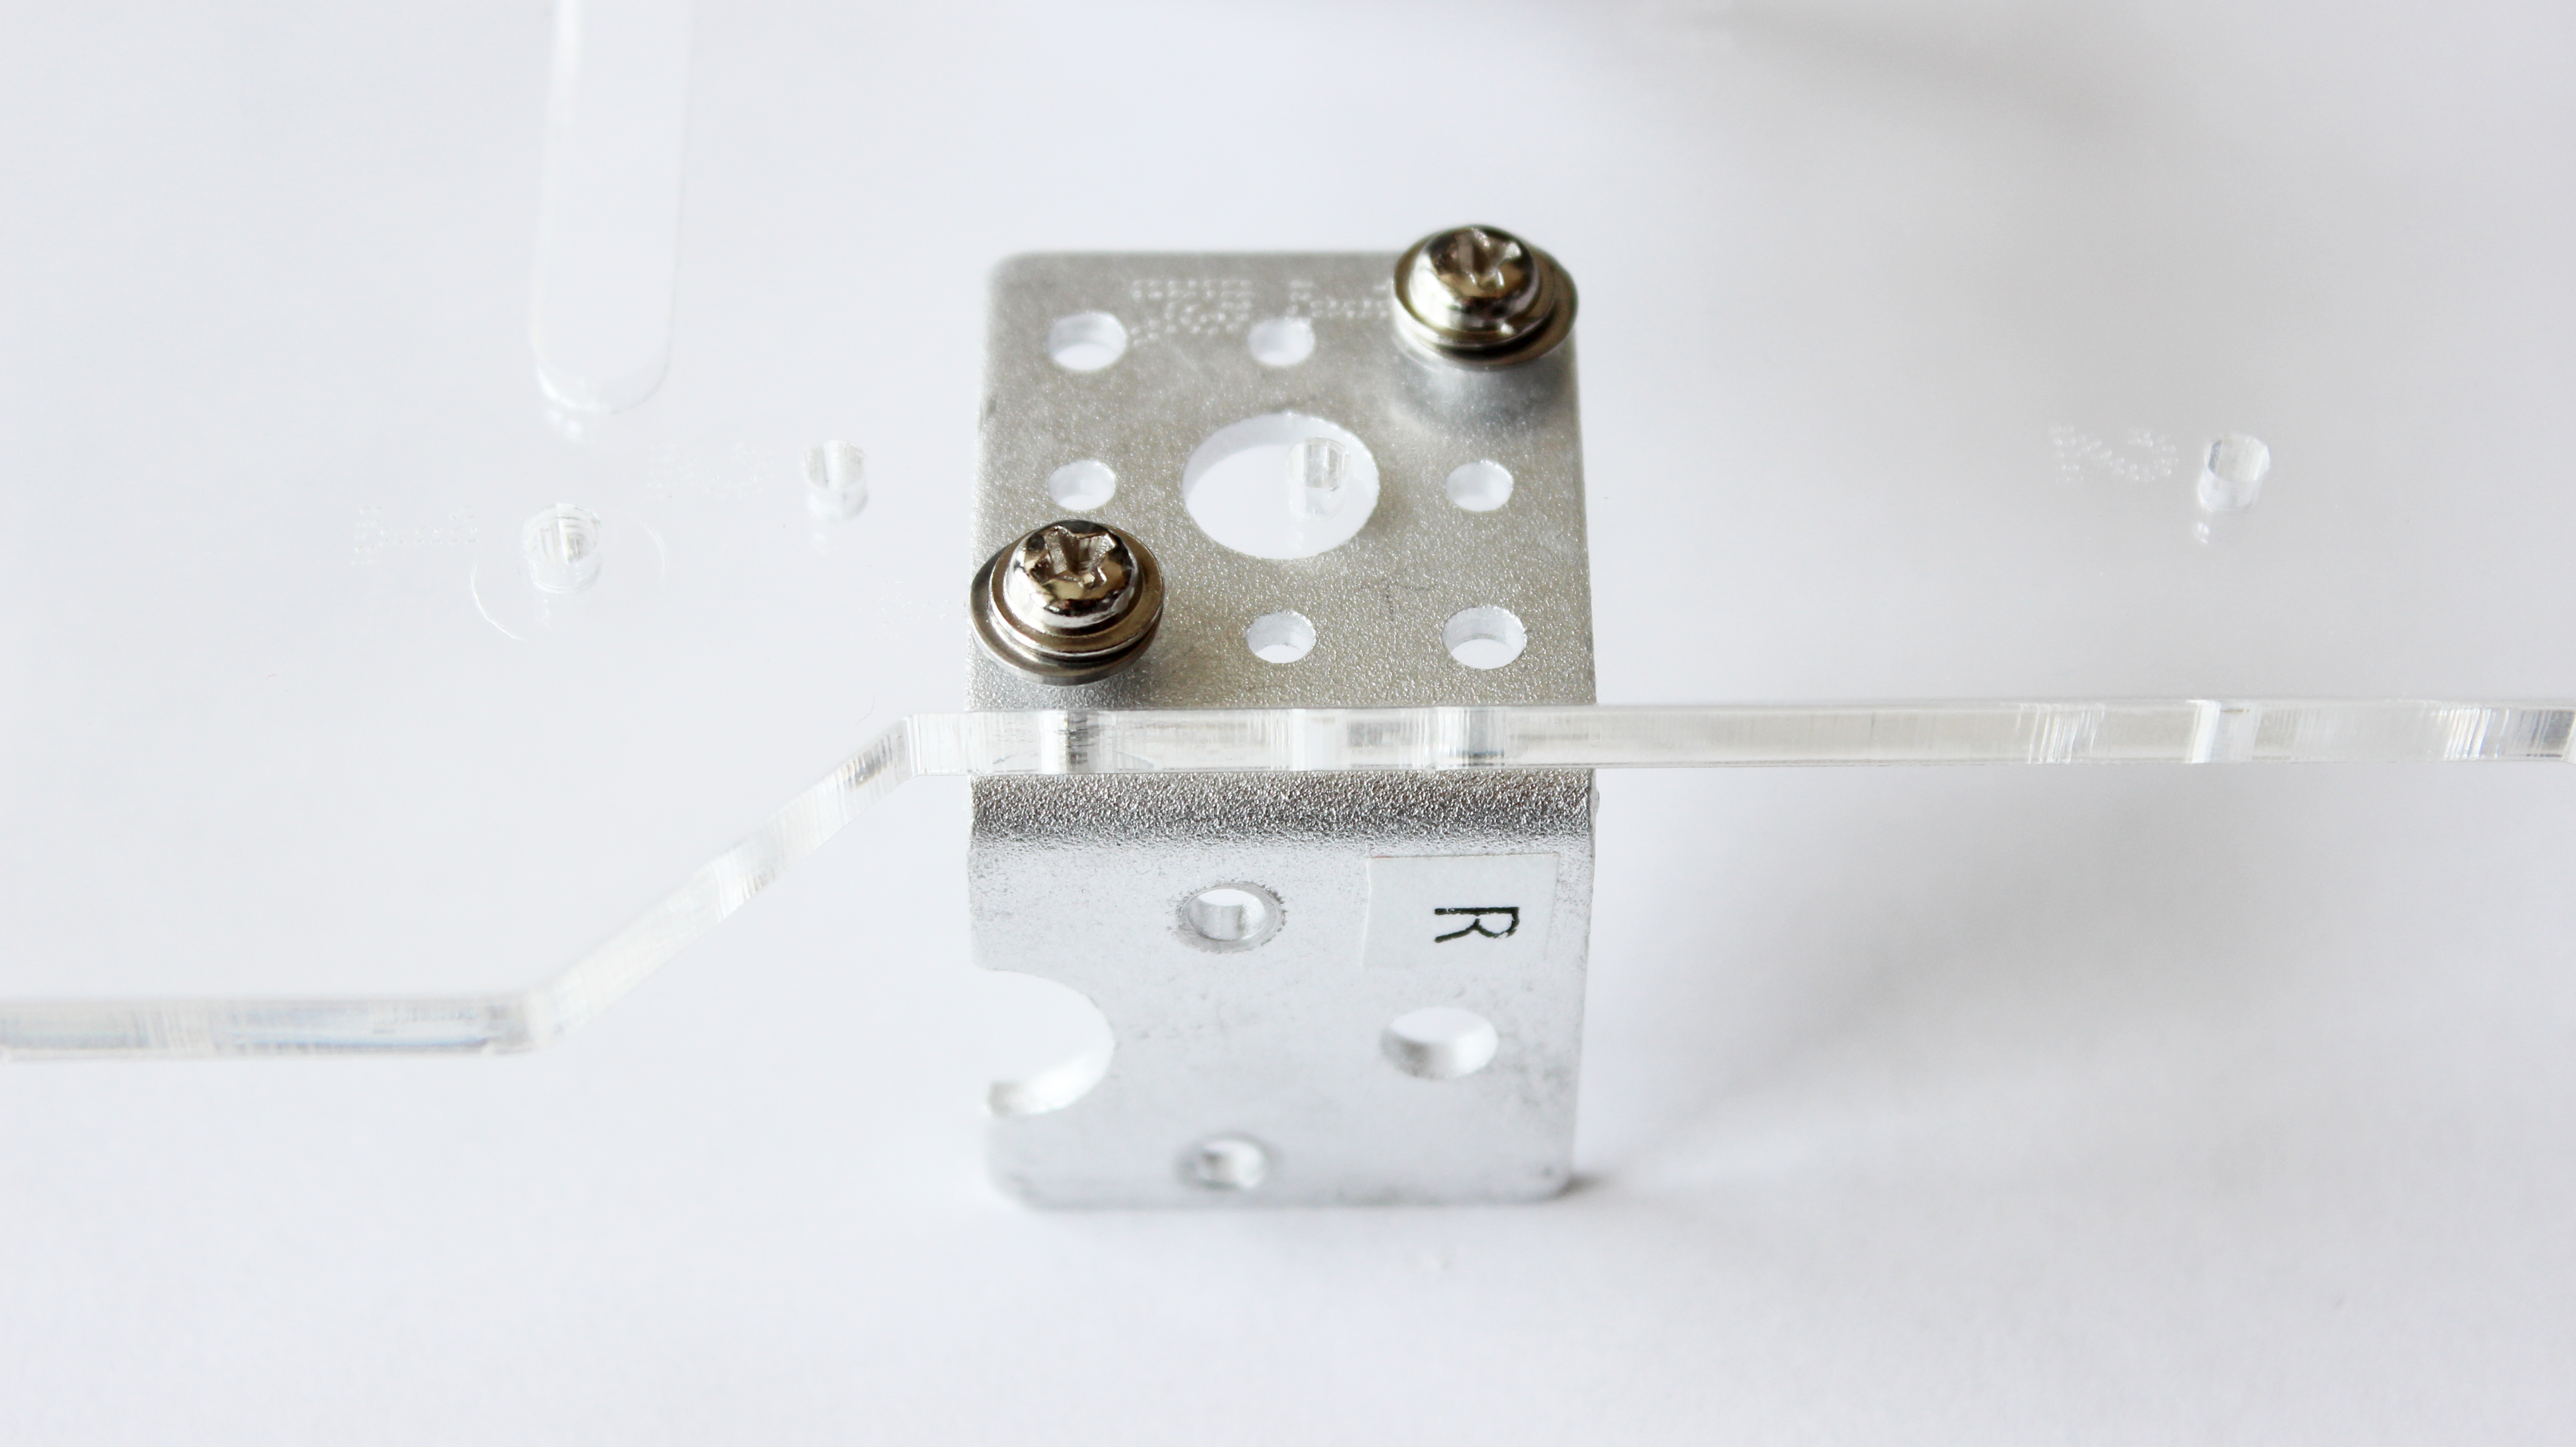
- Match the metal brackets labeled “L” and “R” up with the “1” holes on the corresponding “R” and “L” etchings on the acrylic body.
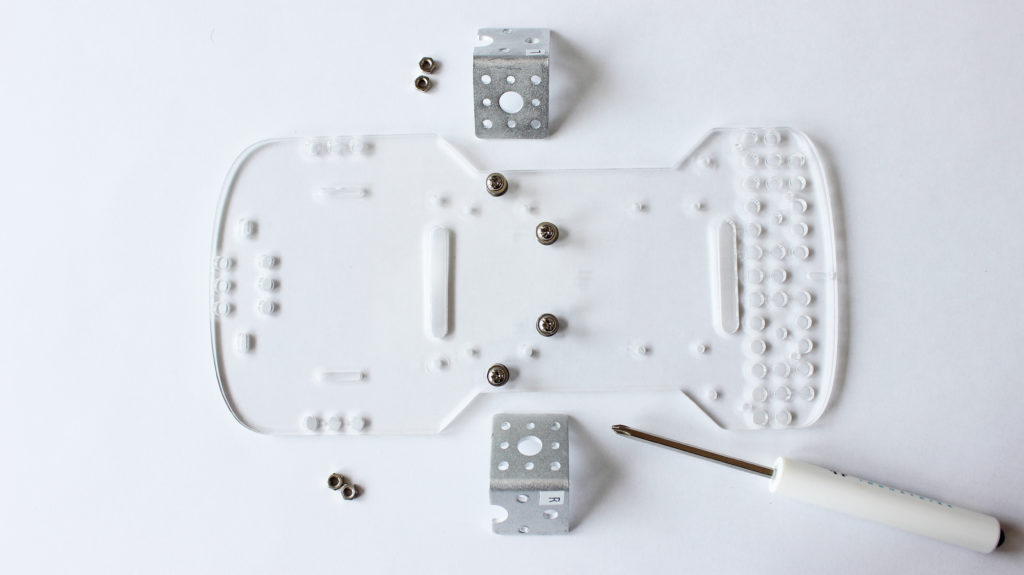
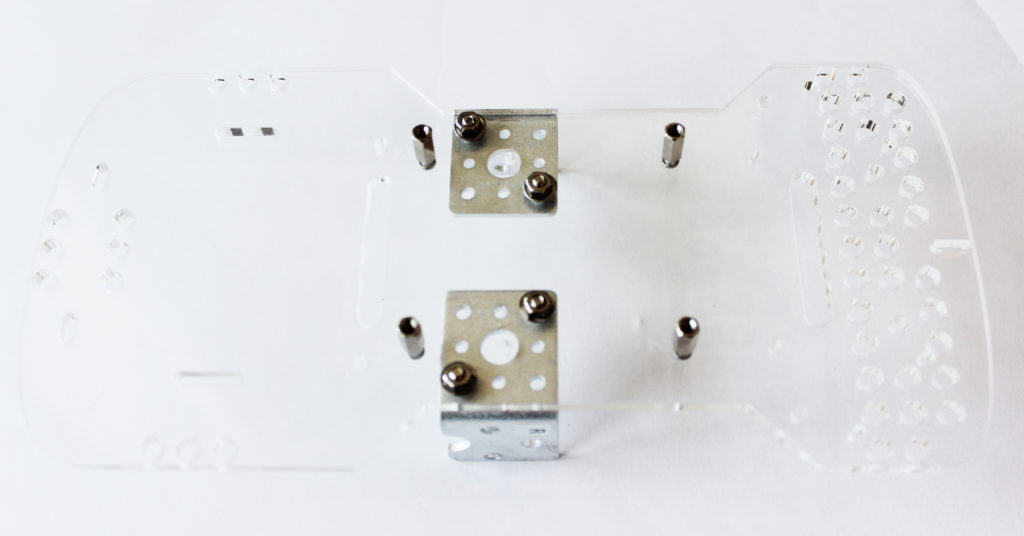
- Slide the metal brackets onto the screws. The half-moon of the brackets should be pointing towards the back of the GoPiGo3 body. Place your fingers on the screws to hold them in place, and turn the body upside down.
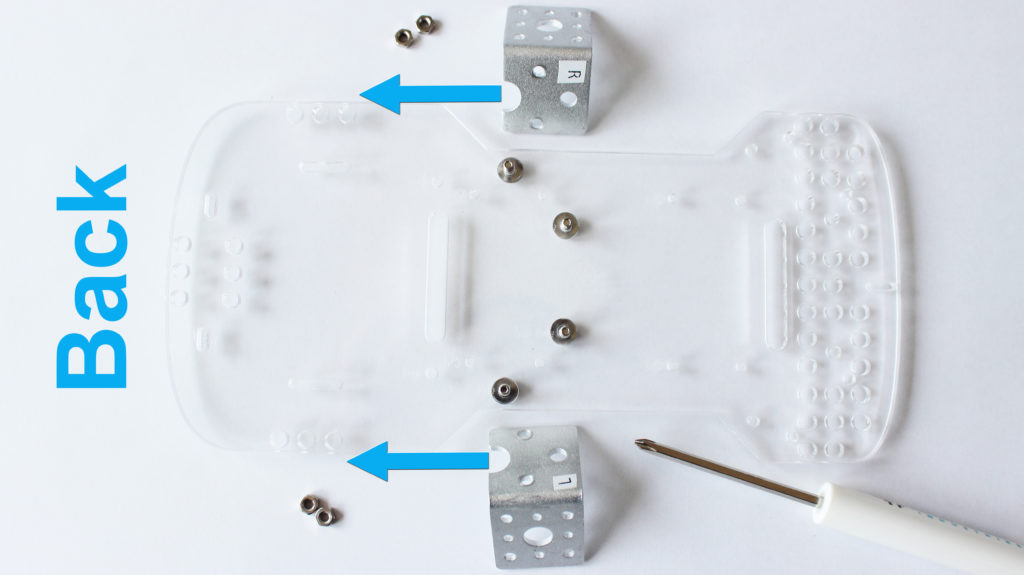
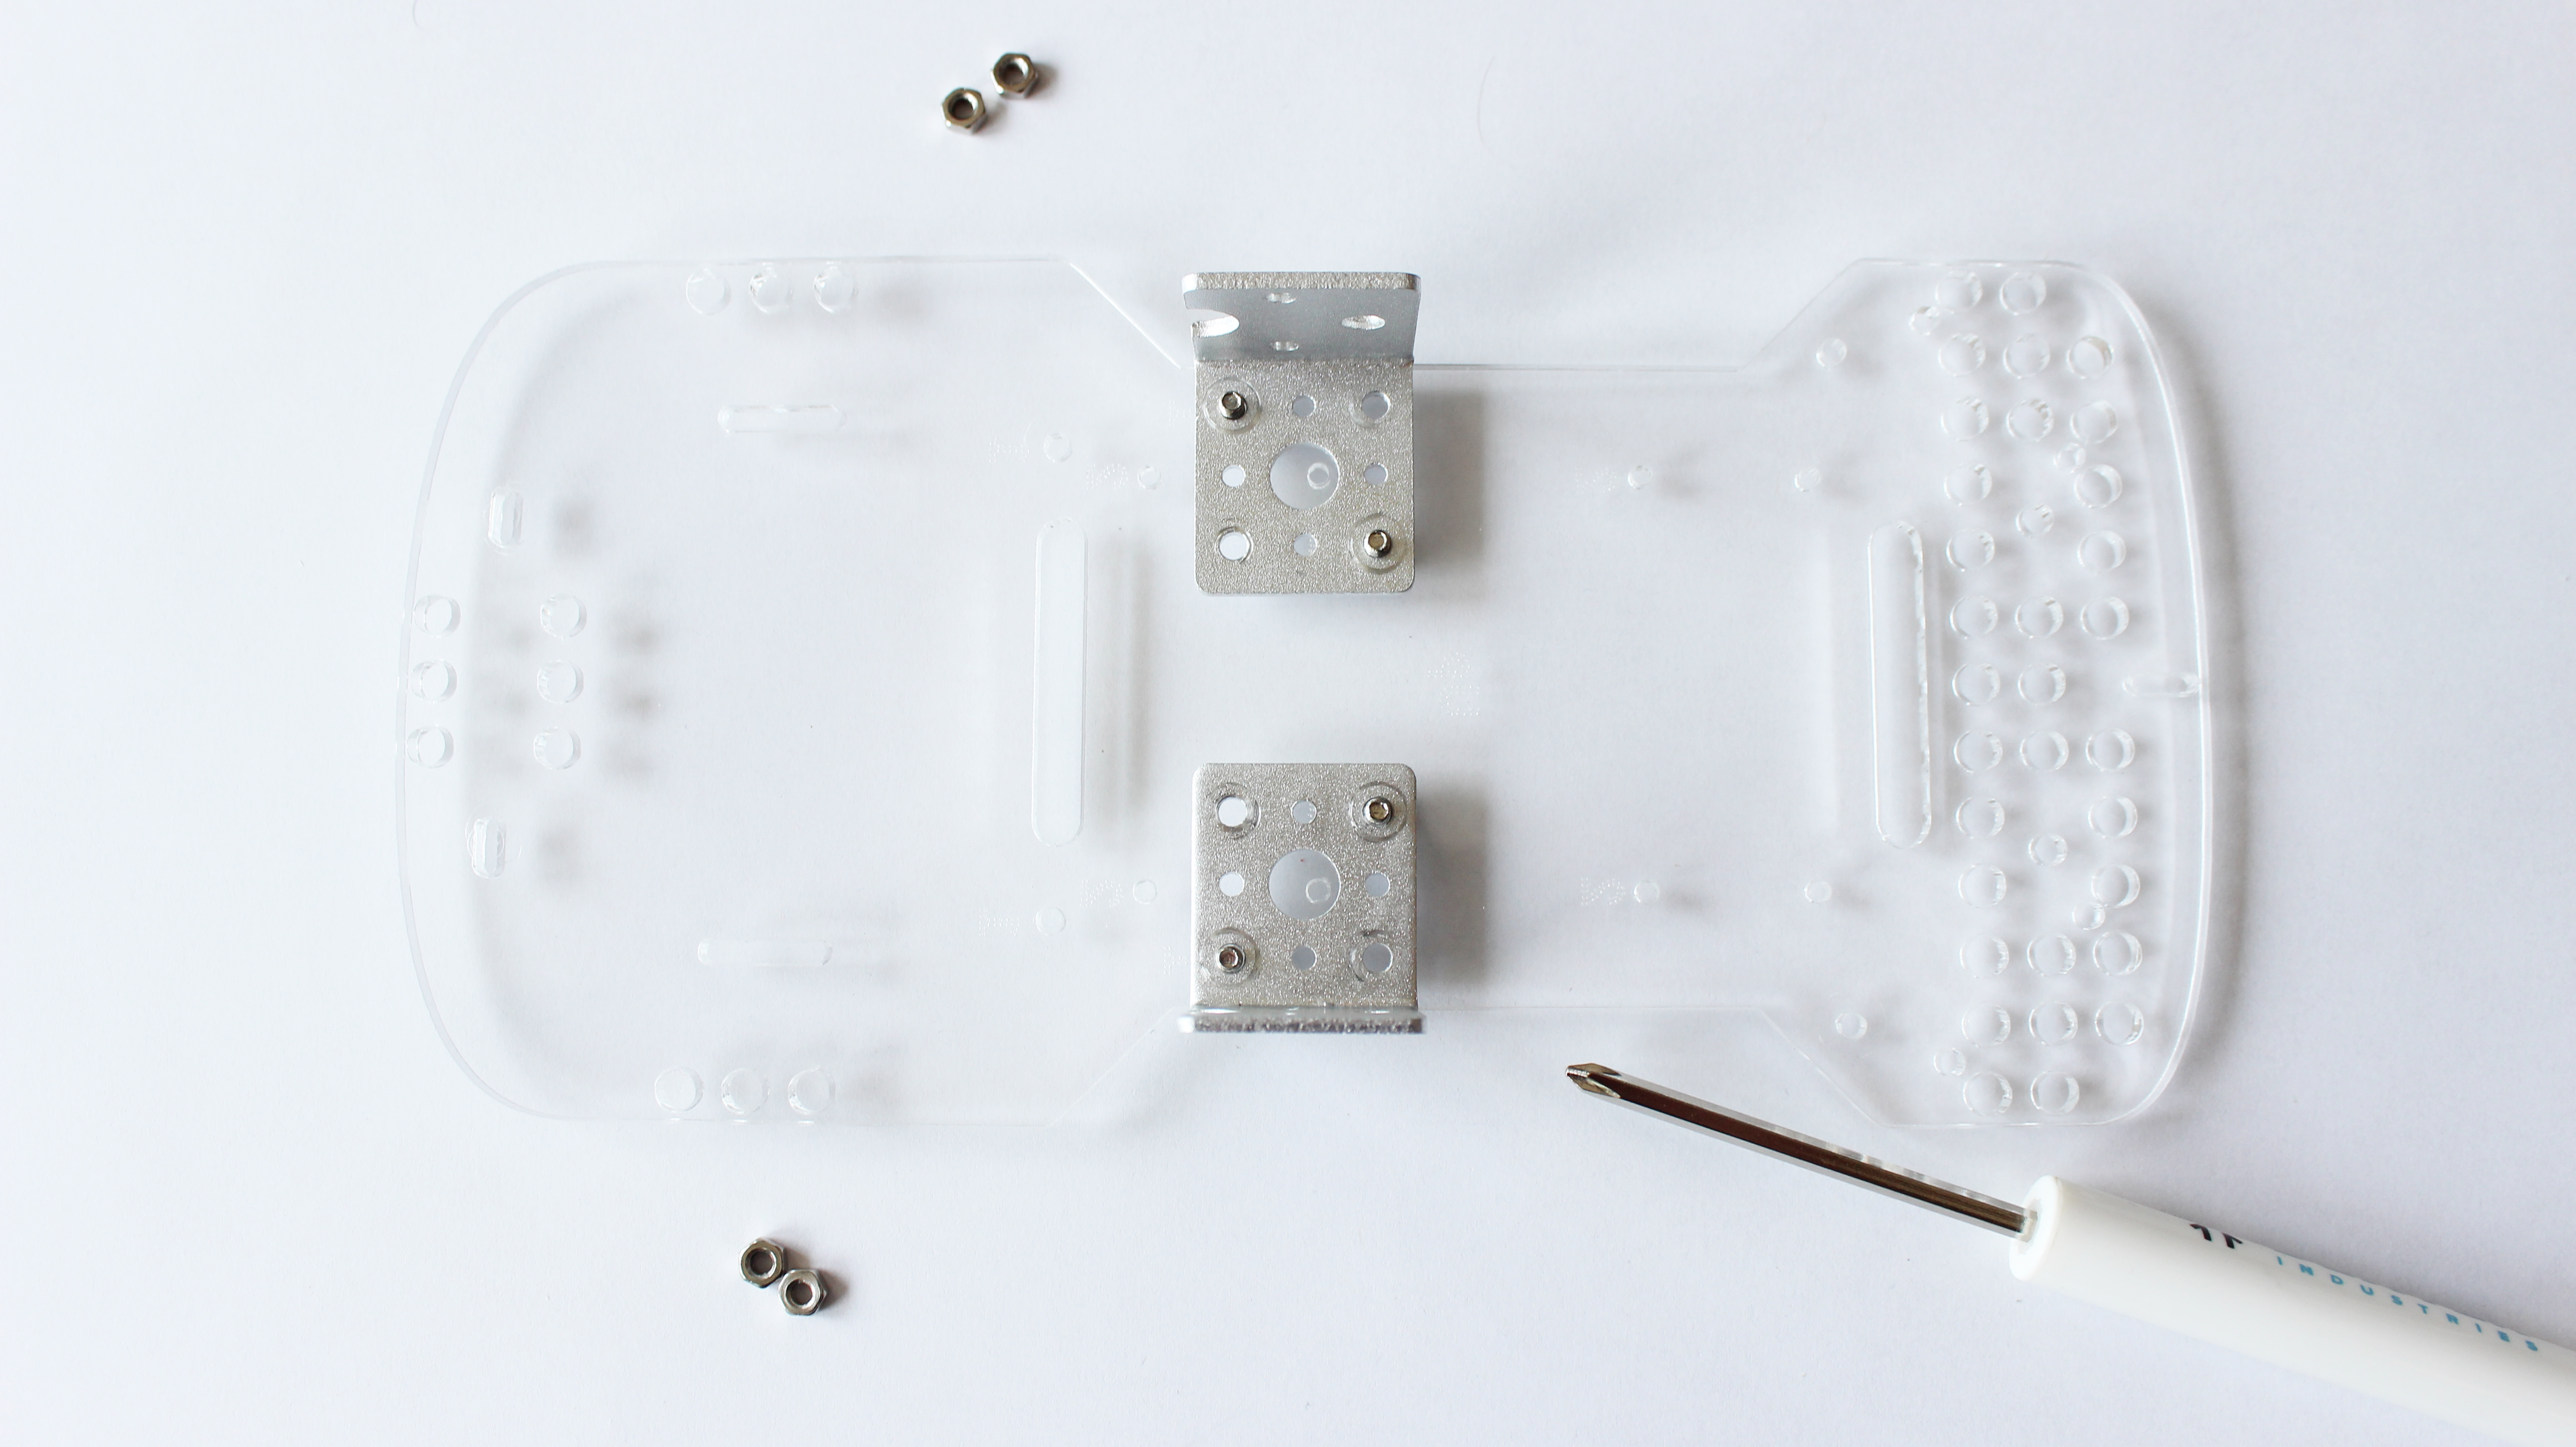
- The metal bracket should be sticking up at you, as shown in the picture below.
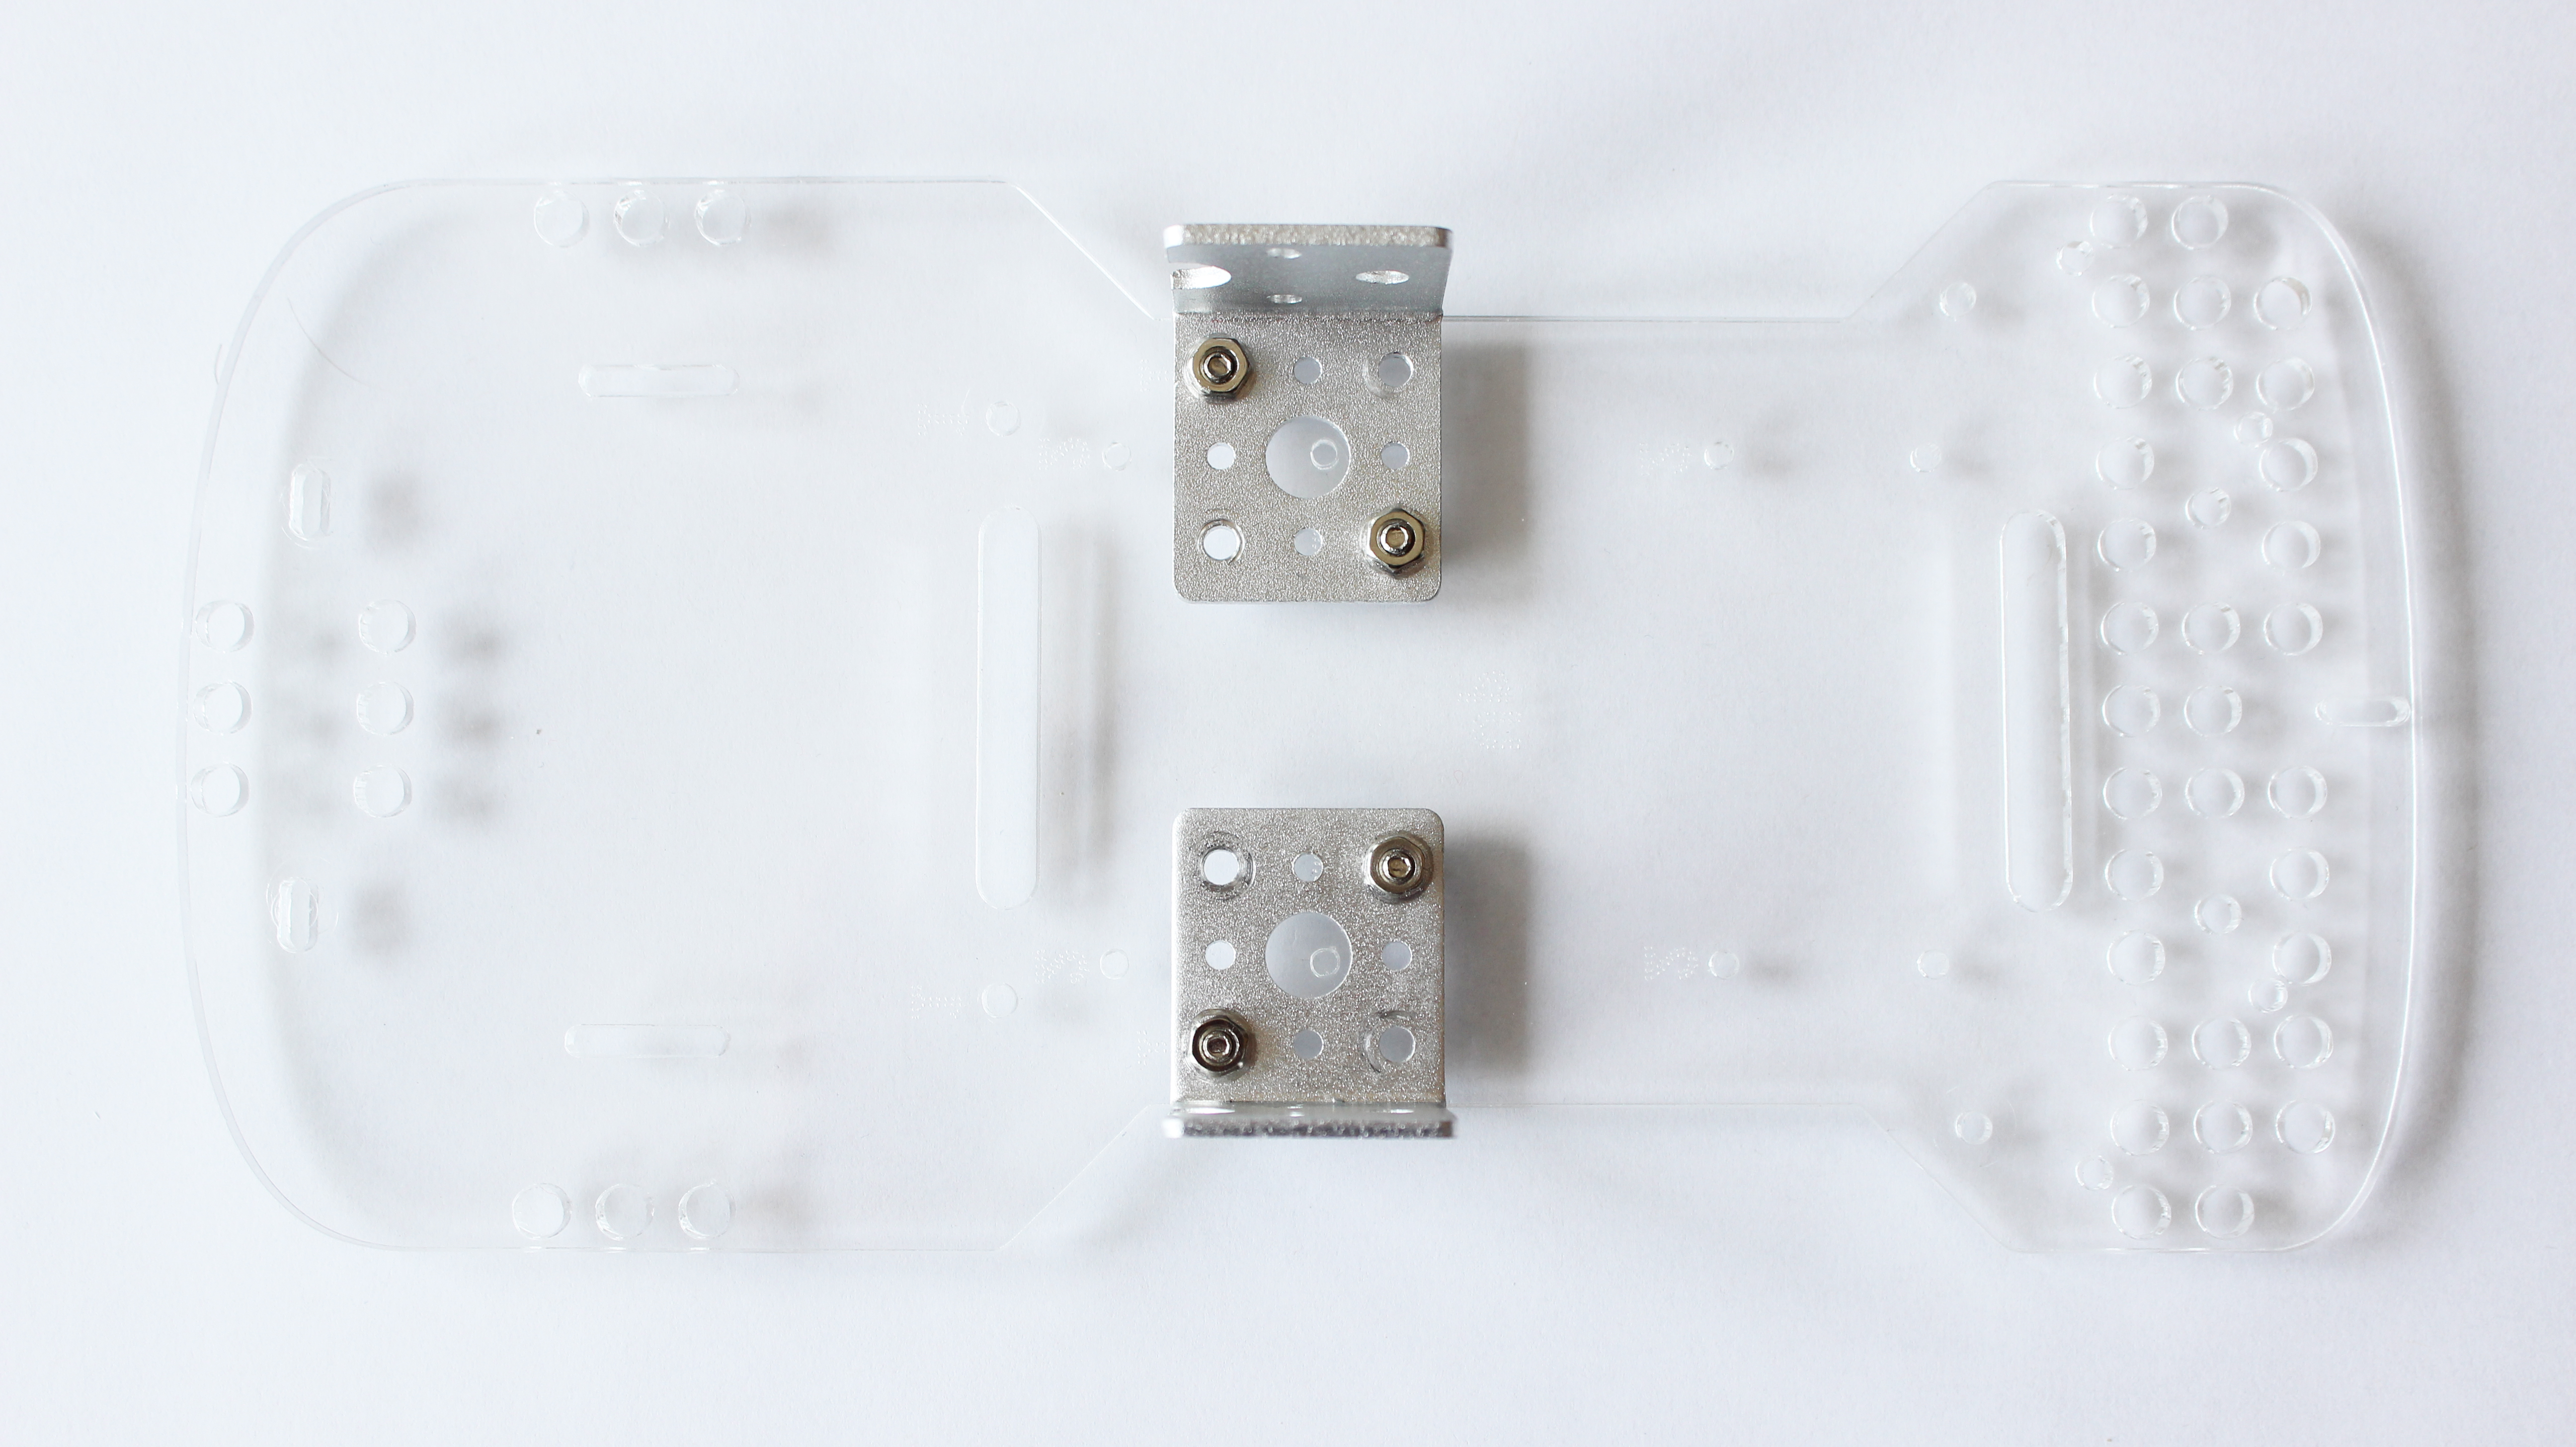
- Place the nuts on the screws.
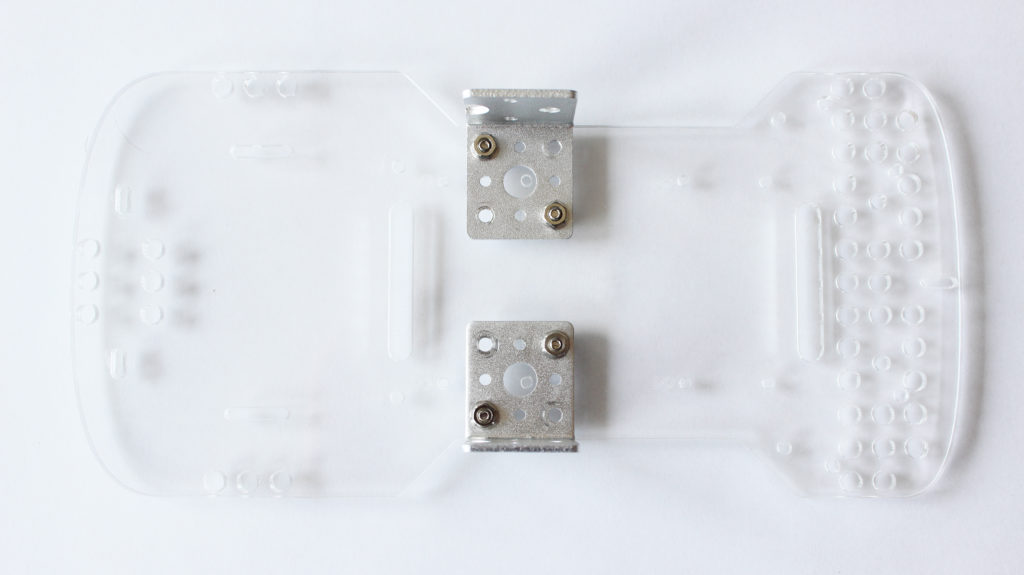
- Tighten the screws until the washers flatten.


Here are a few extra pictures for Step 3 with a colored background. Click on them to see a larger version.
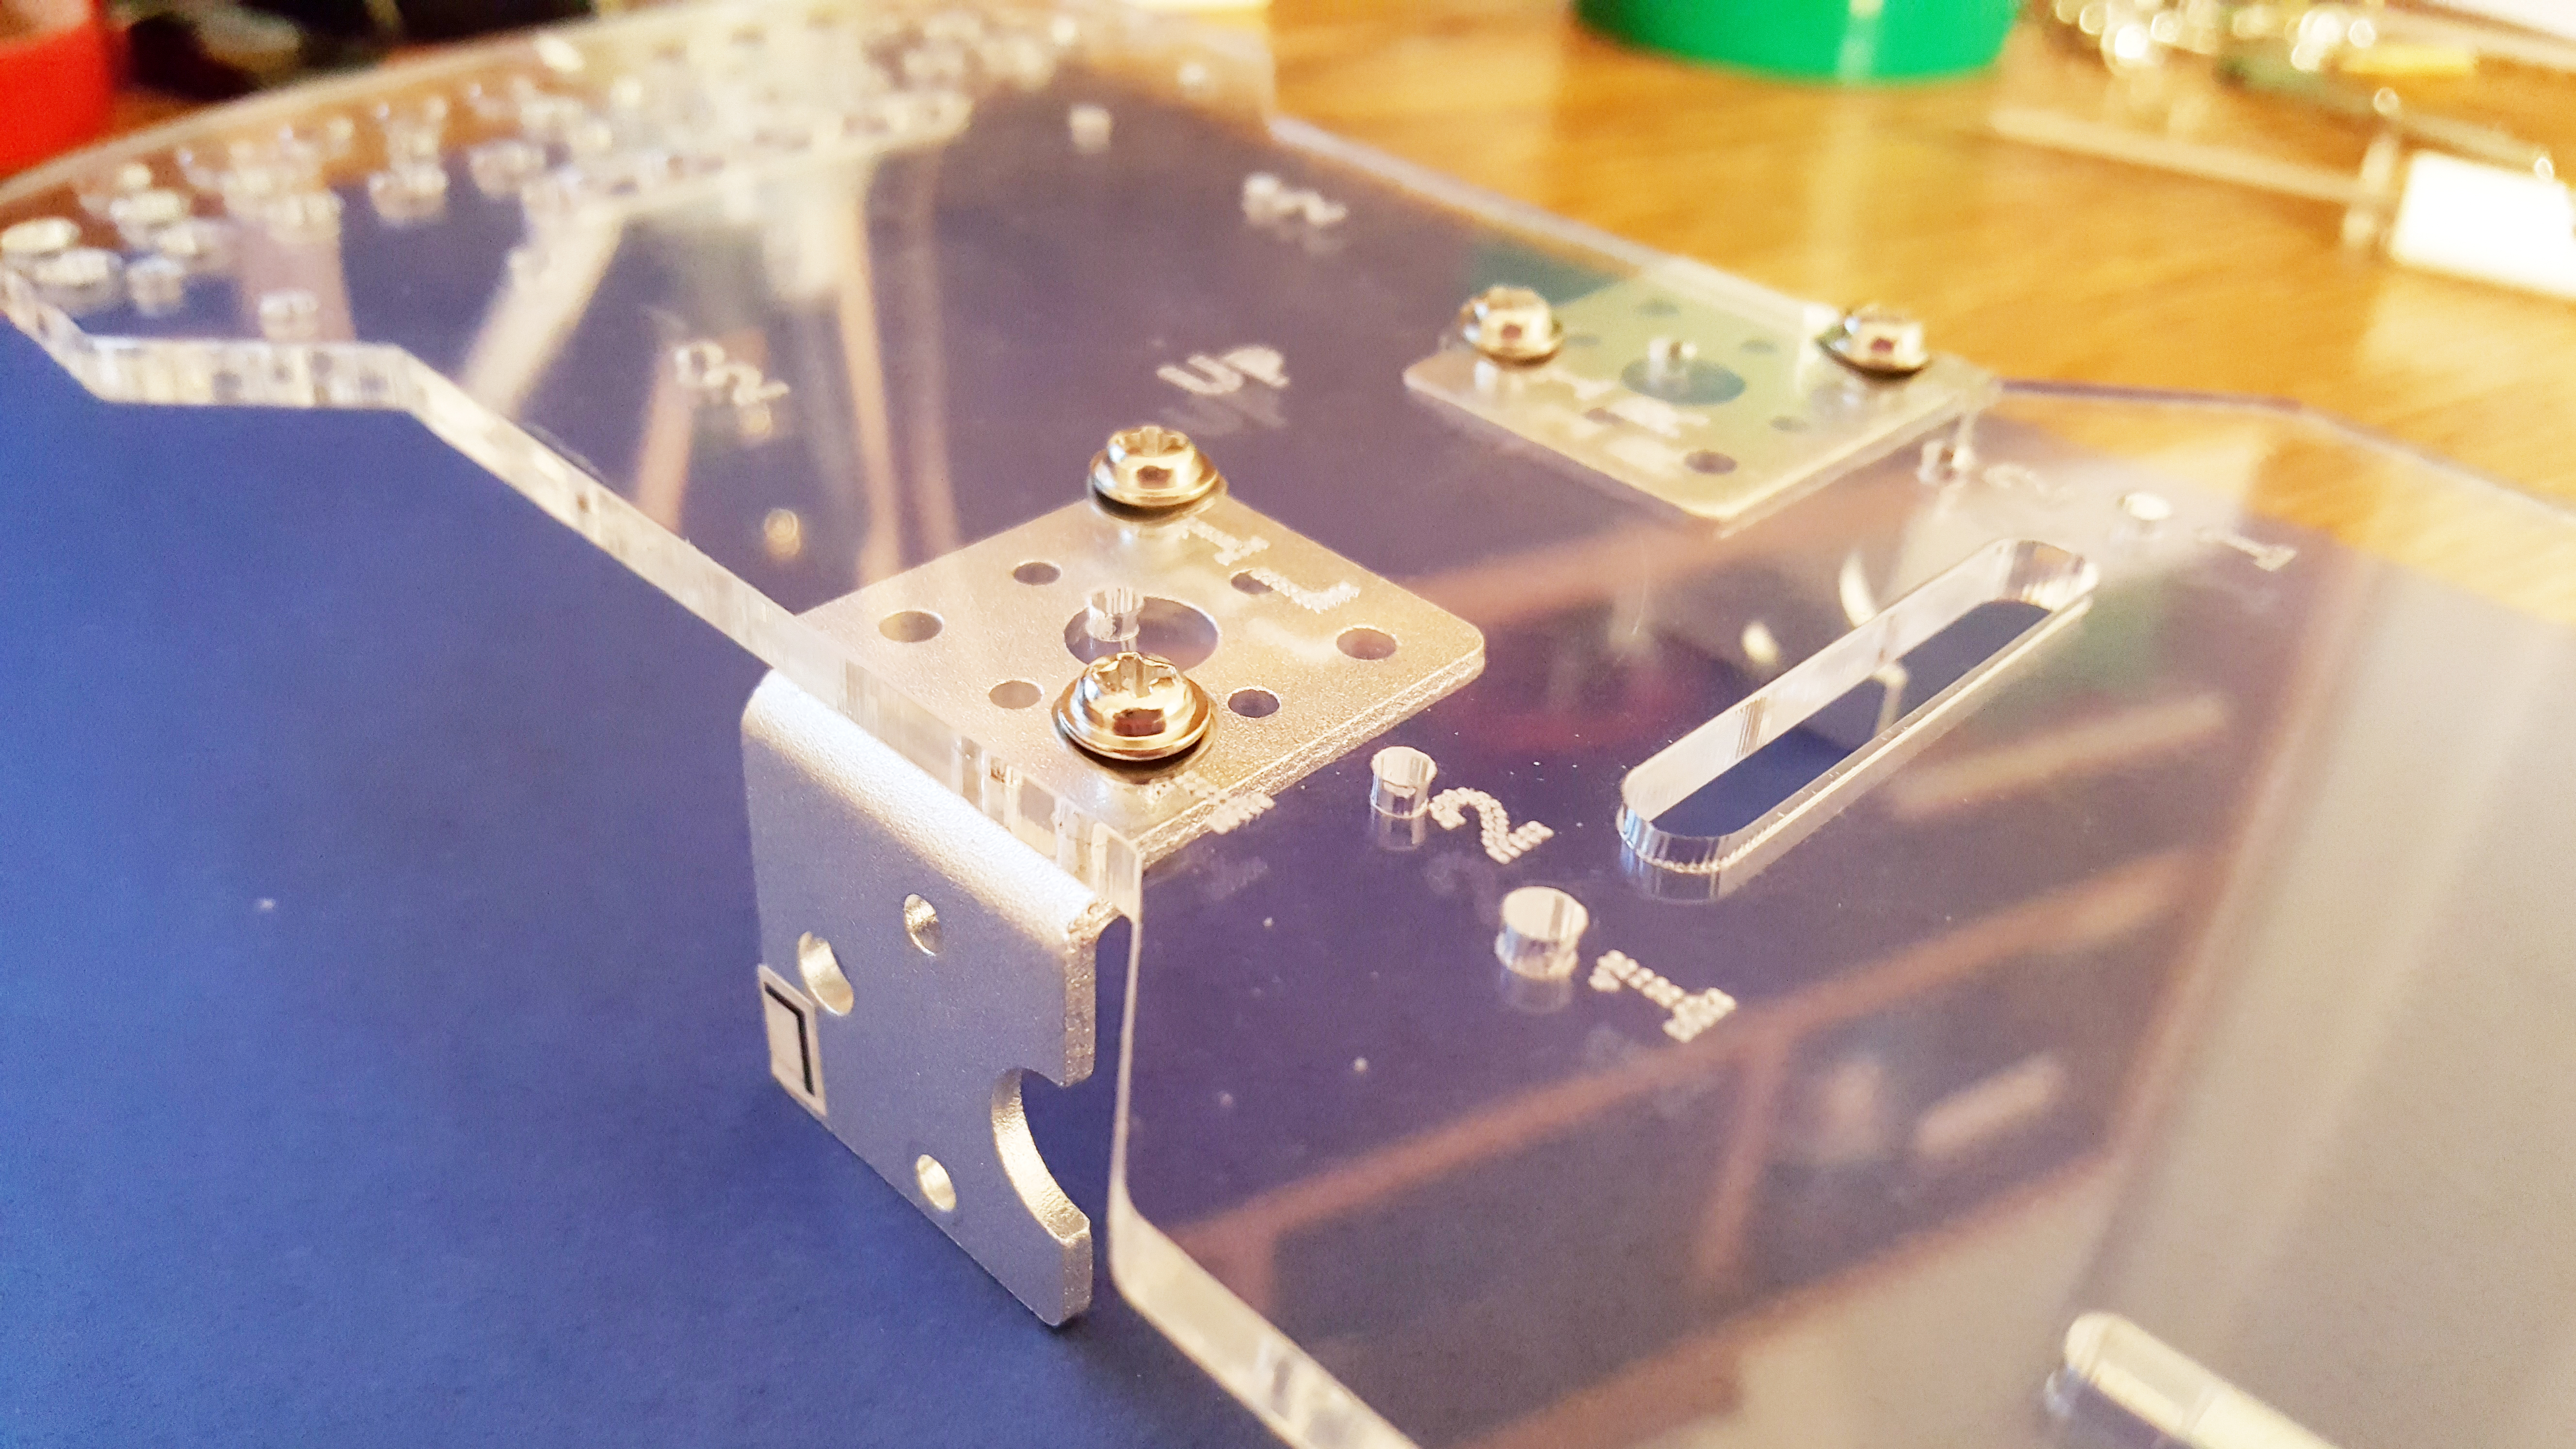
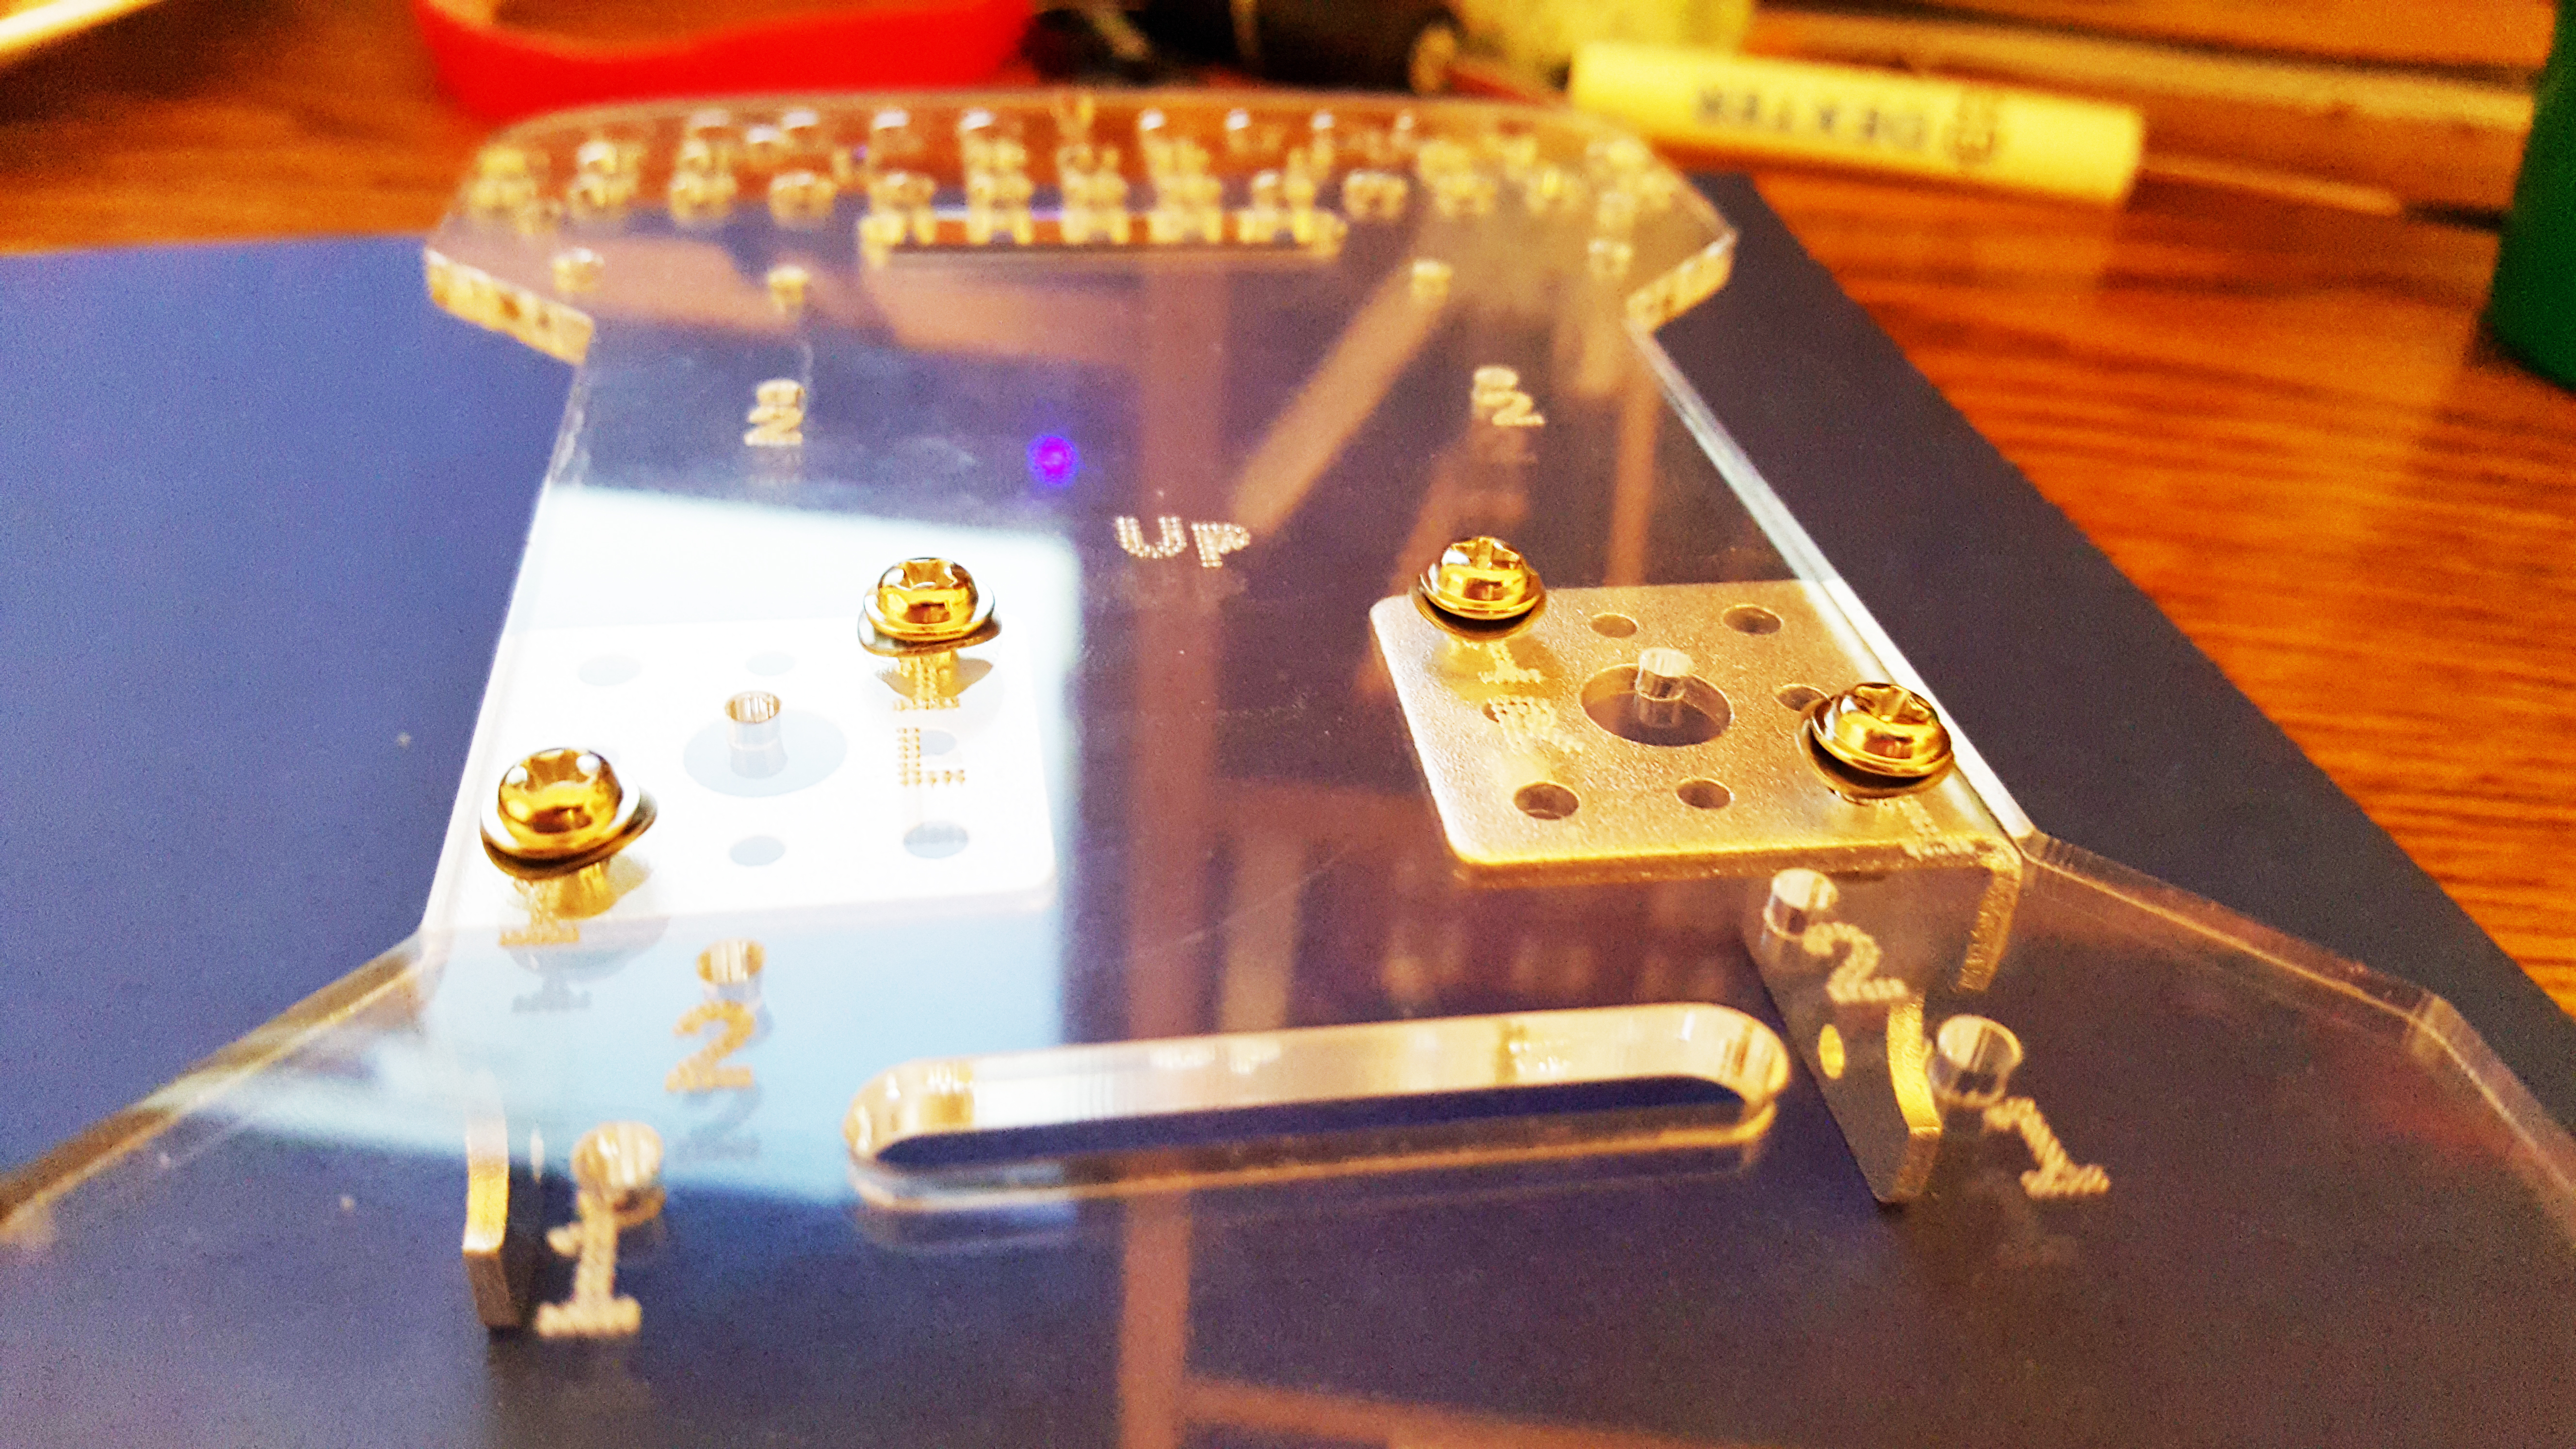
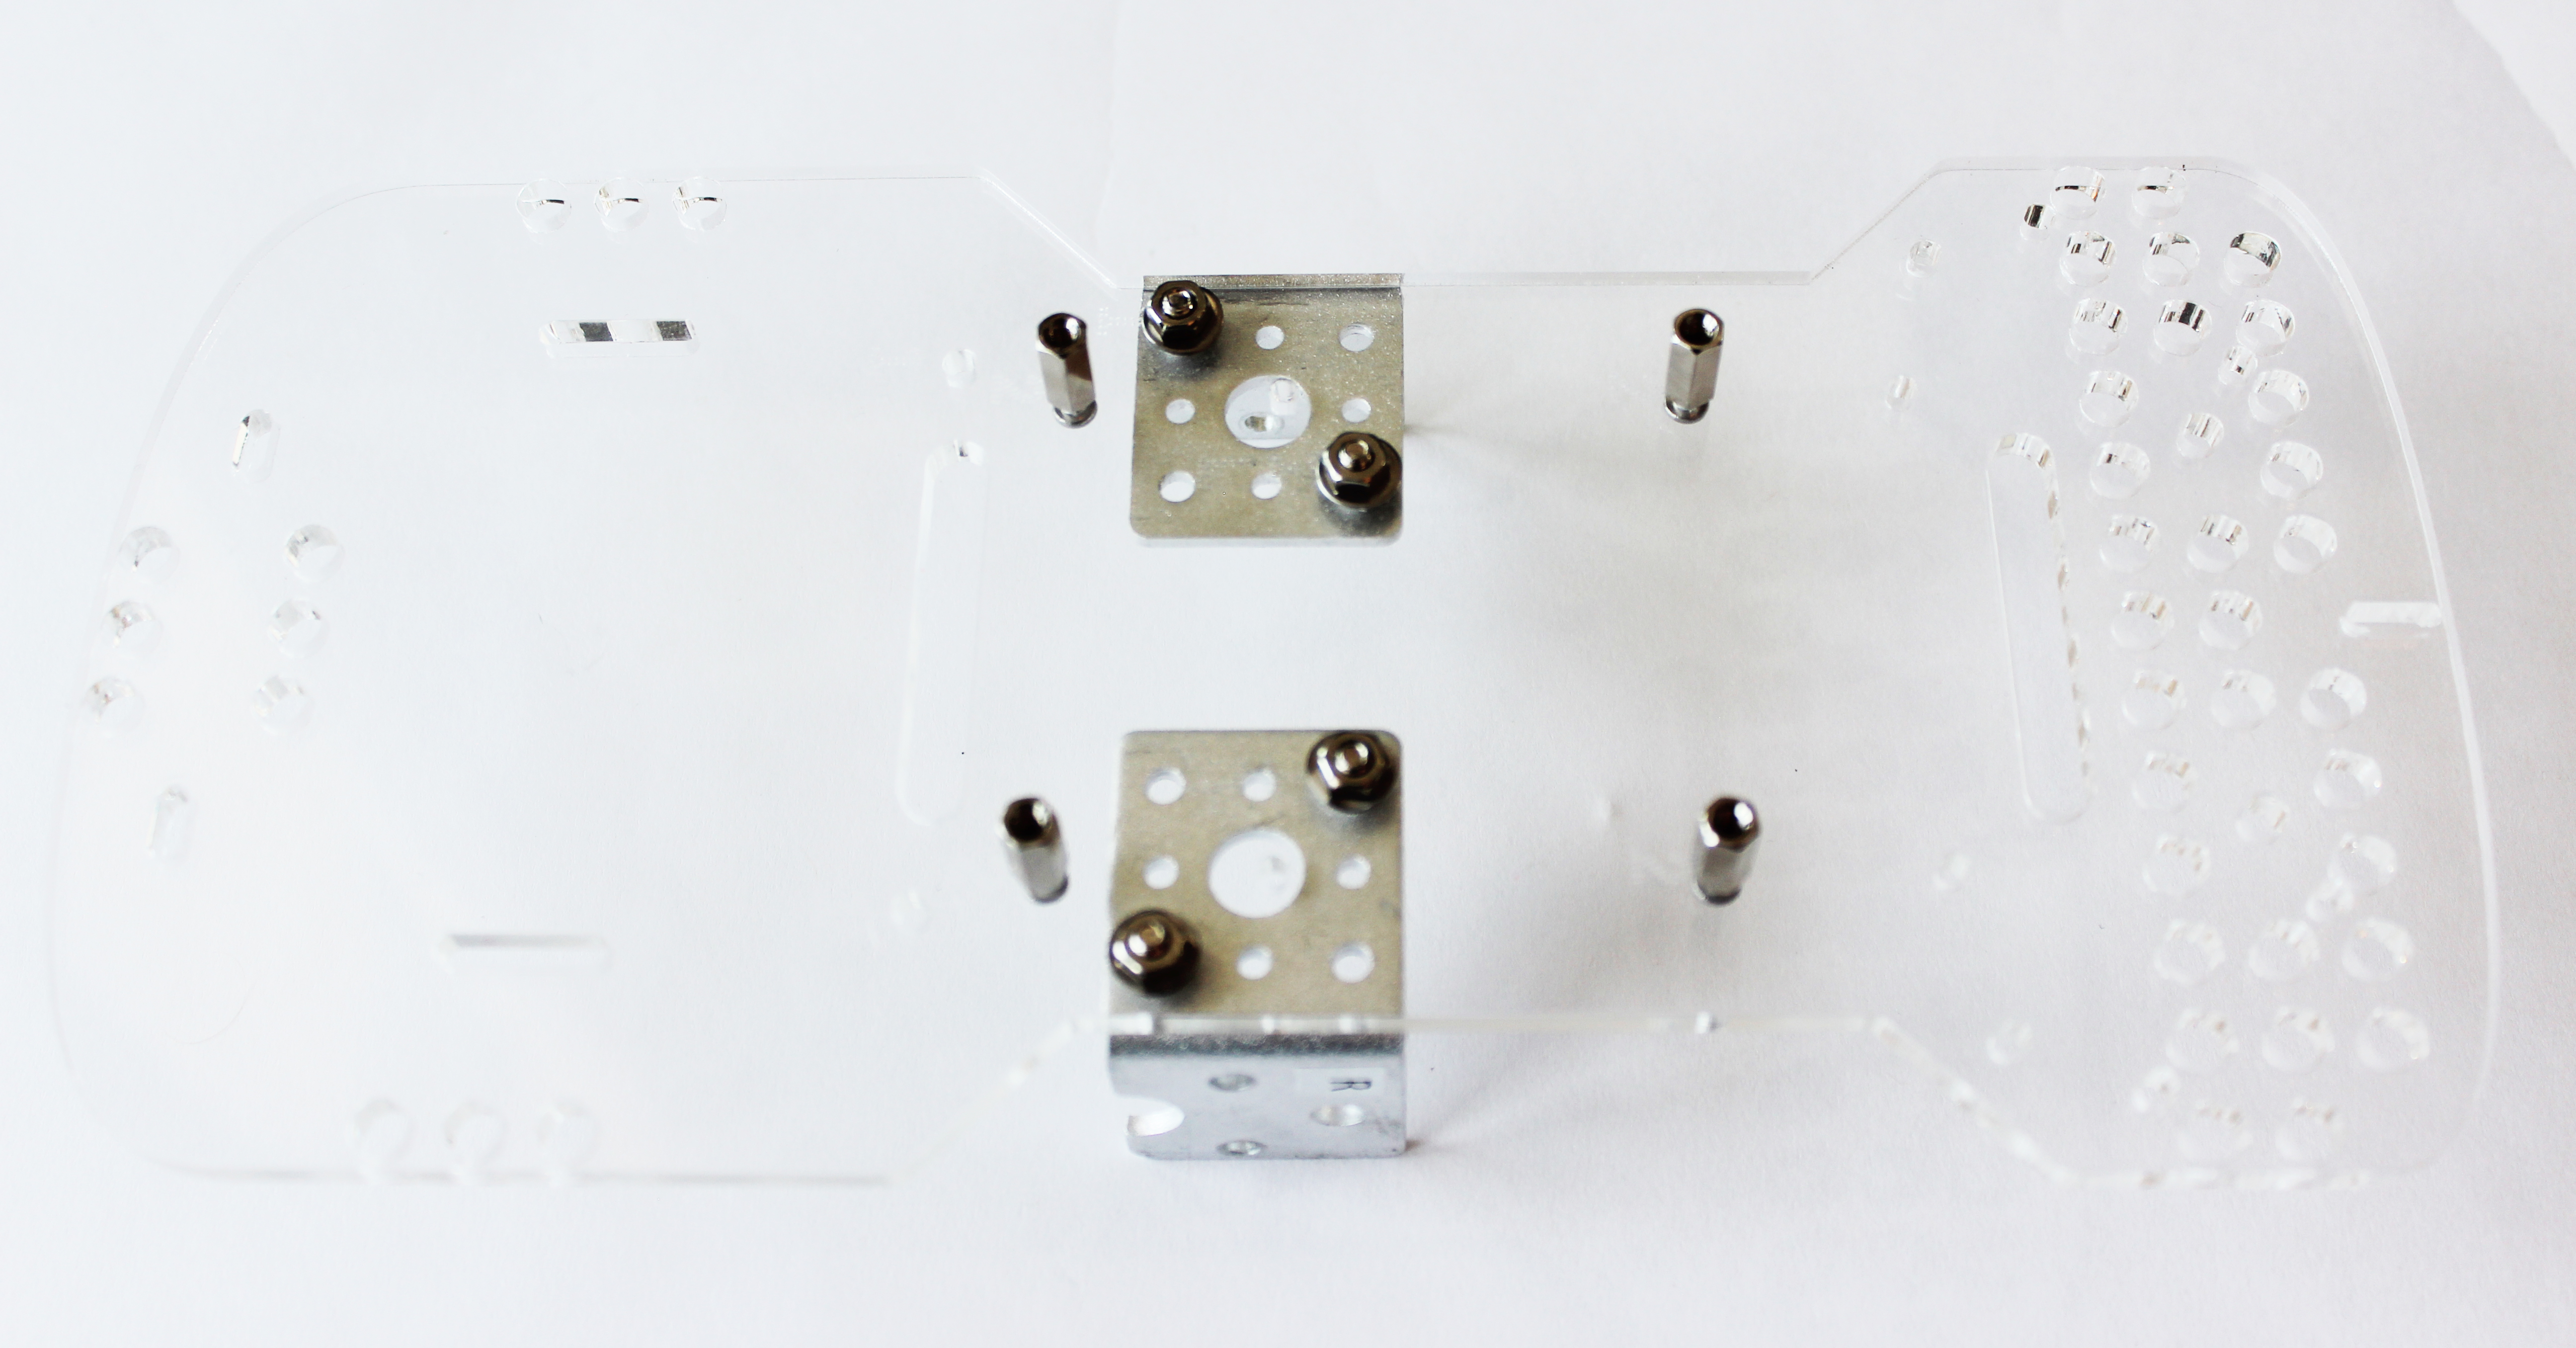
Part 4. Attach the short silver posts
In this step we will attach the short silver posts to the GoPiGo3 acrylic body.
What you’ll need:
Hardware from the small bag:
- (B) 4 mini screws
- (A) 4 short silver posts
Attach the posts:
- Find the 4 holes that make a square in the middle of the acrylic. Two of these holes are labeled “2” on the acrylic body.
- Place screws up through the acrylic body and attach four short silver posts (so they are sticking up towards you). Hand tighten the posts.
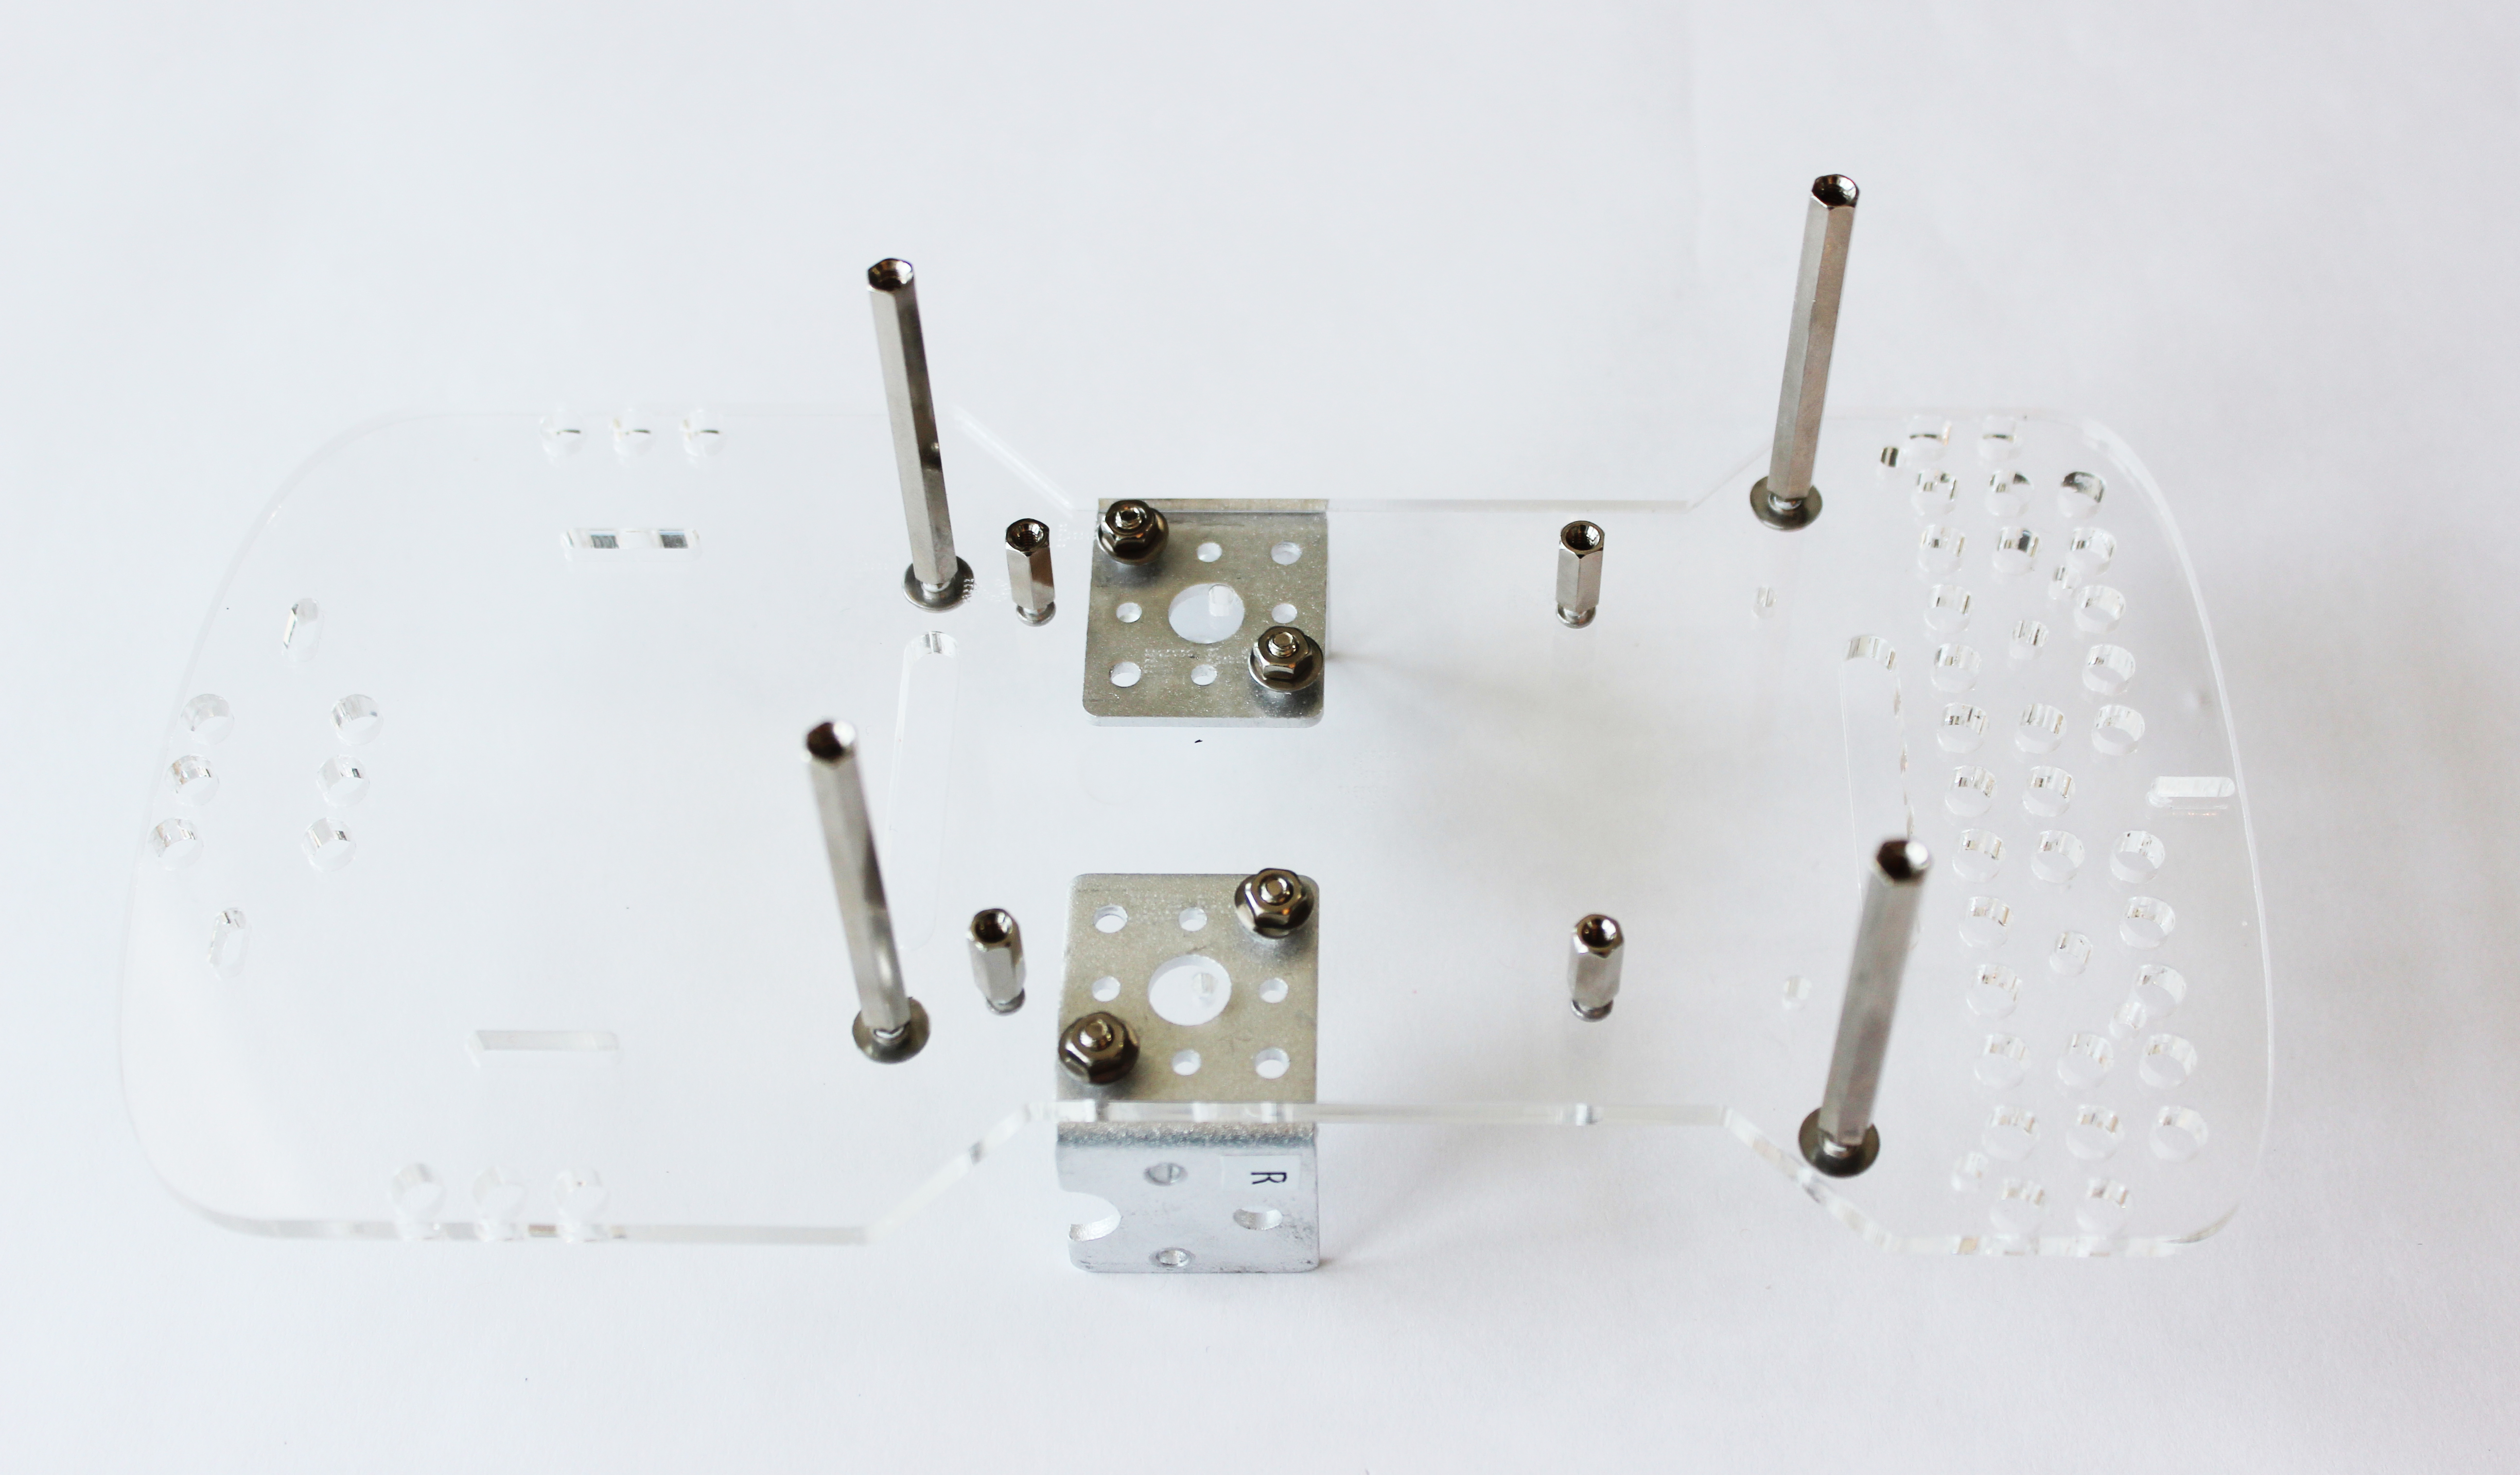
Part 5. Attach the 4 long posts to the GoPiGo3 acrylic body
What you’ll need:
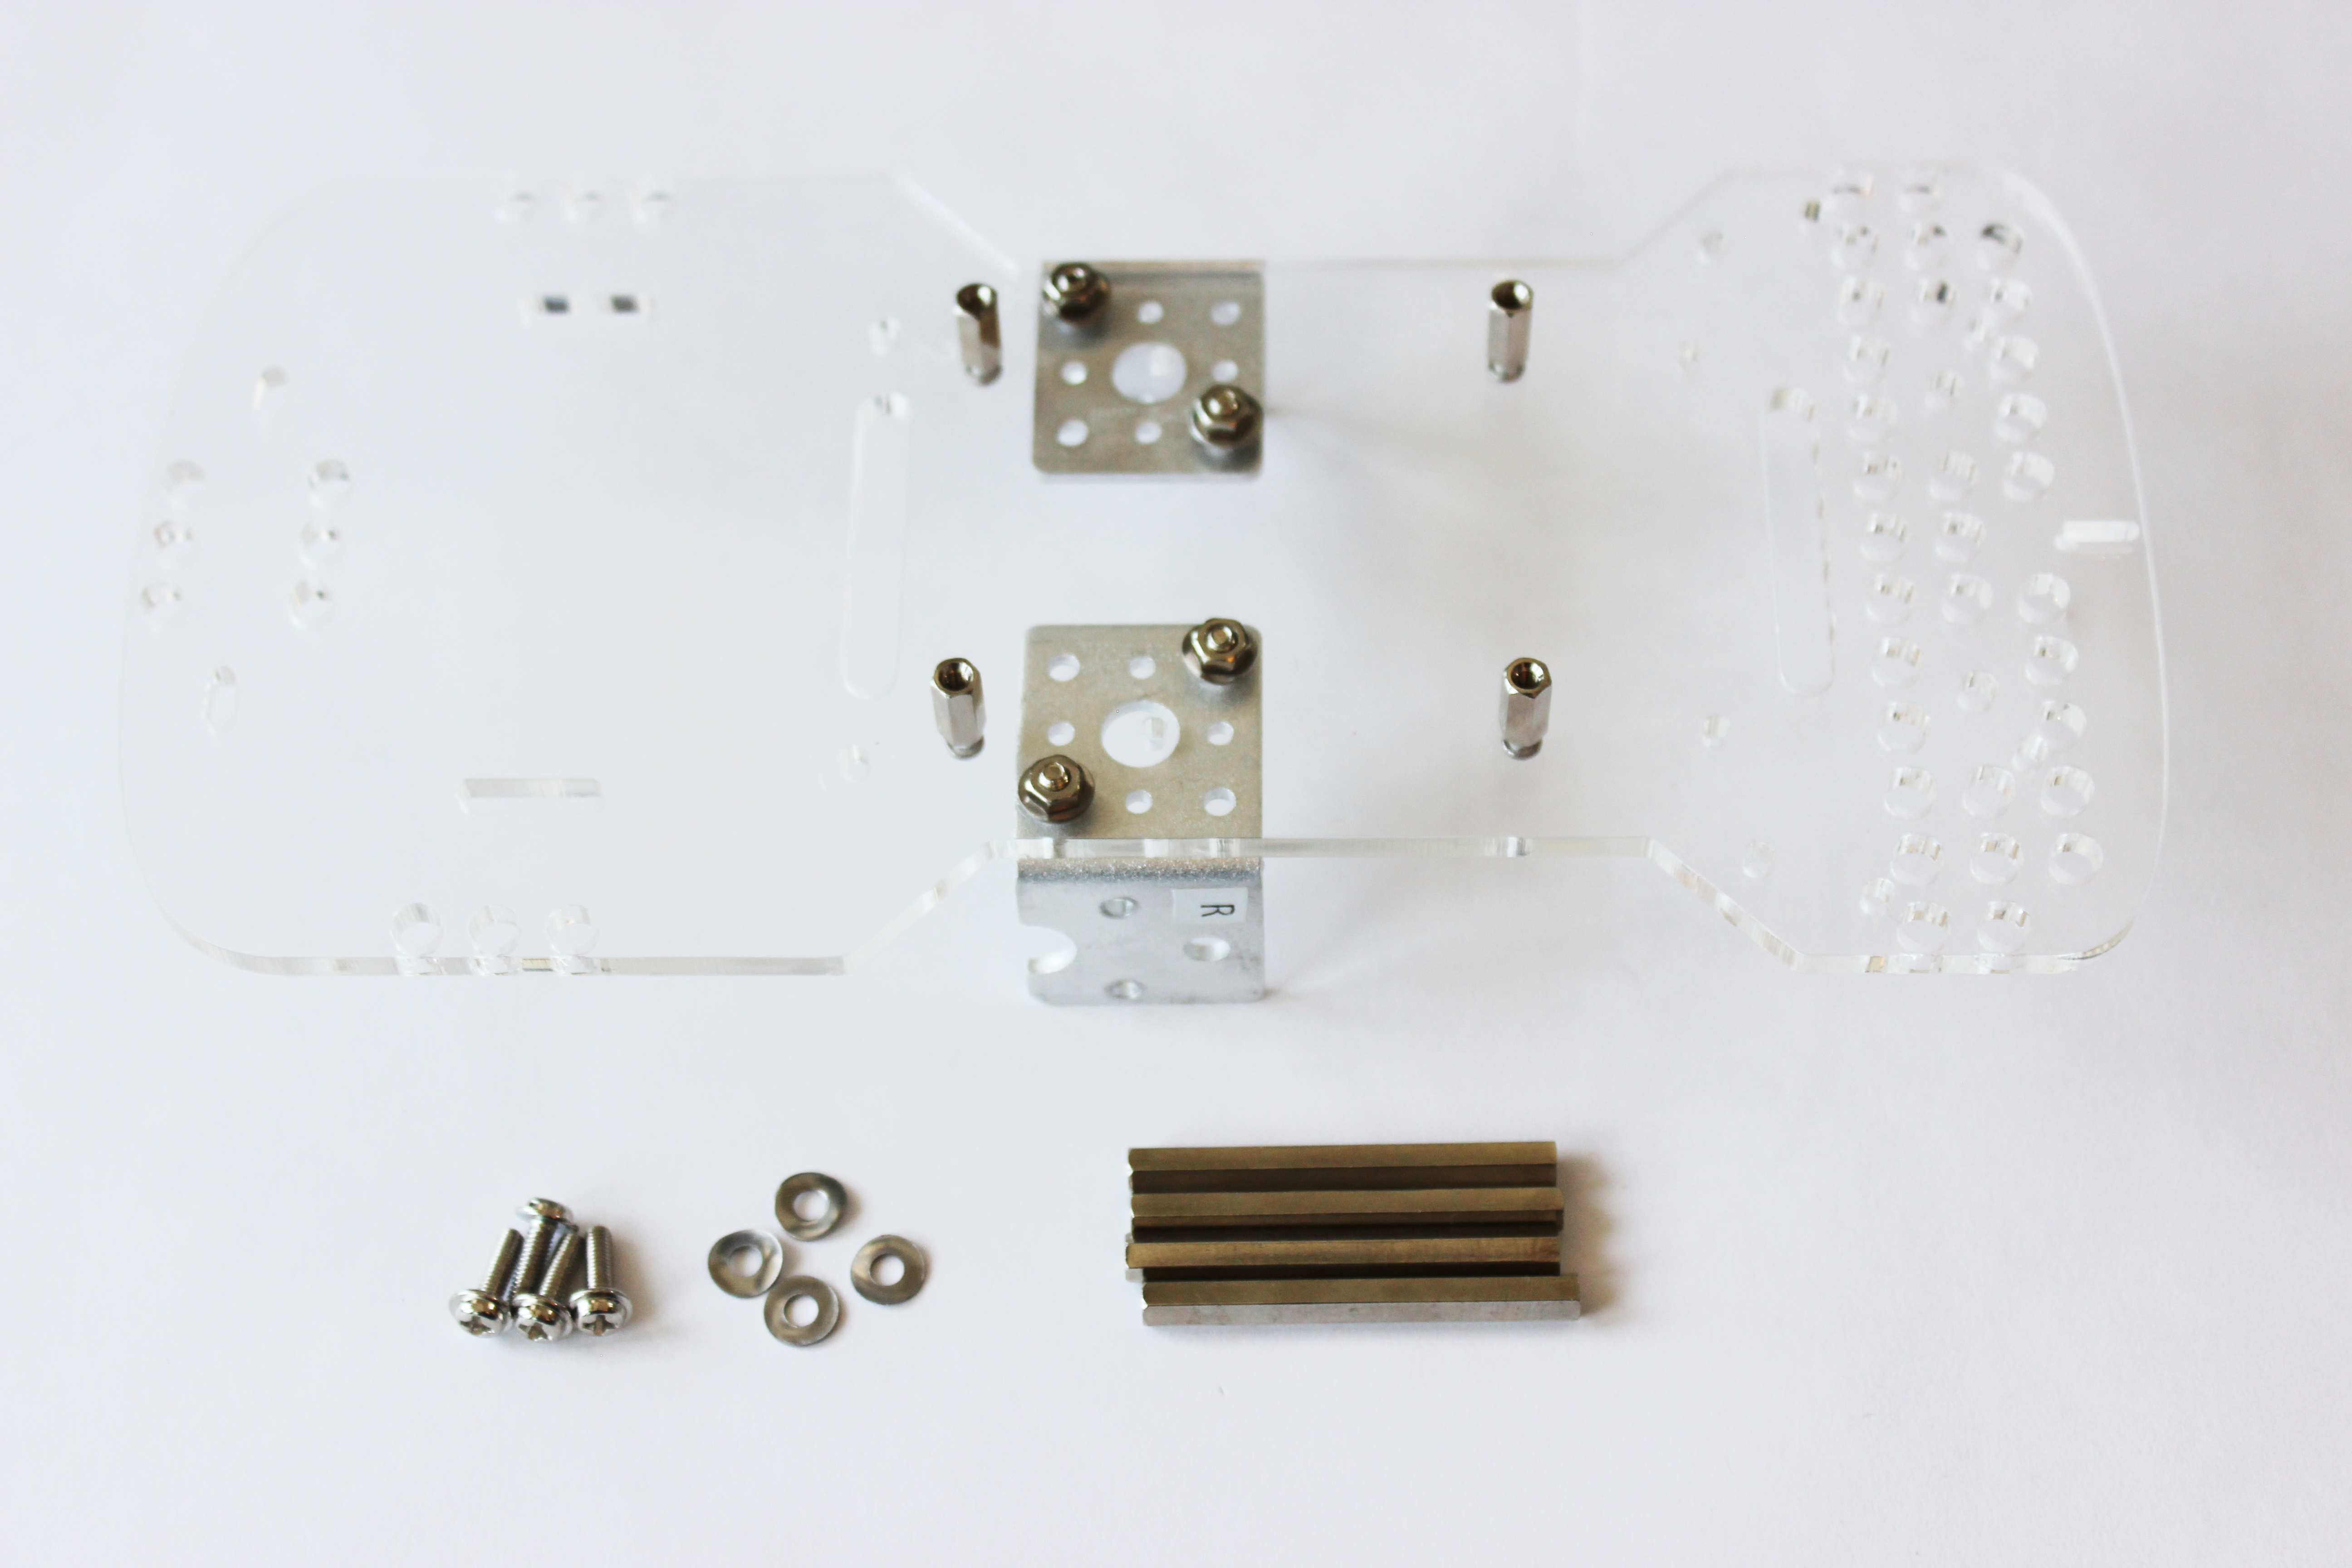
- Hardware from the large bag:
- (D) 4 short screws
- (E) 4 washers
- (J) 4 long silver posts
- Slide the washers onto the screws.
- Find the four holes for the canopy supports. Two of them will be labeled “1” on the GoPiGo3 acrylic body.
- The board should be facing UP. Insert the screws (with washers on them) up through the bottom of the board and screw them into the metal posts.
- Screw the posts onto the body and tighten until the washers flatten.
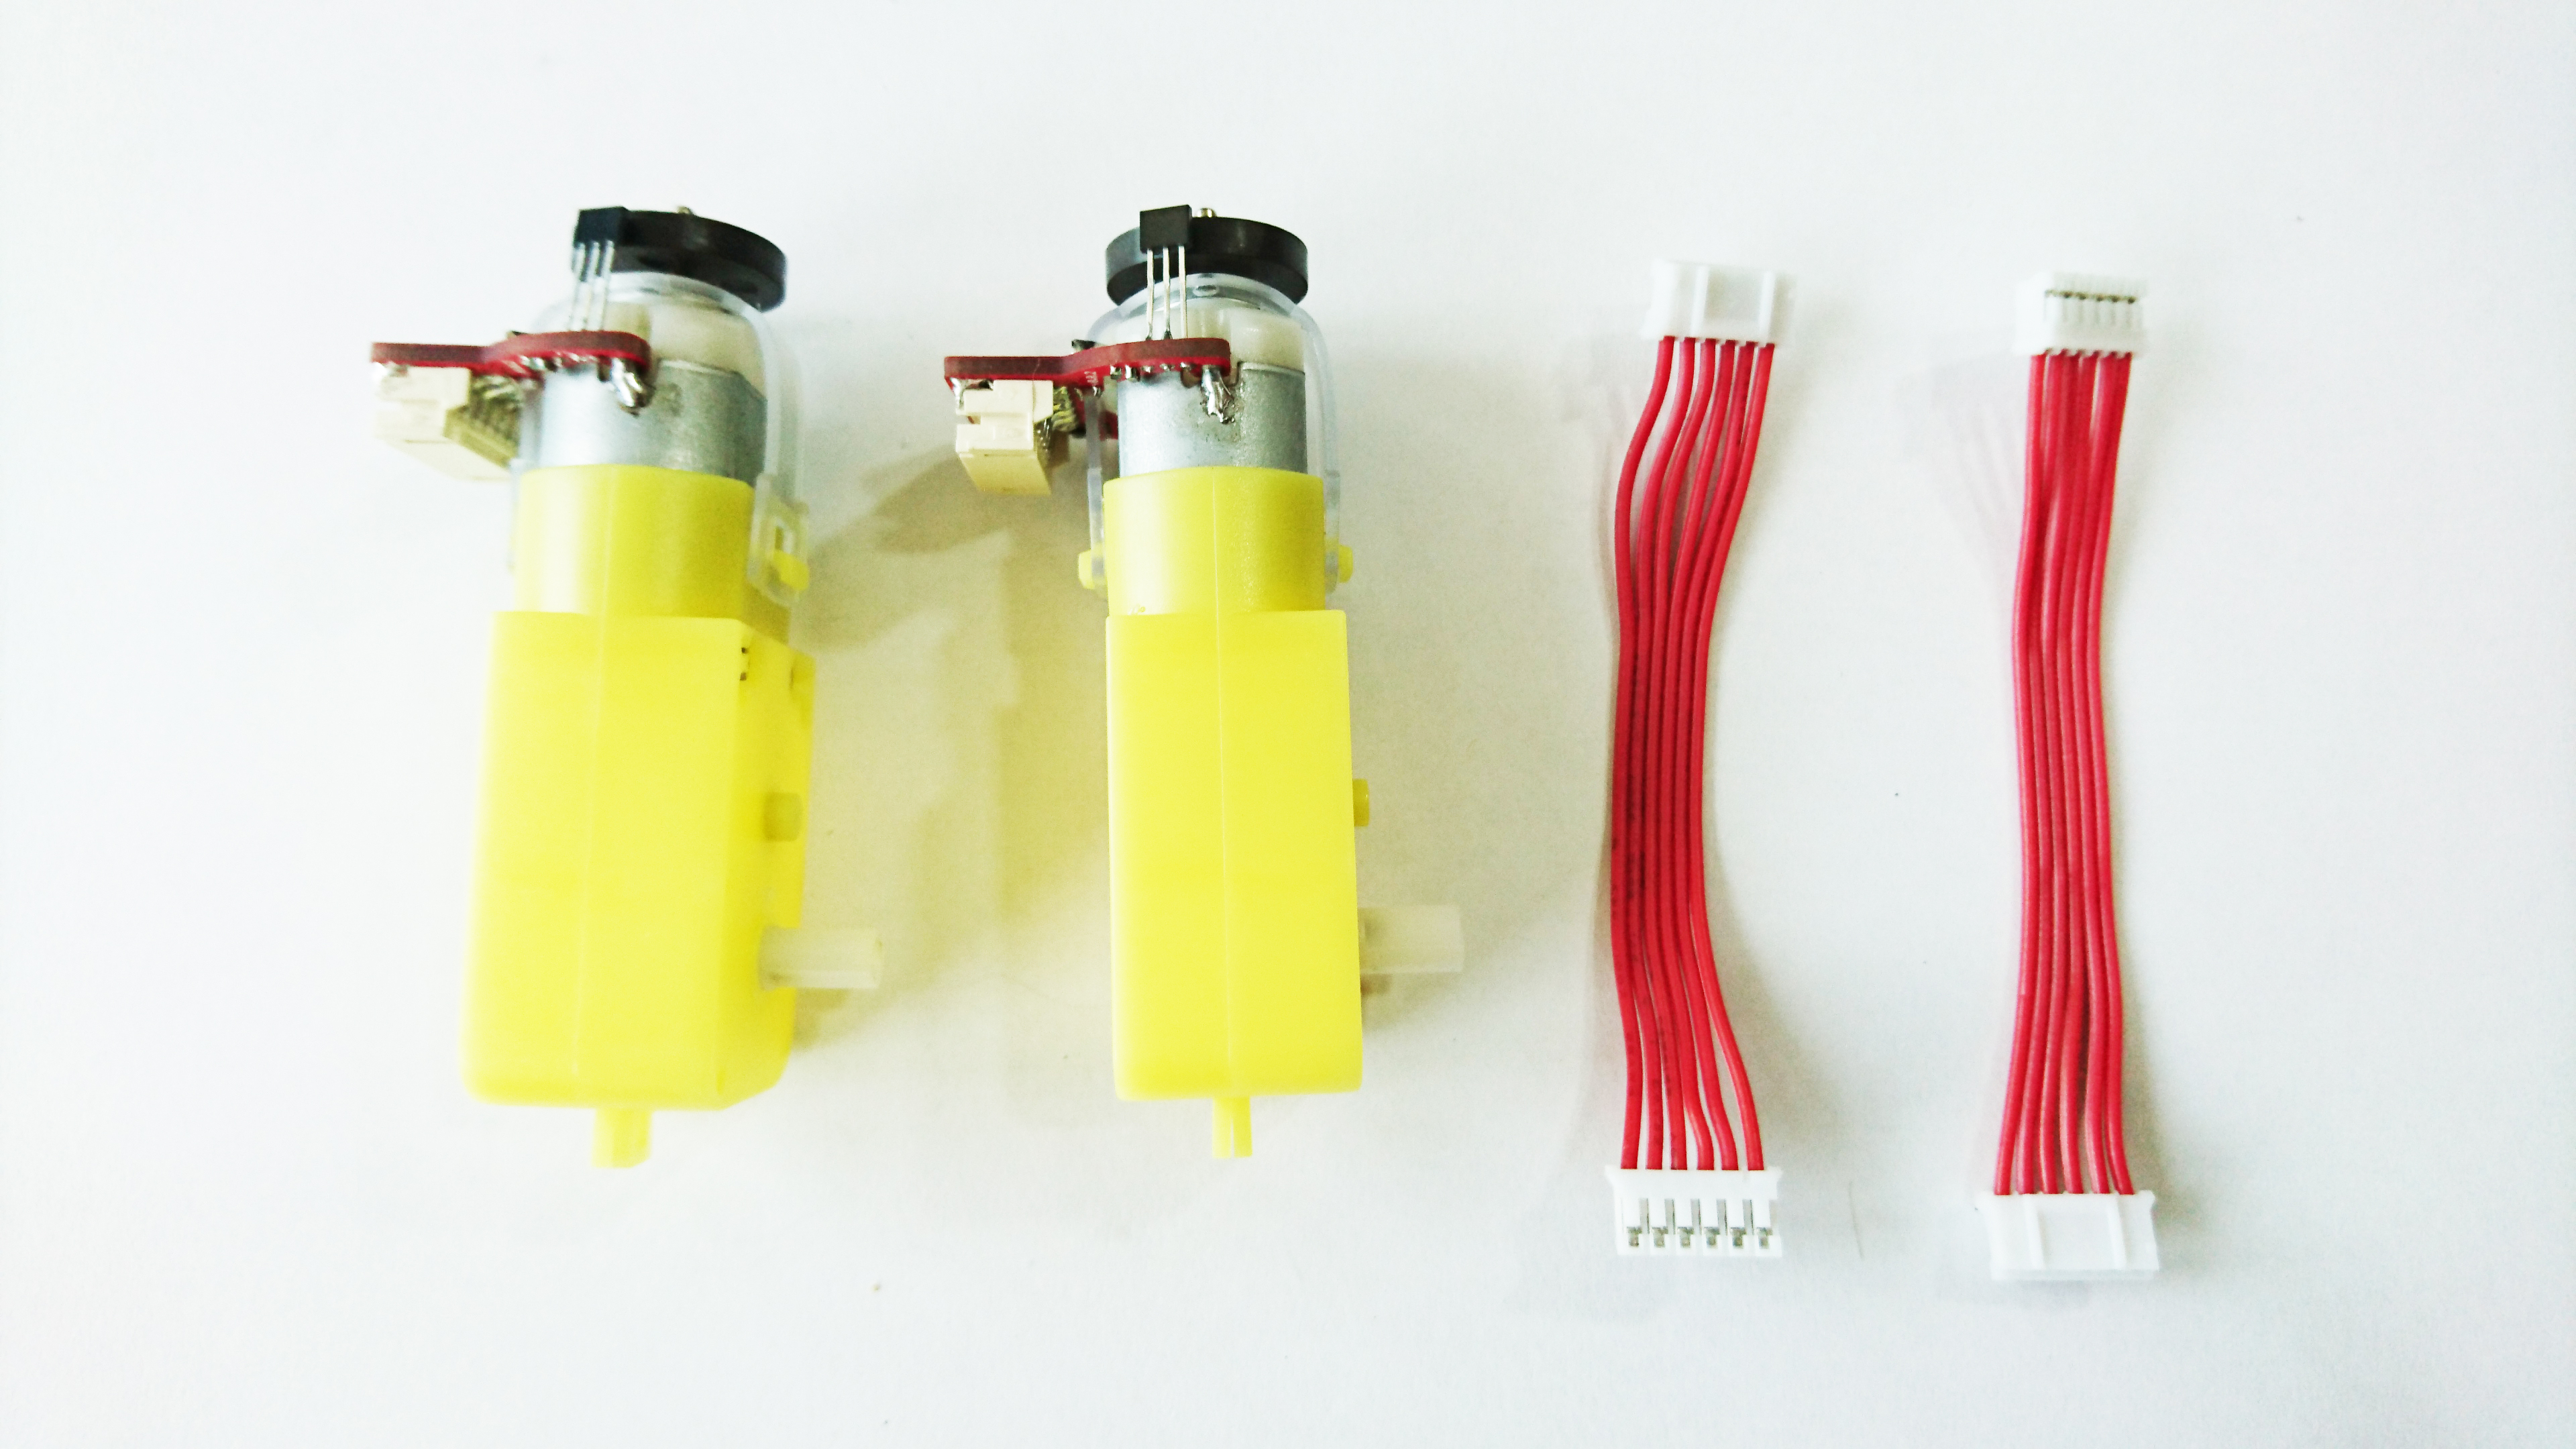
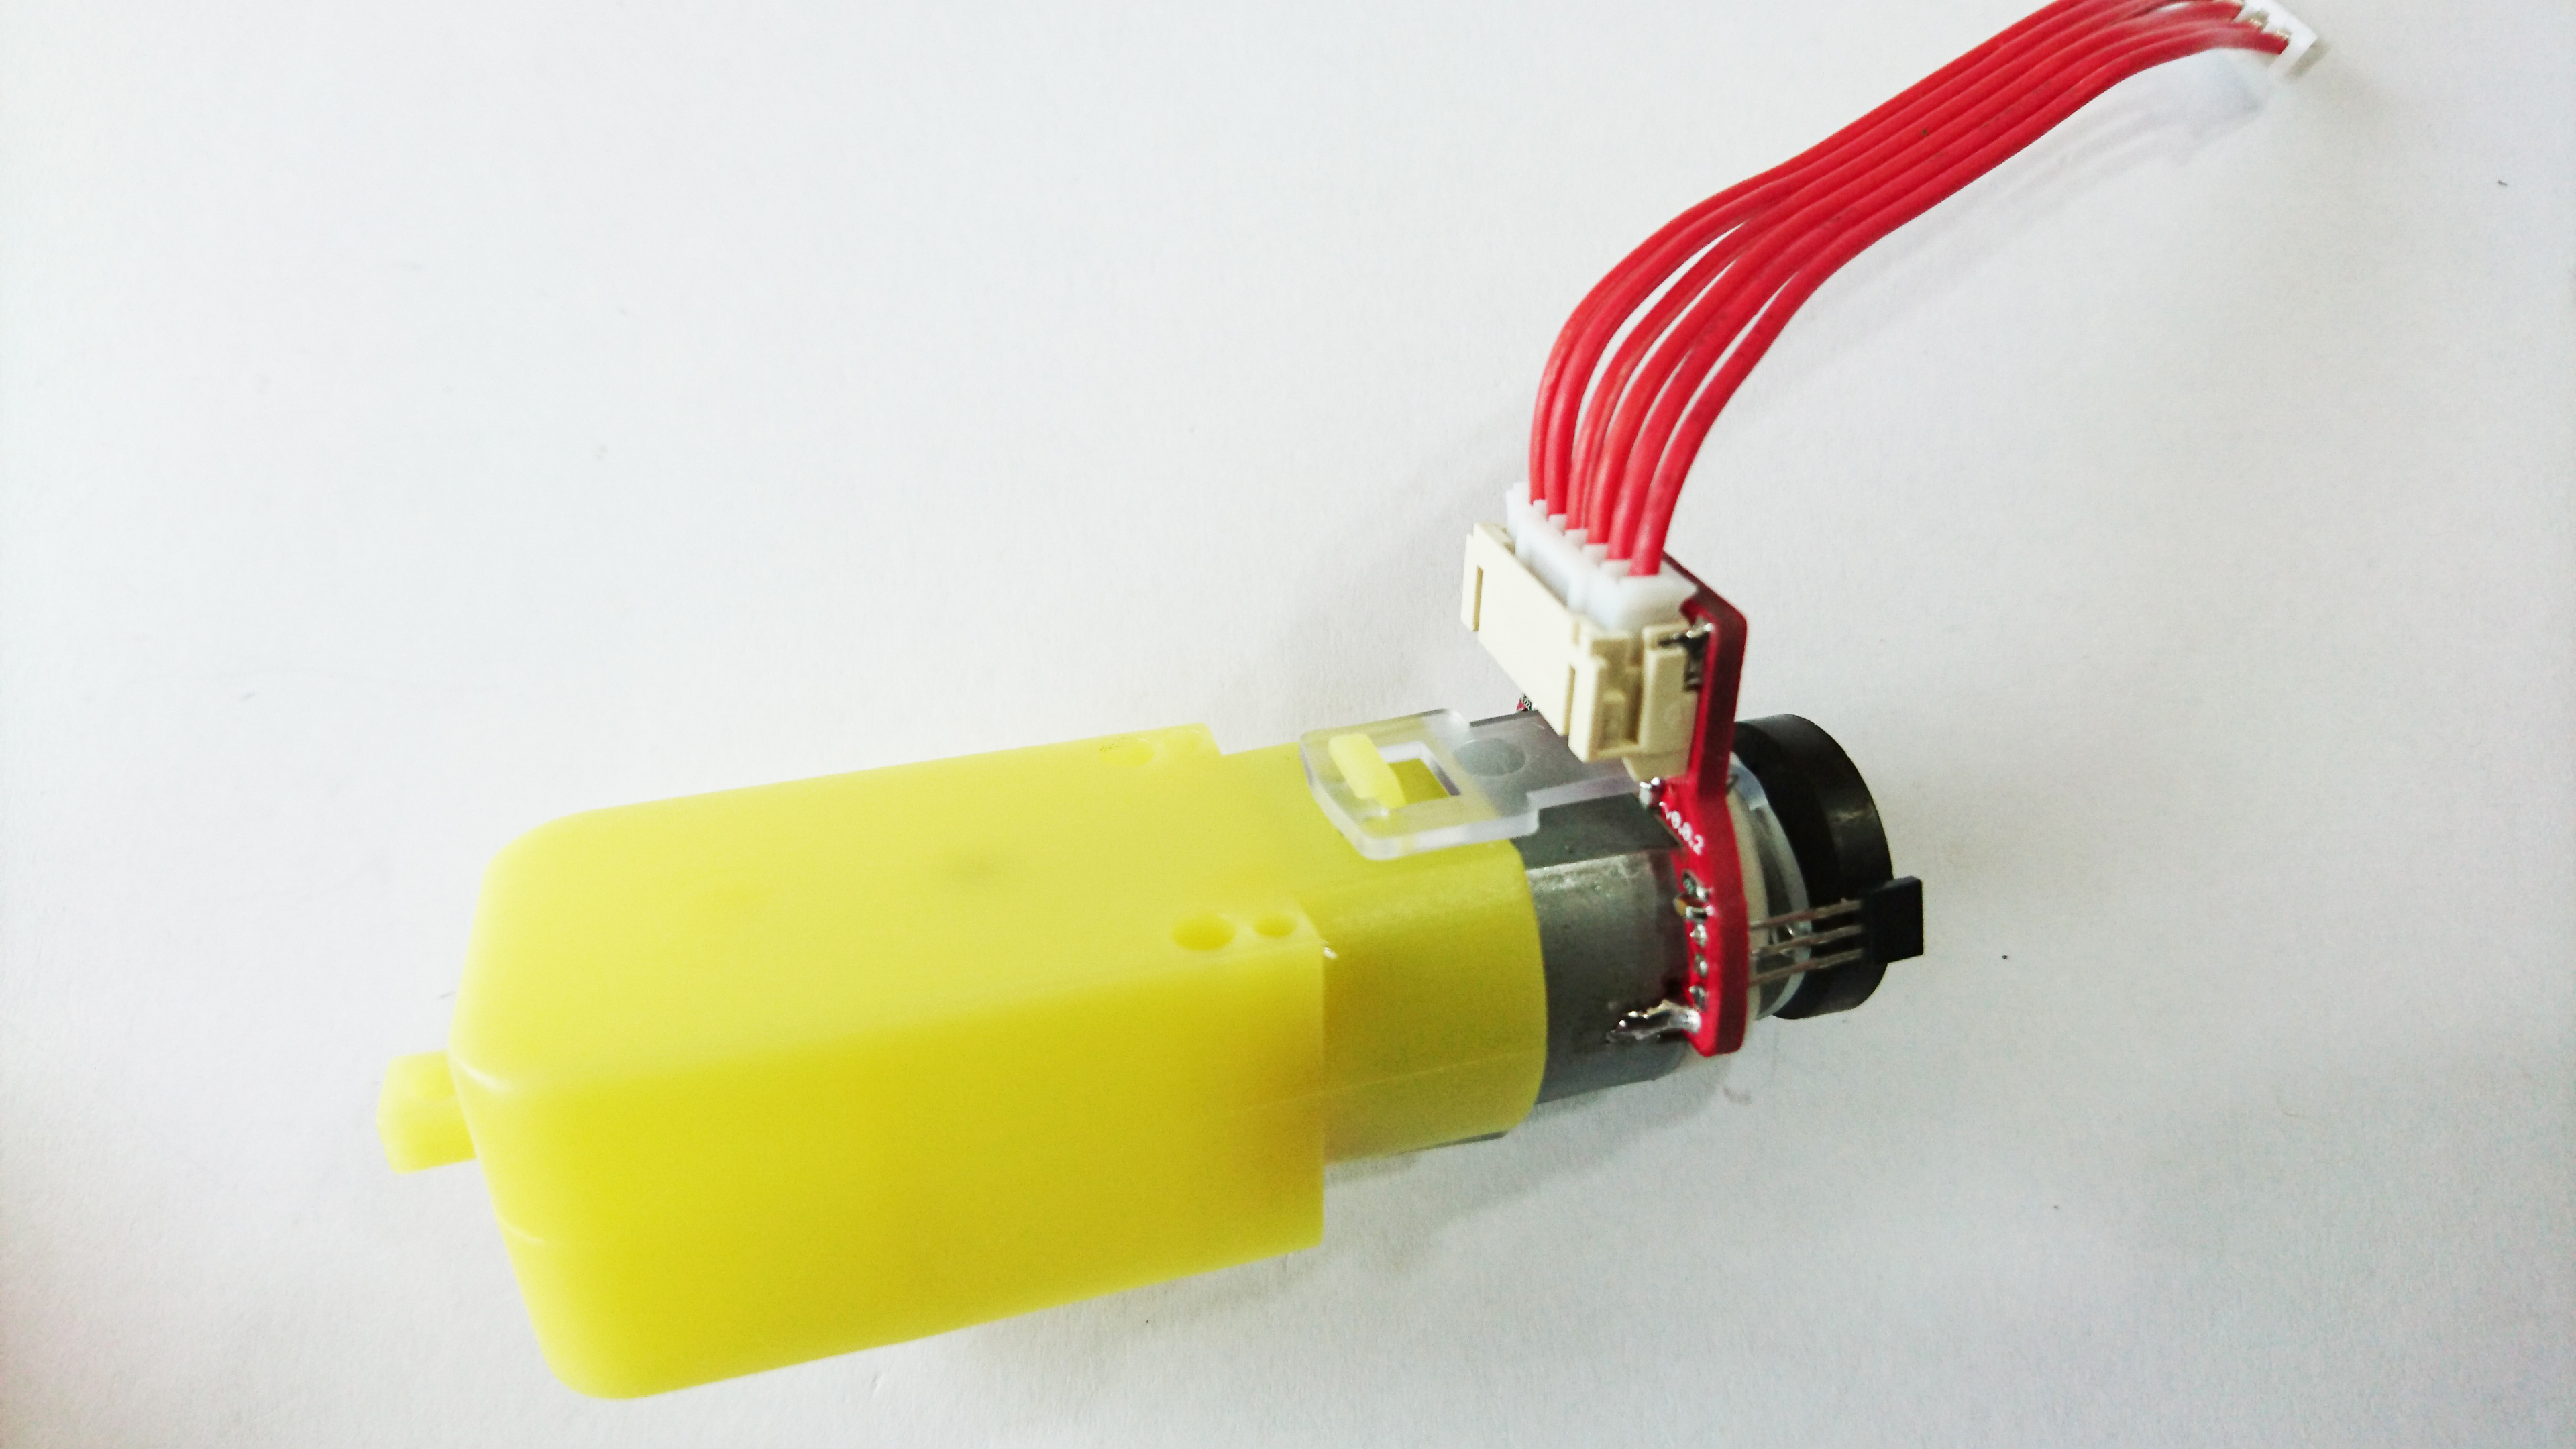
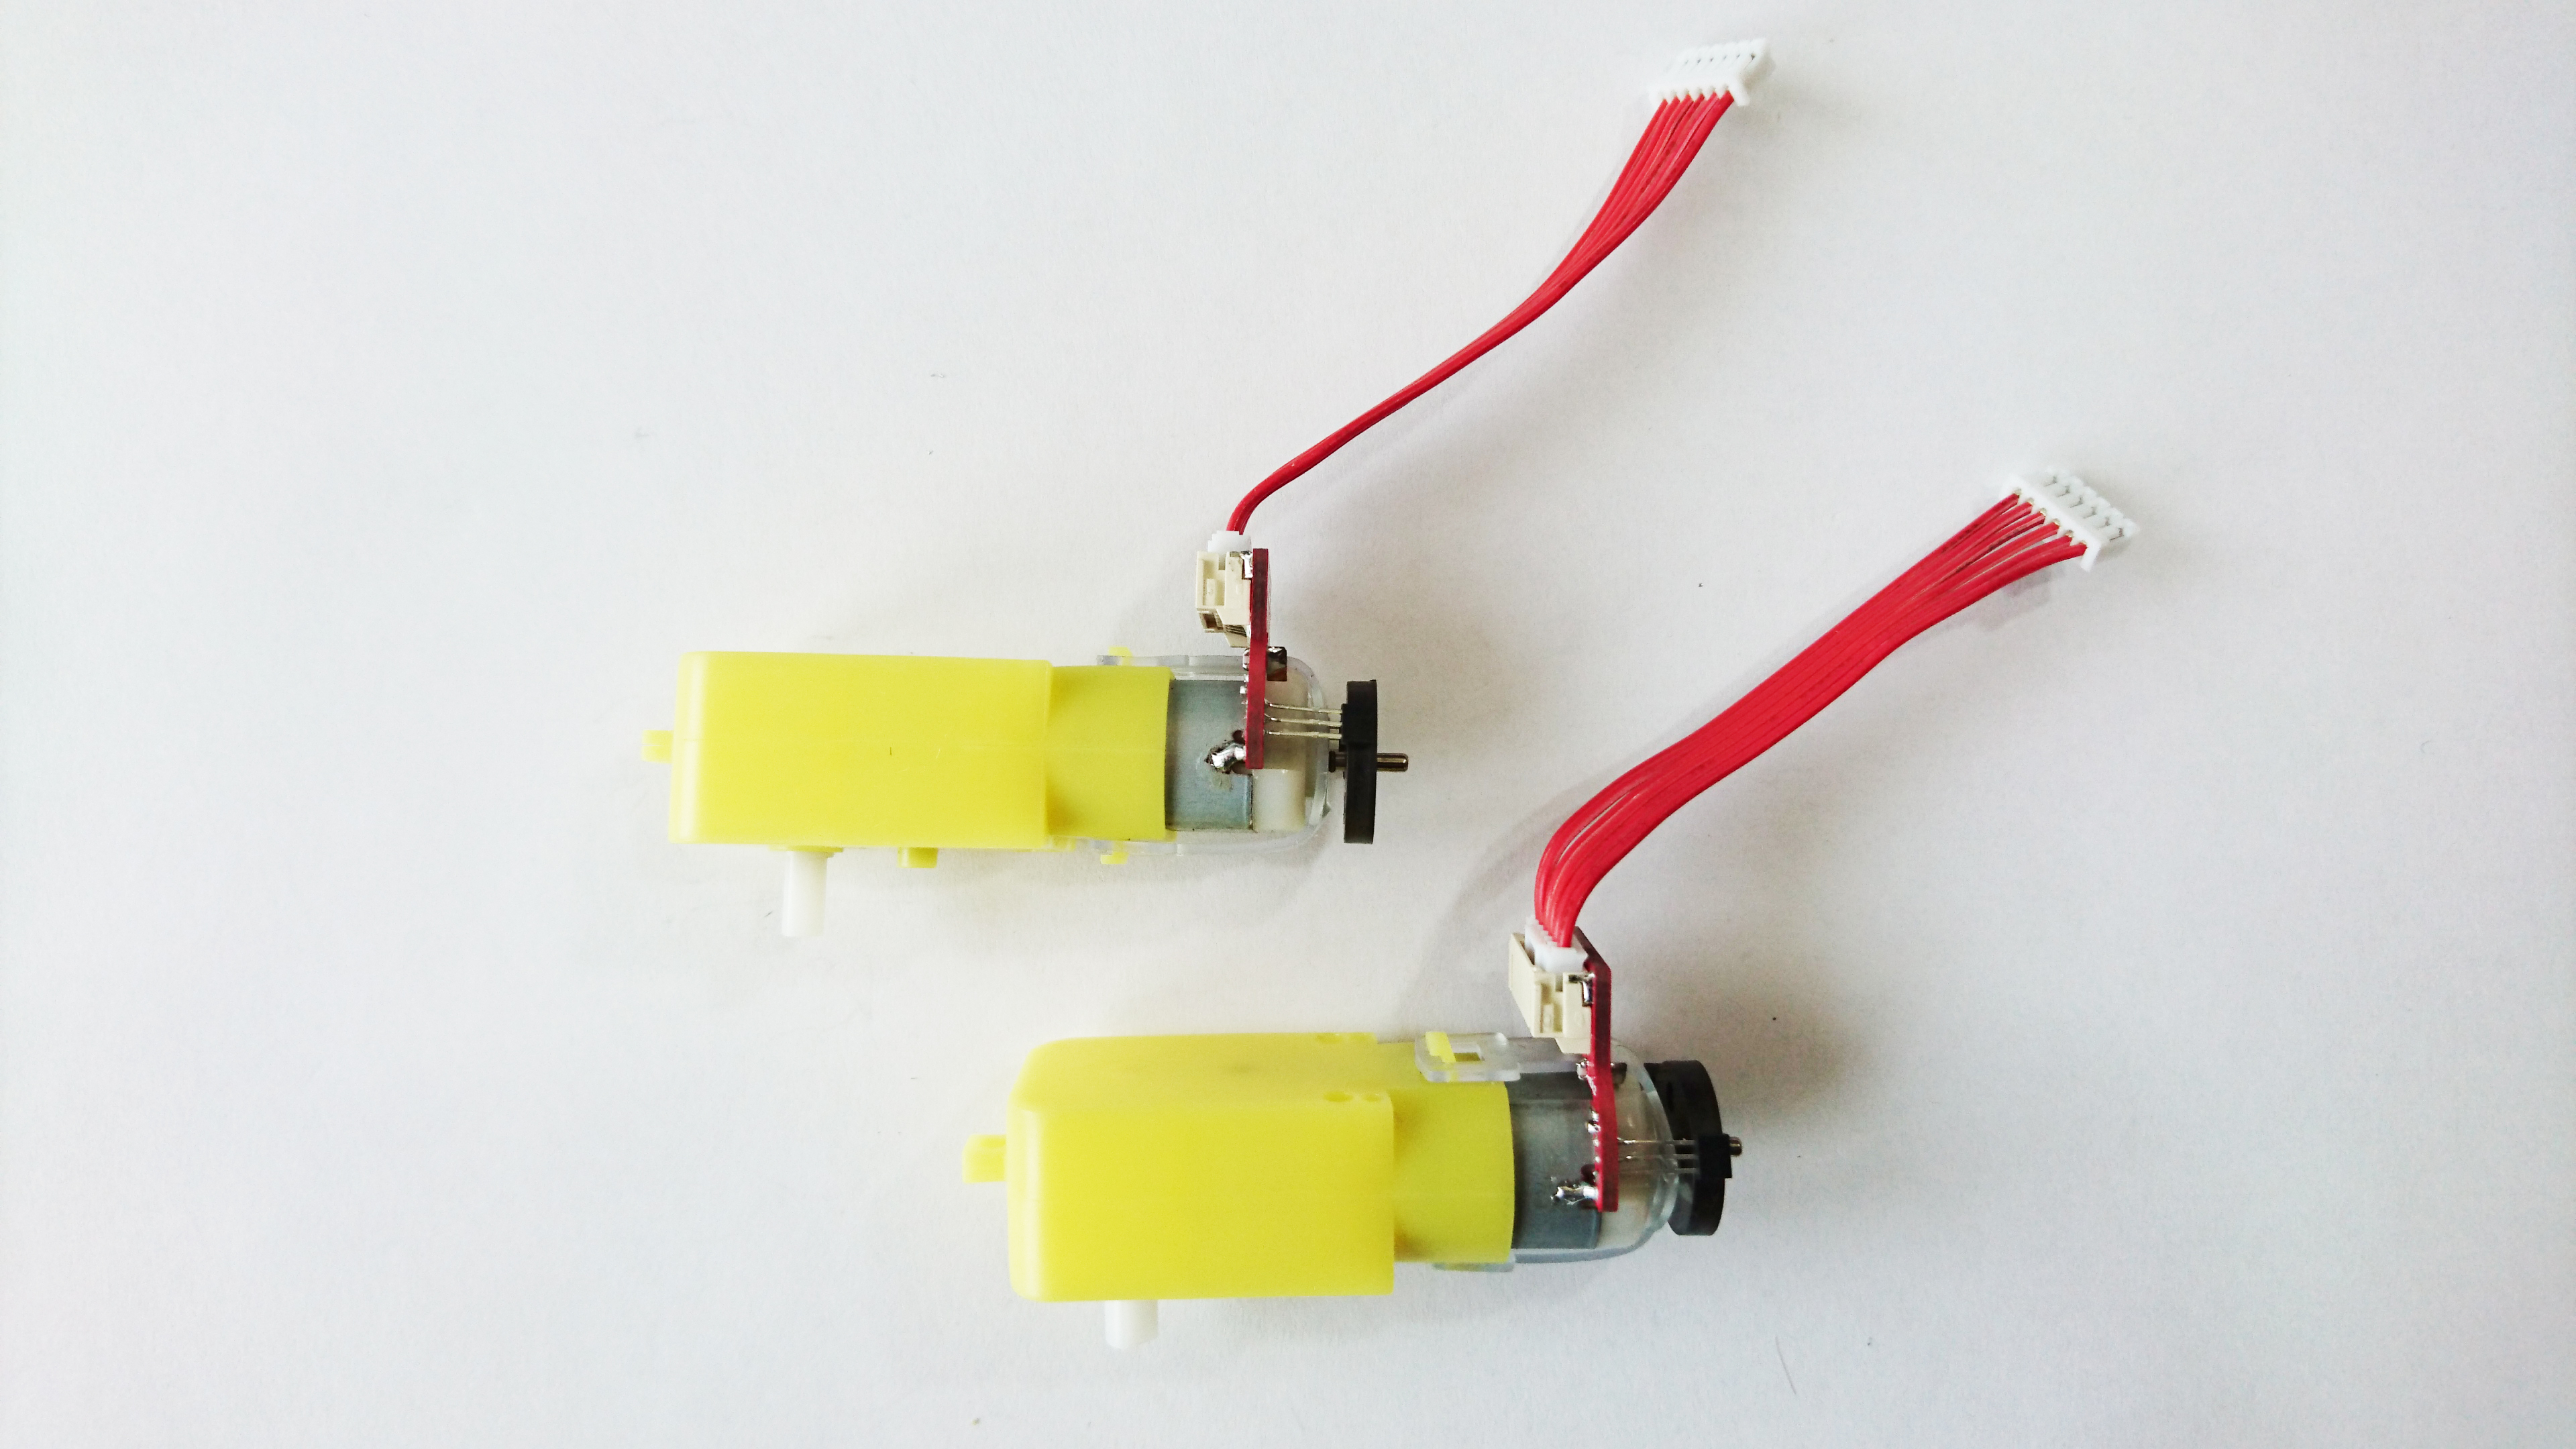
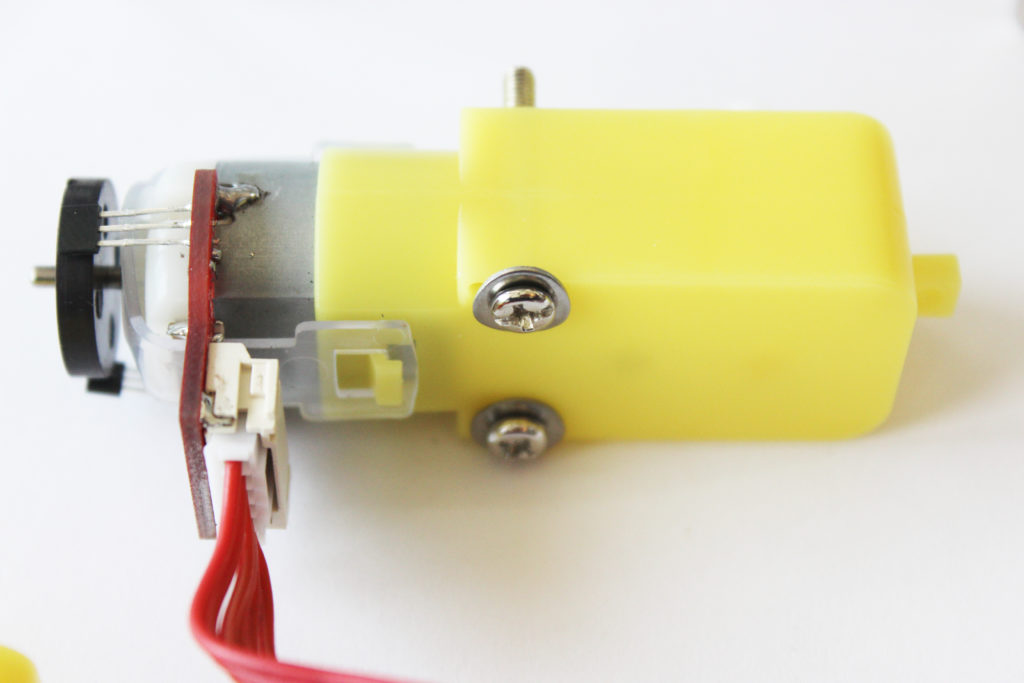
Part 6. Connect the cables to the motors
- You will need: Two yellow motors with the encoders attached, and two red cables. Note that the motors come with the encoder circuit boards already attached. See the first picture below, your hardware should arrive like this.
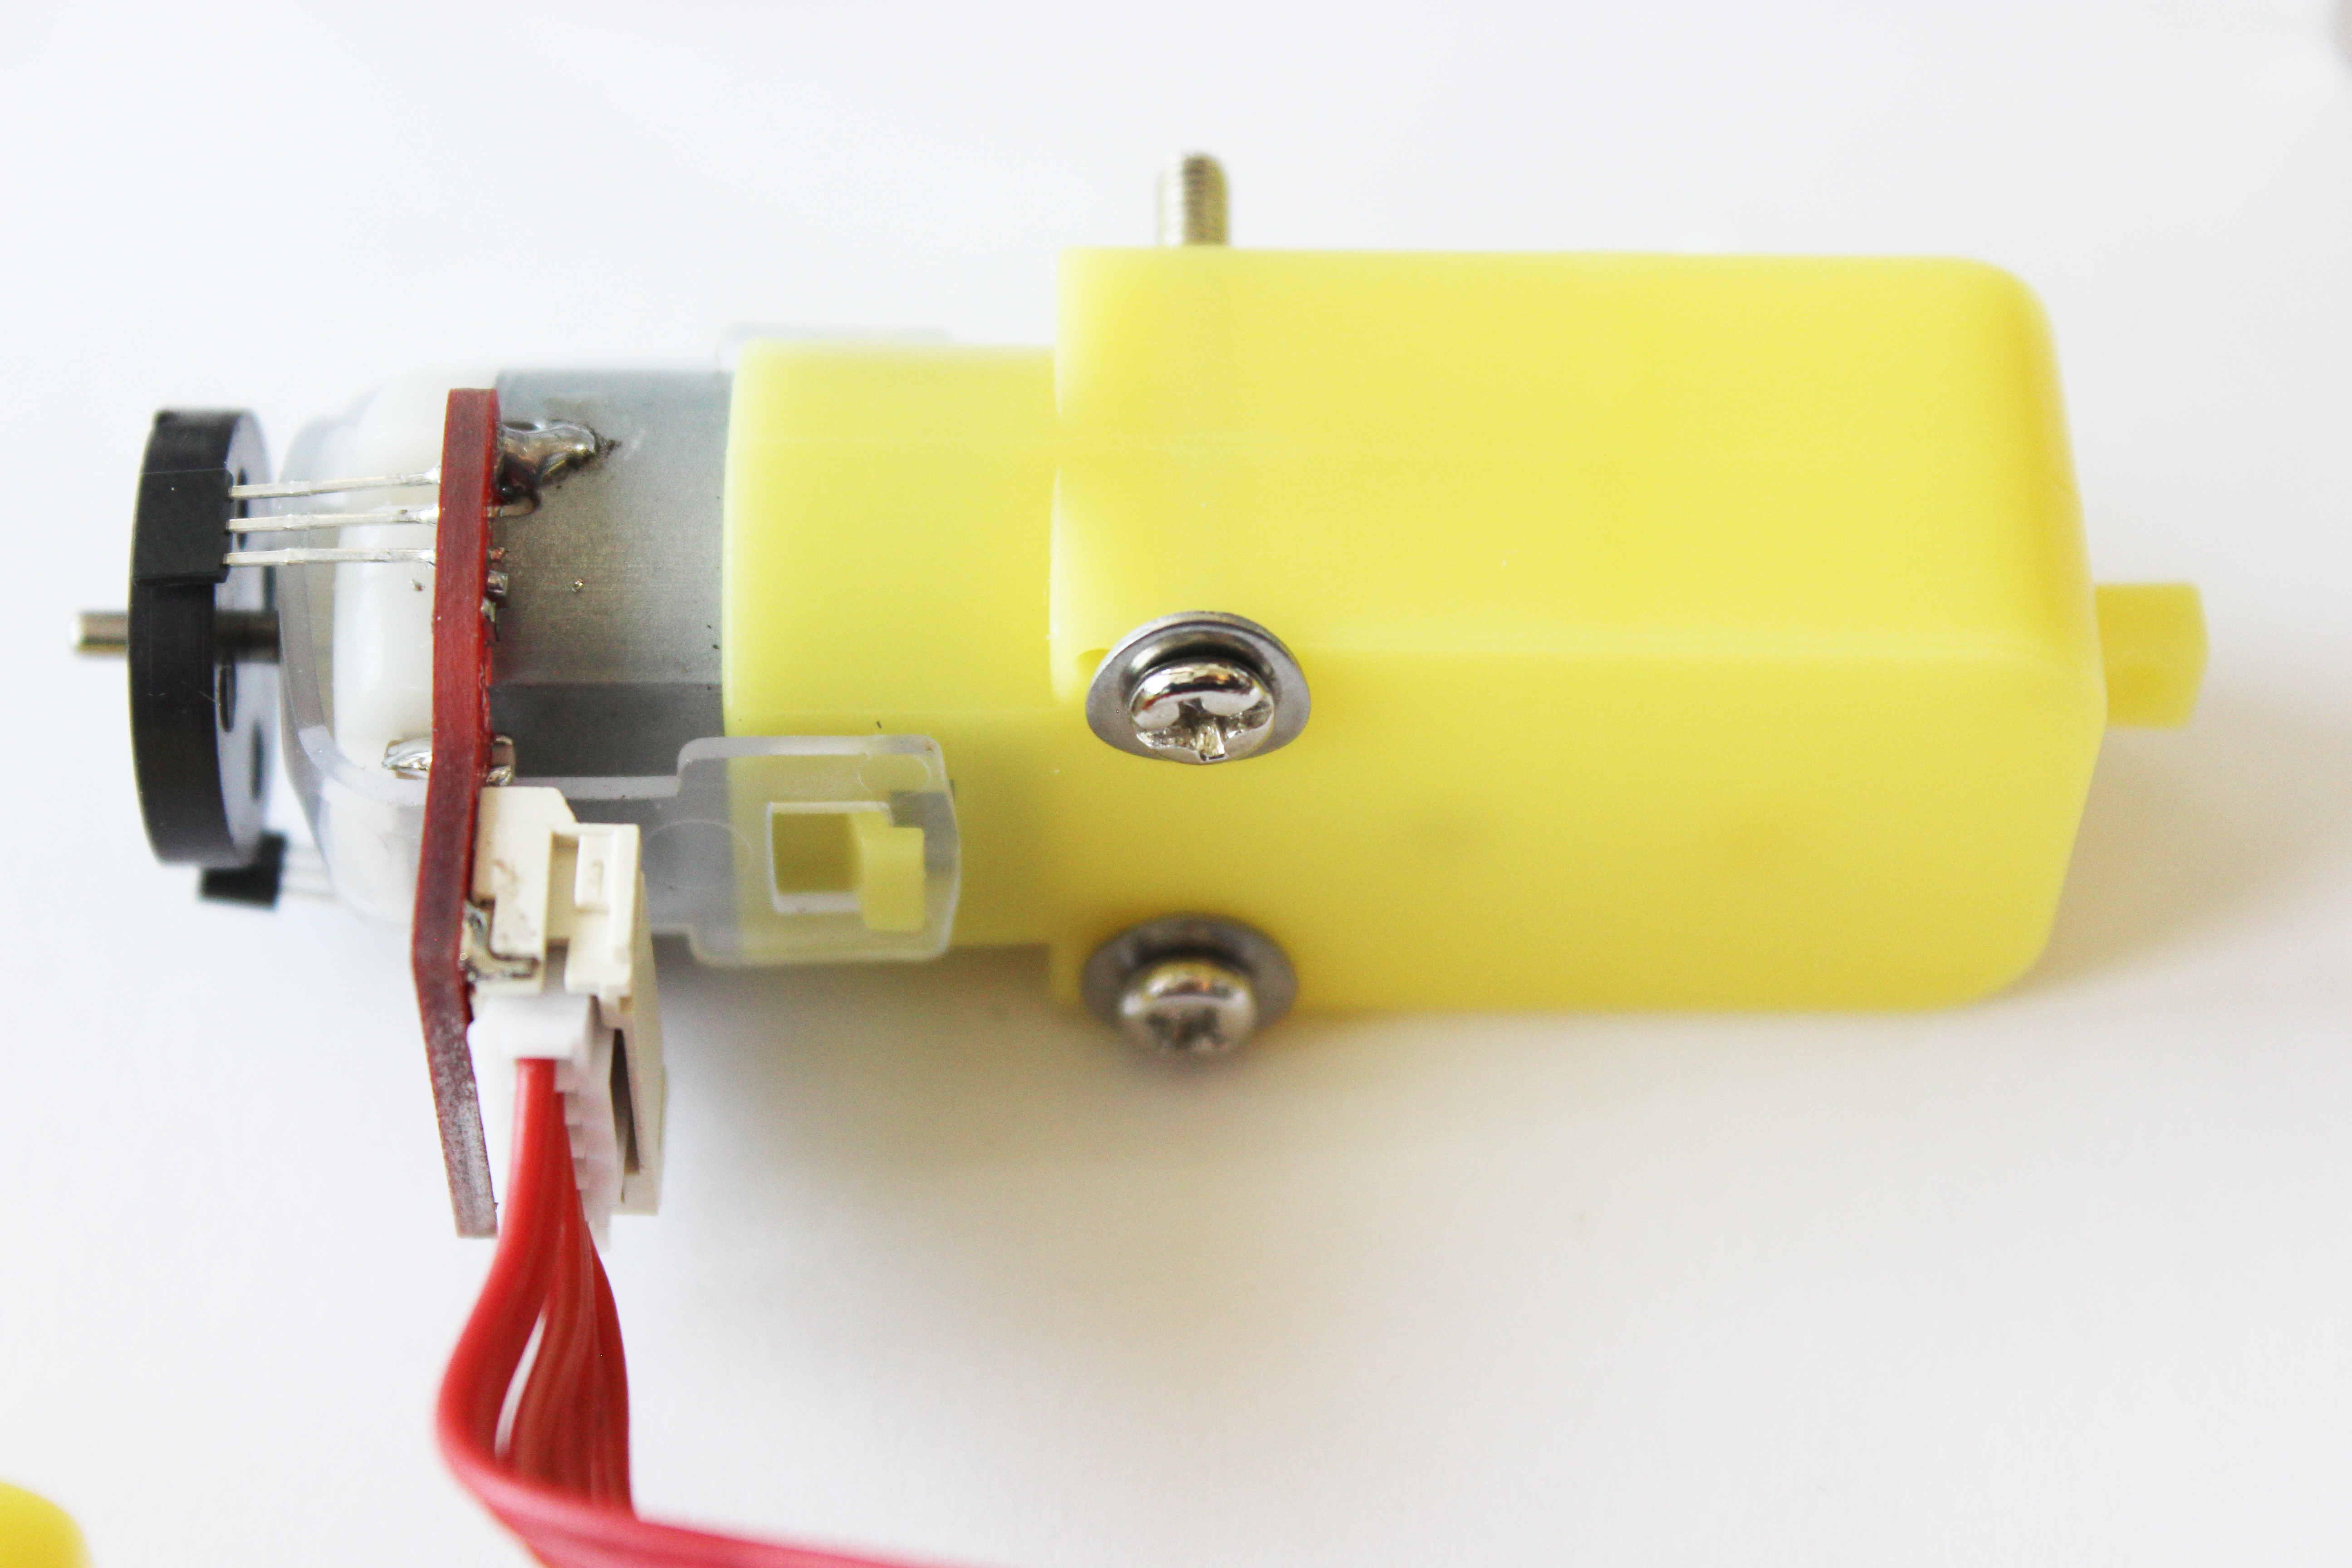
- Prepare the 2 motors for the next step by attaching the two red motor cables to the motors. Insert the motor cable into the white female port on the motor. Bend the cable as shown in the picture below to make it easier when assembling in the next few steps. The cables will only go into the motor ports one way (they can not be put in backwards).
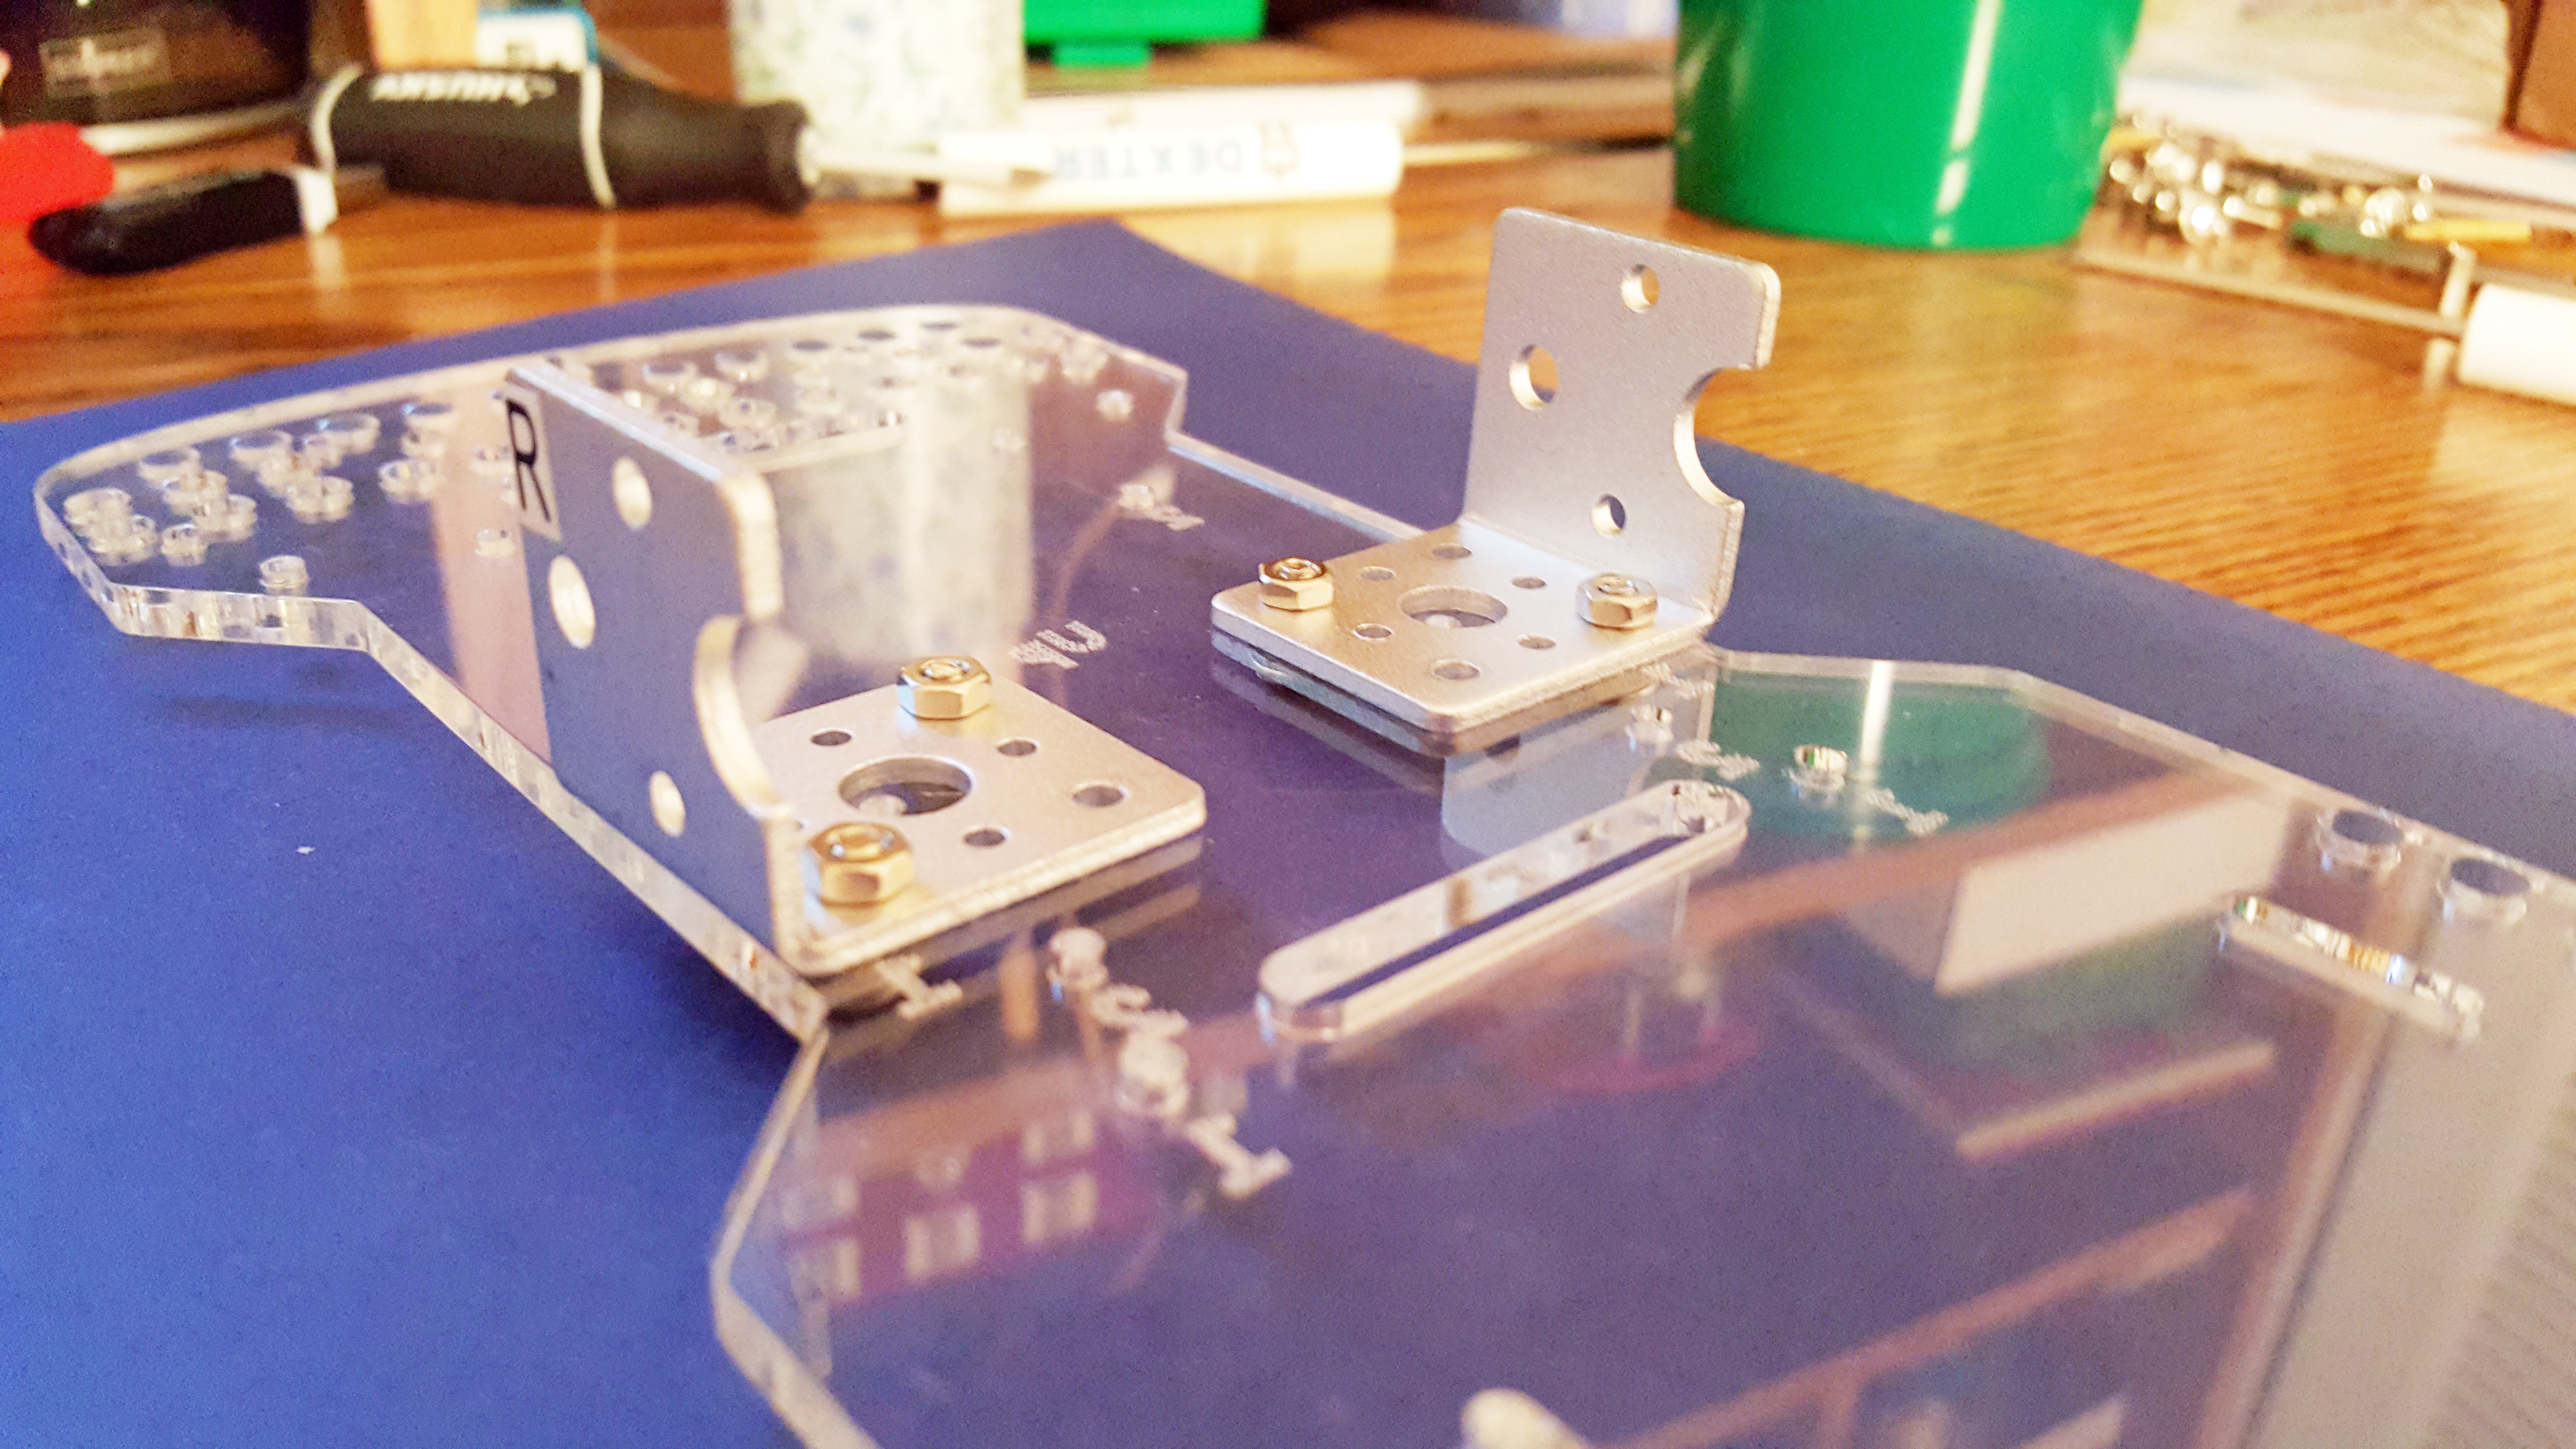
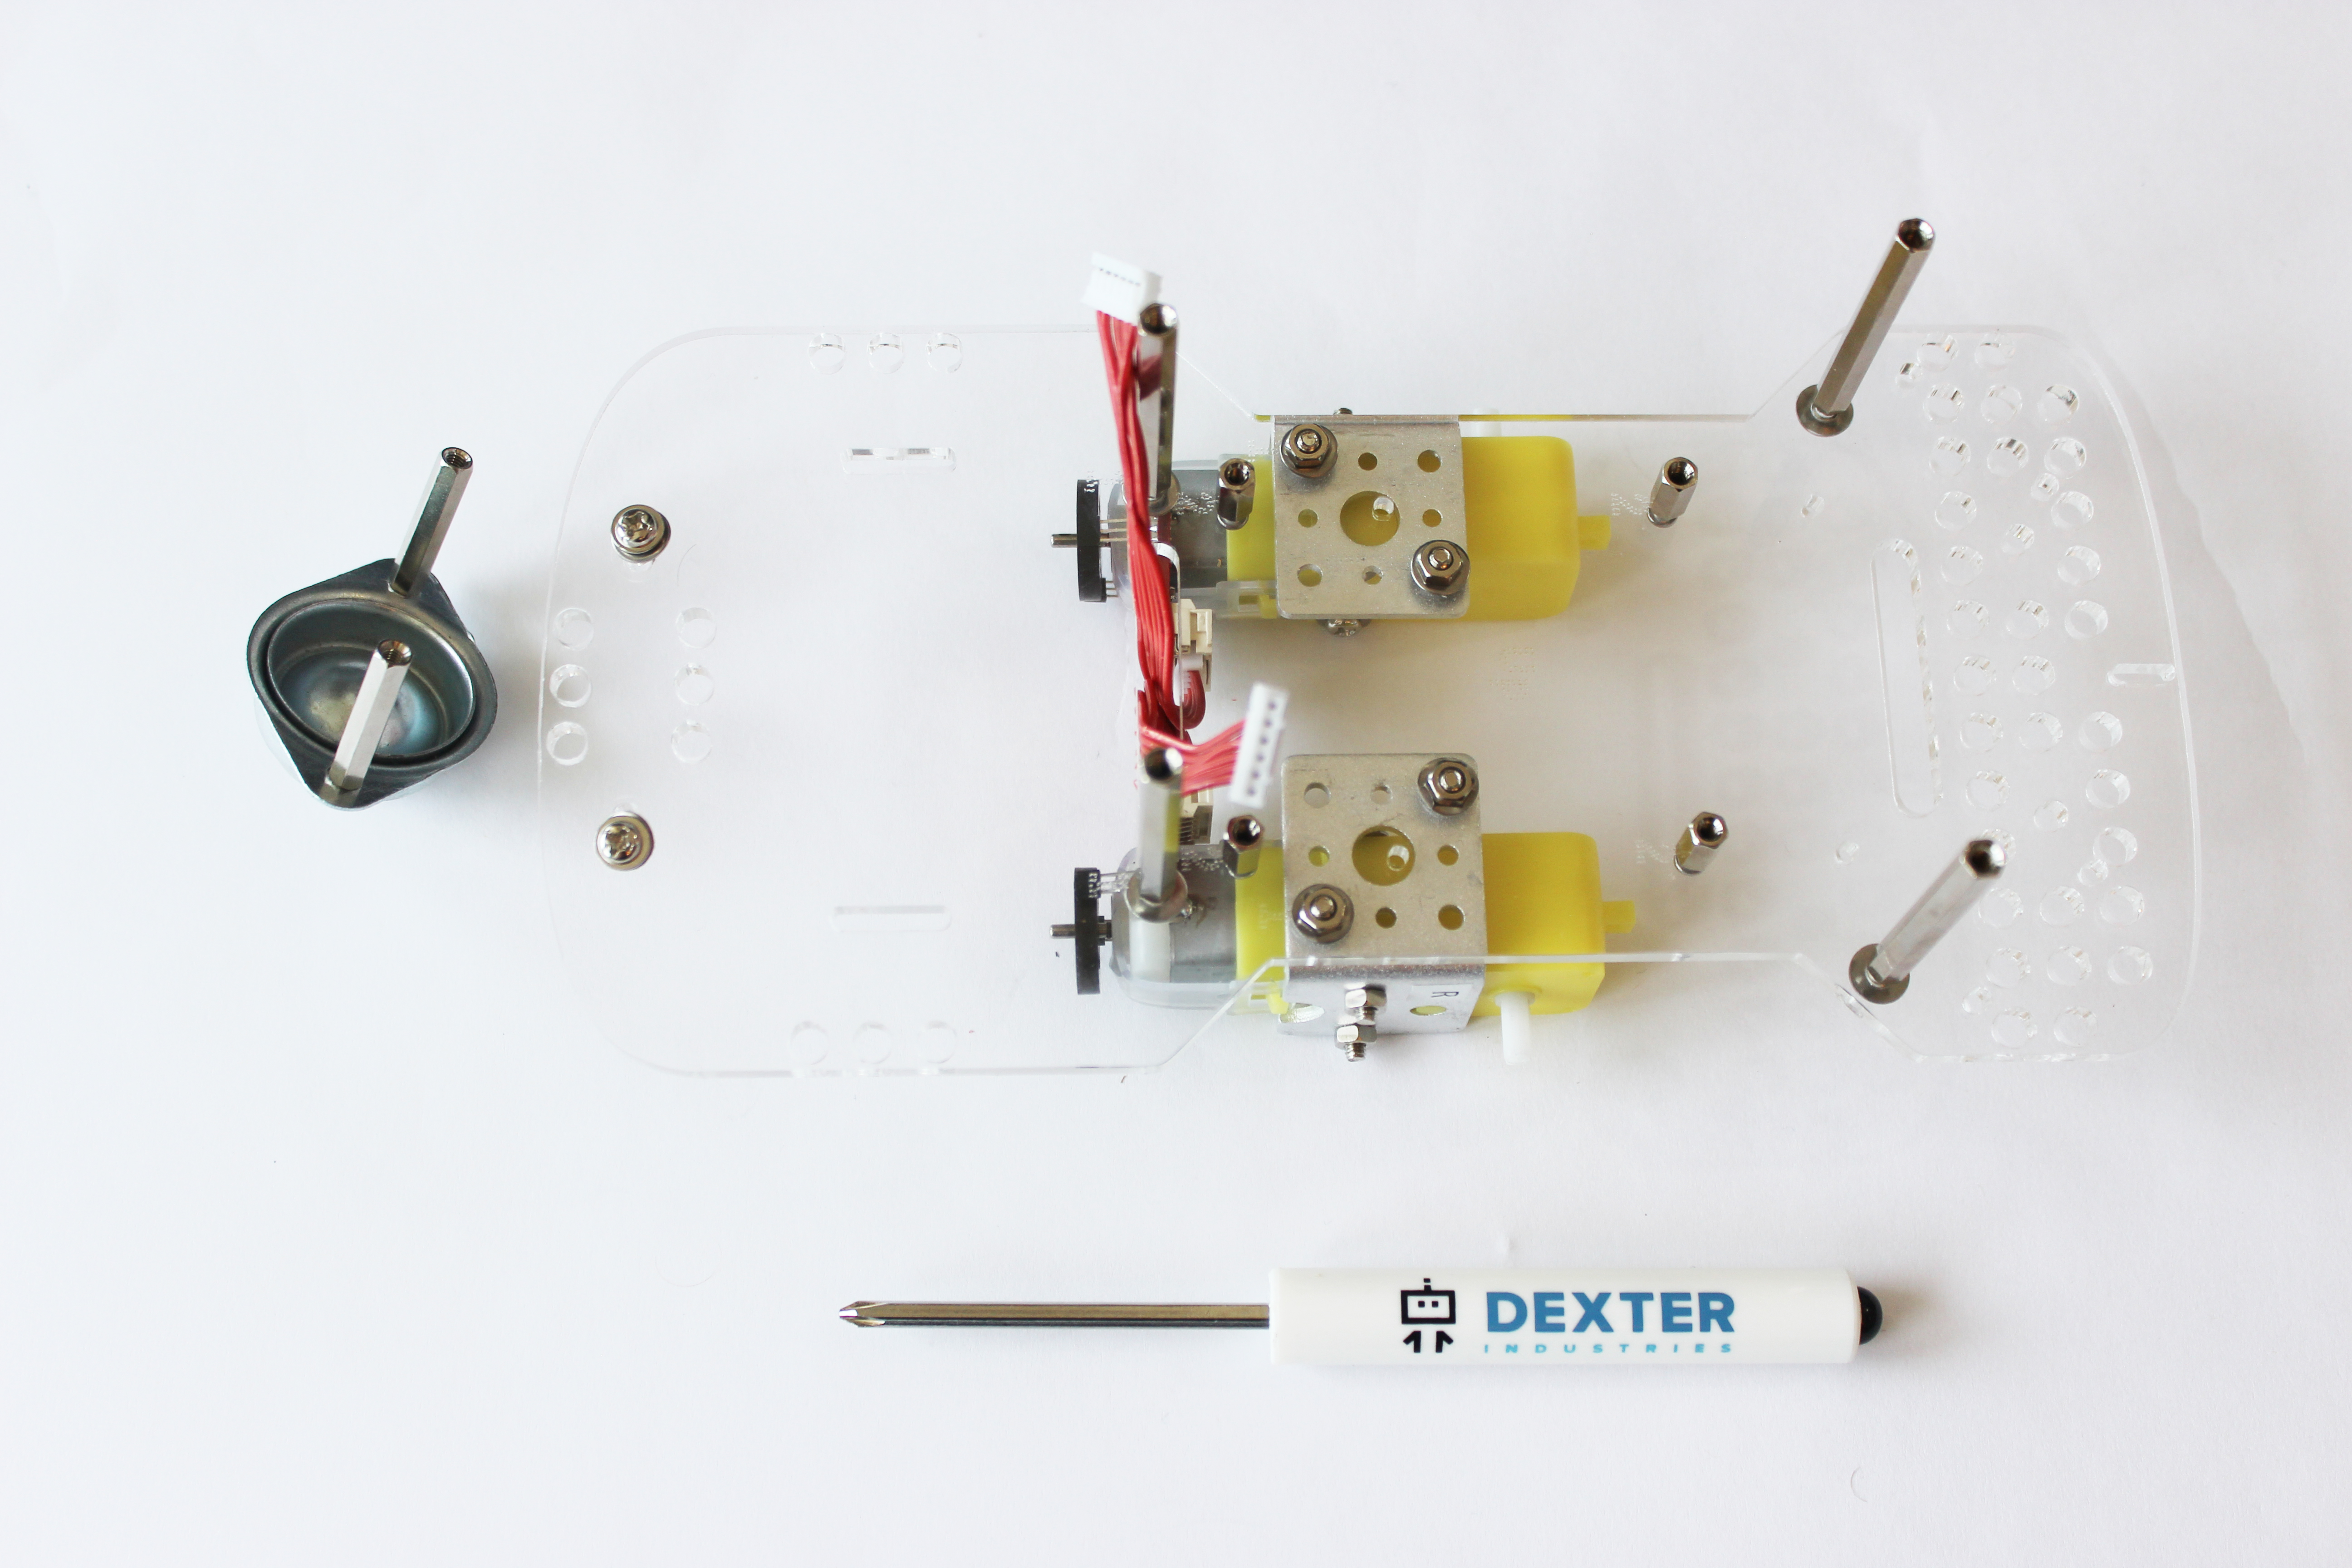
Part 7. Attach the motors to the motor brackets
What you’ll need:
- Hardware from the large bag: (G) 4 long screws, (E) 4 washers, (F) 4 nuts.
- Two motors and encoders from the previous part.
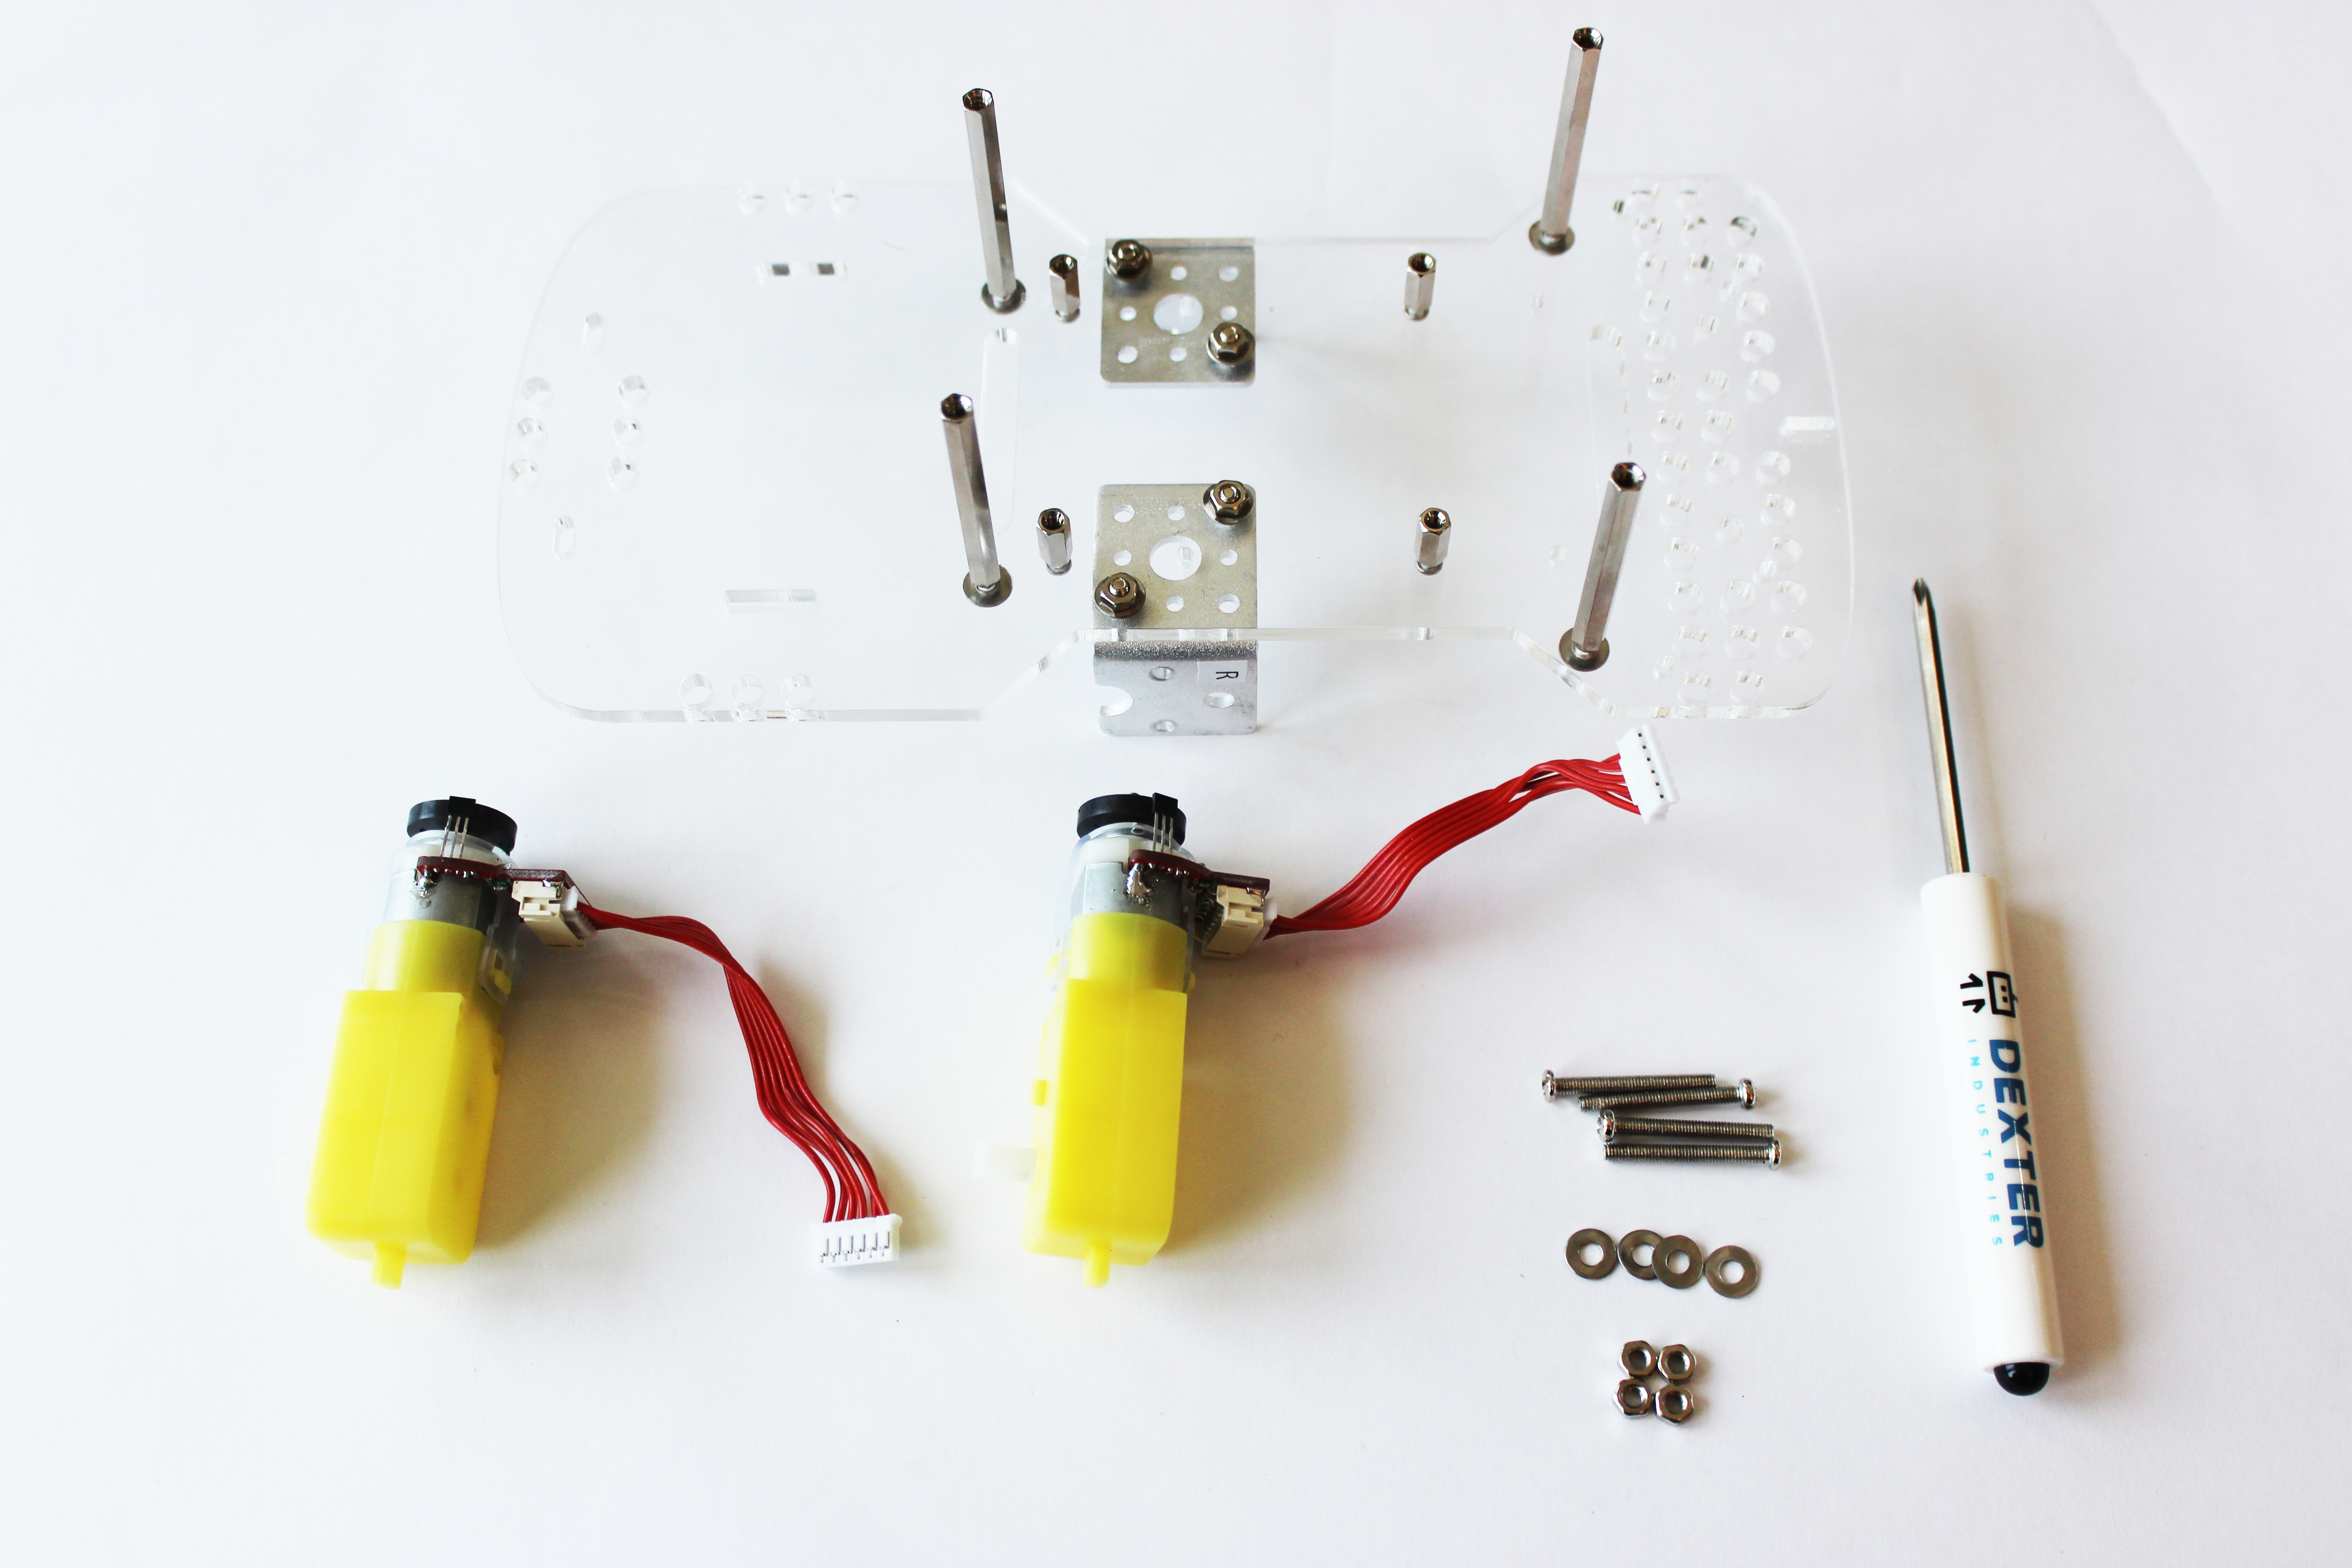
To attach the motors:
- Turn the GoPiGo3 over so the metal motor brackets are pointing up.
- Put the washers on the screws.
- Slide the long screws into the motors from the side where the wire is connected as shown in the picture.
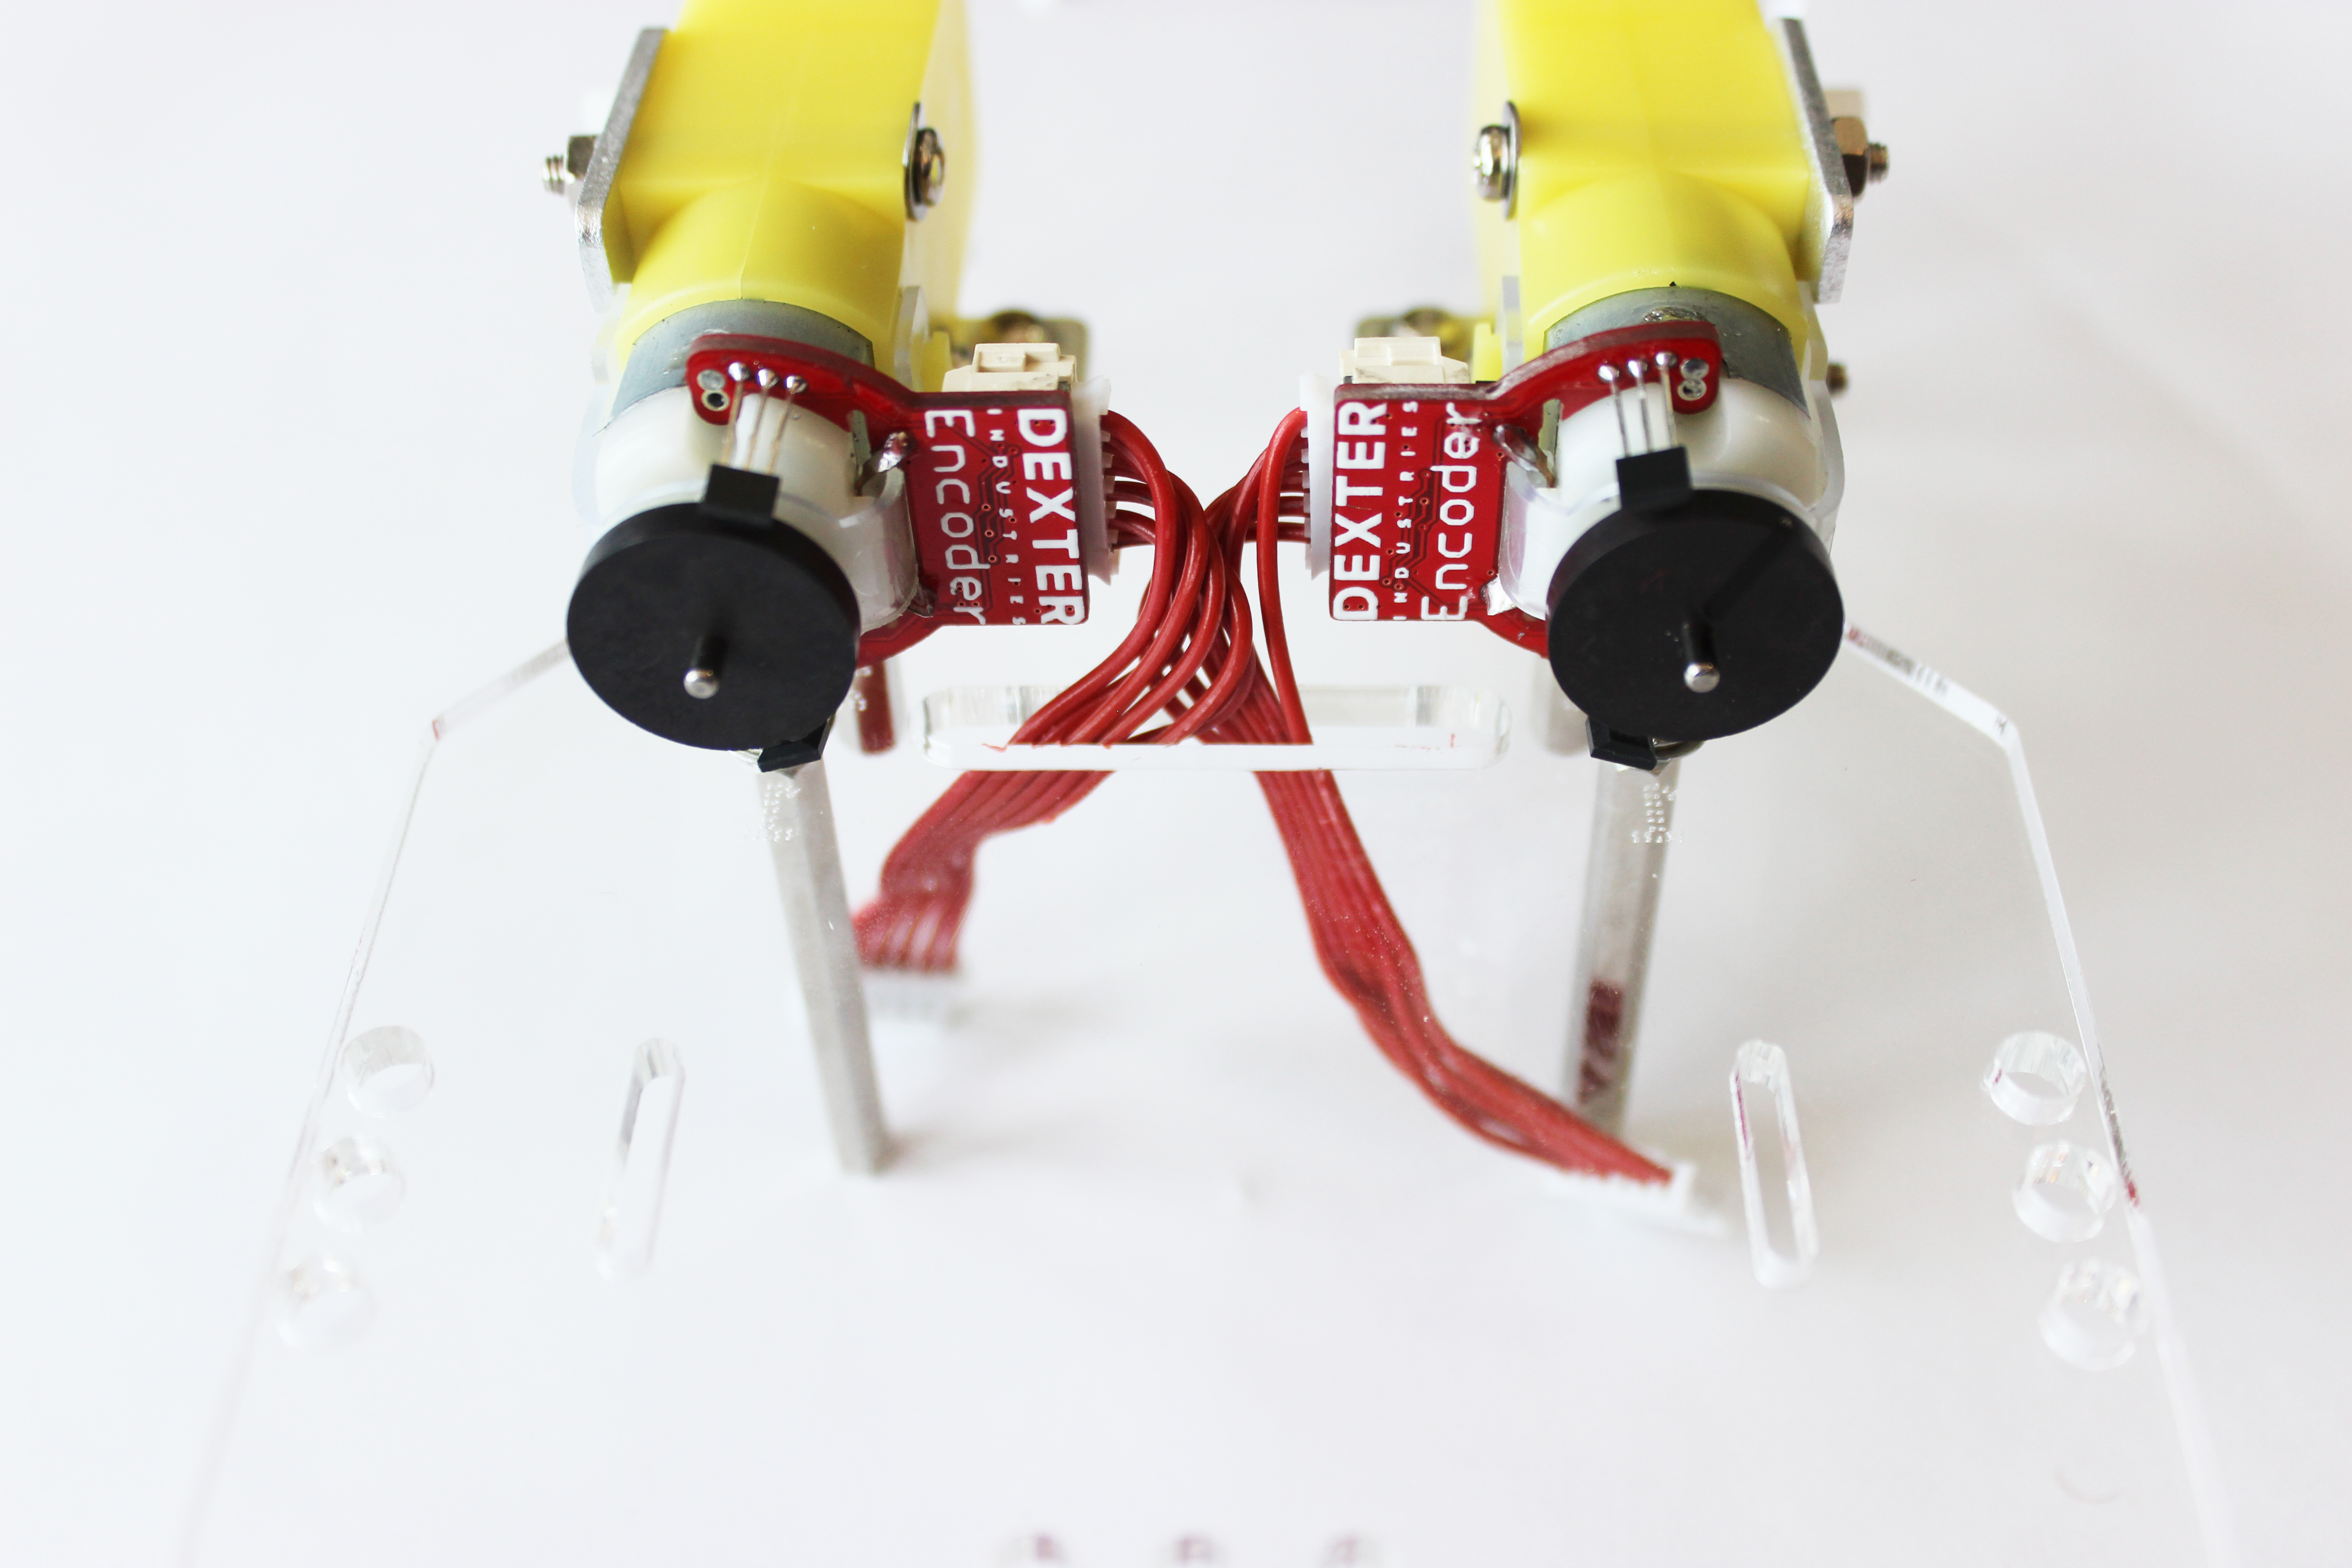
- Align the motors with the screws sticking through them up to the brackets with the motor wires in the middle. Slide the screws through the motors.

- Attach the washers and then nuts to the screws, tighten until the washers flatten.
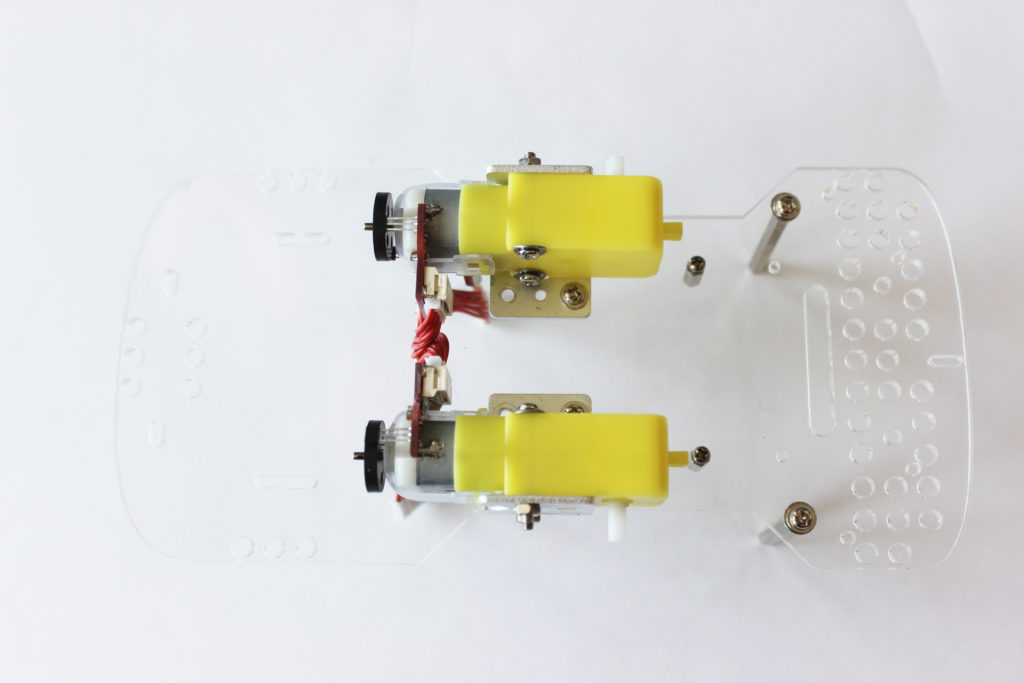
- Slide the motor cable through the GoPiGo3 board in the rectangular slot (from the bottom up so they are coming out the top when you flip it over).


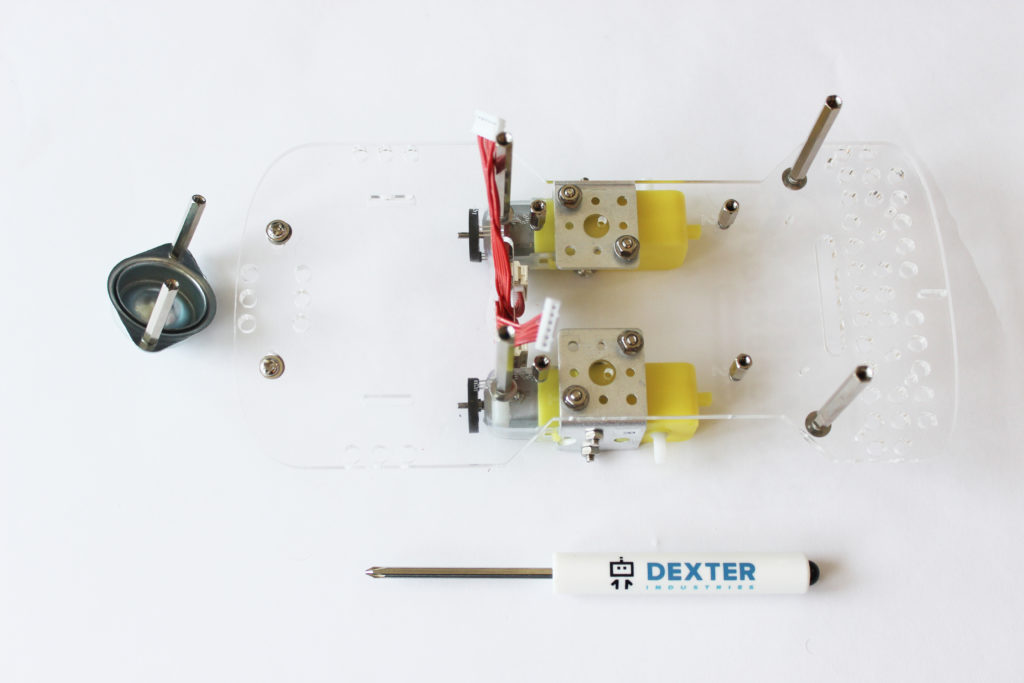
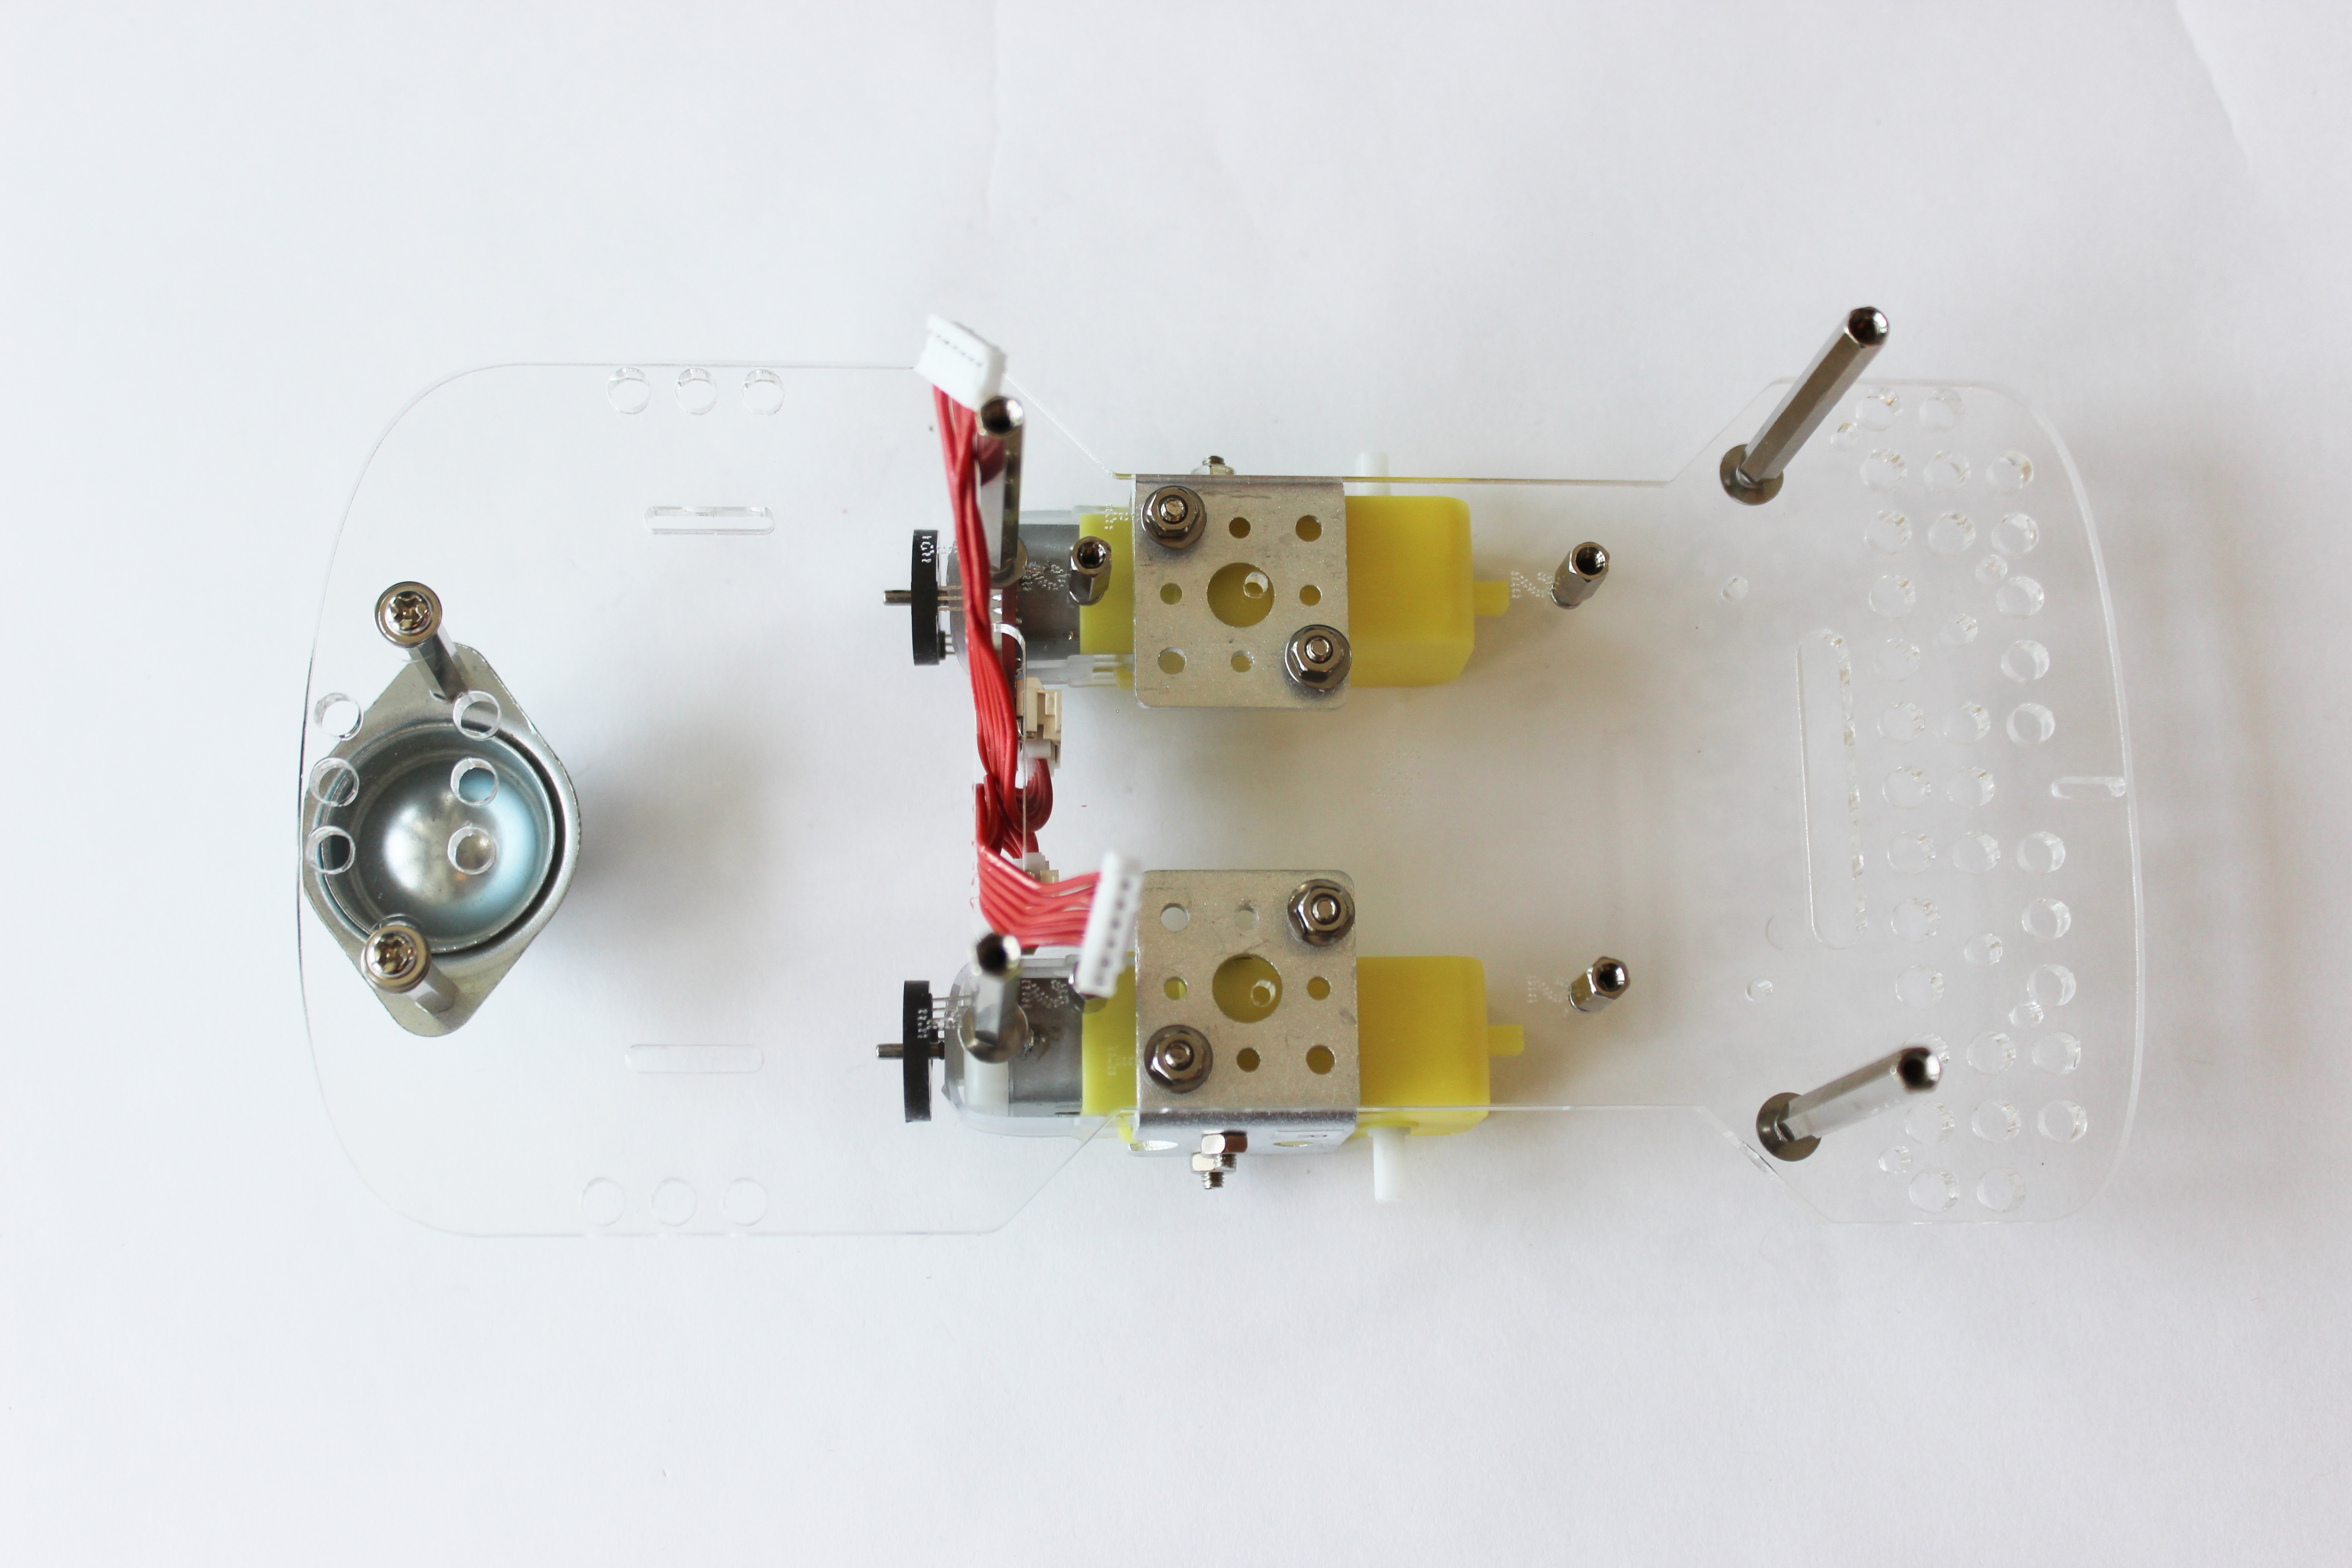
Part 8. Attach the caster wheel
What you’ll need:
- Hardware from the large bag: (D) 4 short screws, (E) 4 washers, (I) 2 medium metal posts.
- Caster Wheel
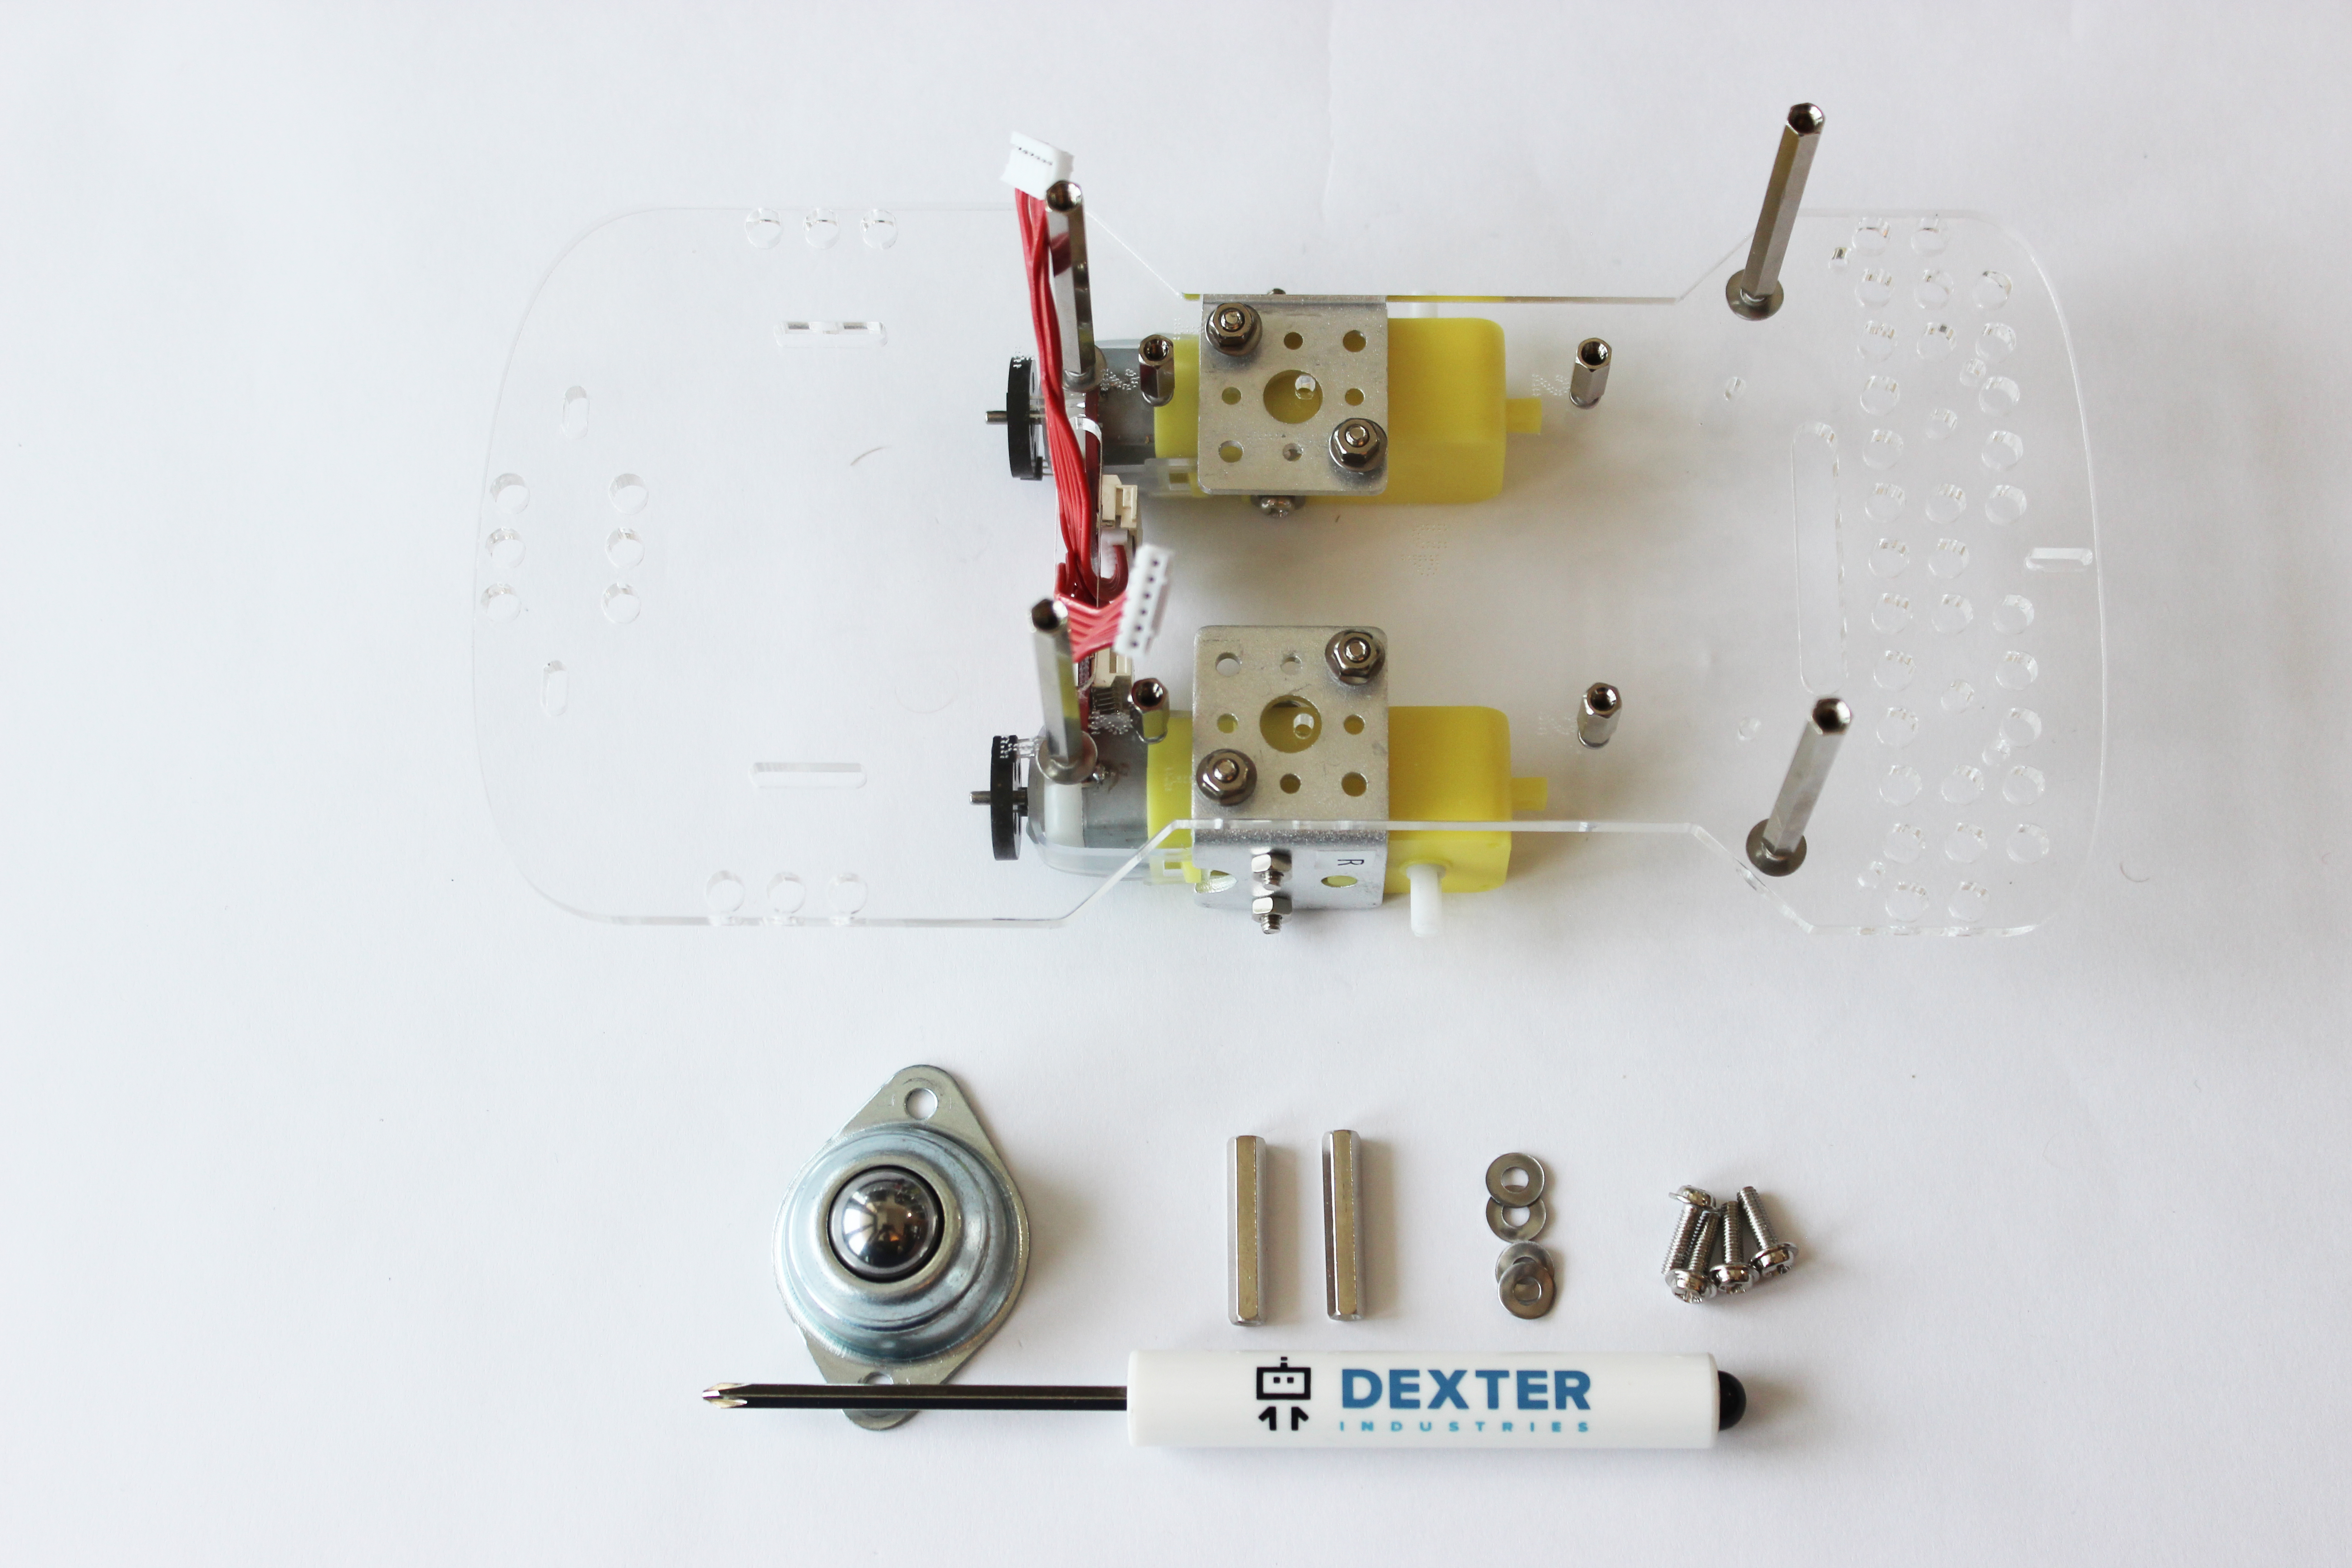
To attach the caster wheel:
- Place a washer on each screw, and screw the two medium silver posts into the caster wheel. Tighten until the washers are flat.
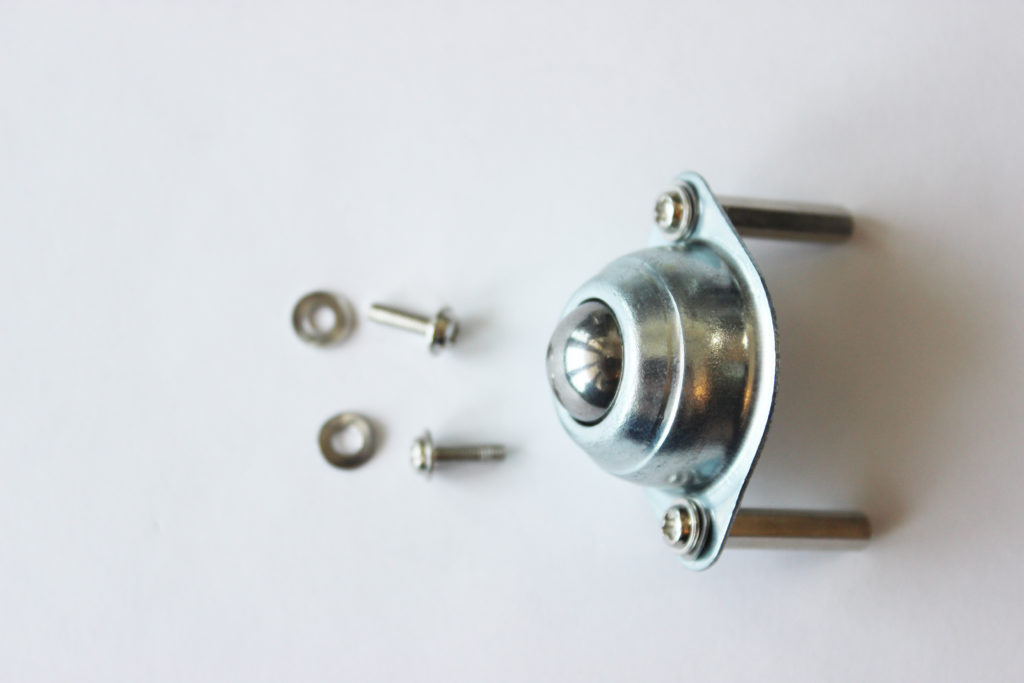
- There are two short oval holes in the back of the GoPiGo3 acrylic body. Screw the caster wheel into the GoPiGo3 acrylic body. Tighten the screws until the washers are flat.
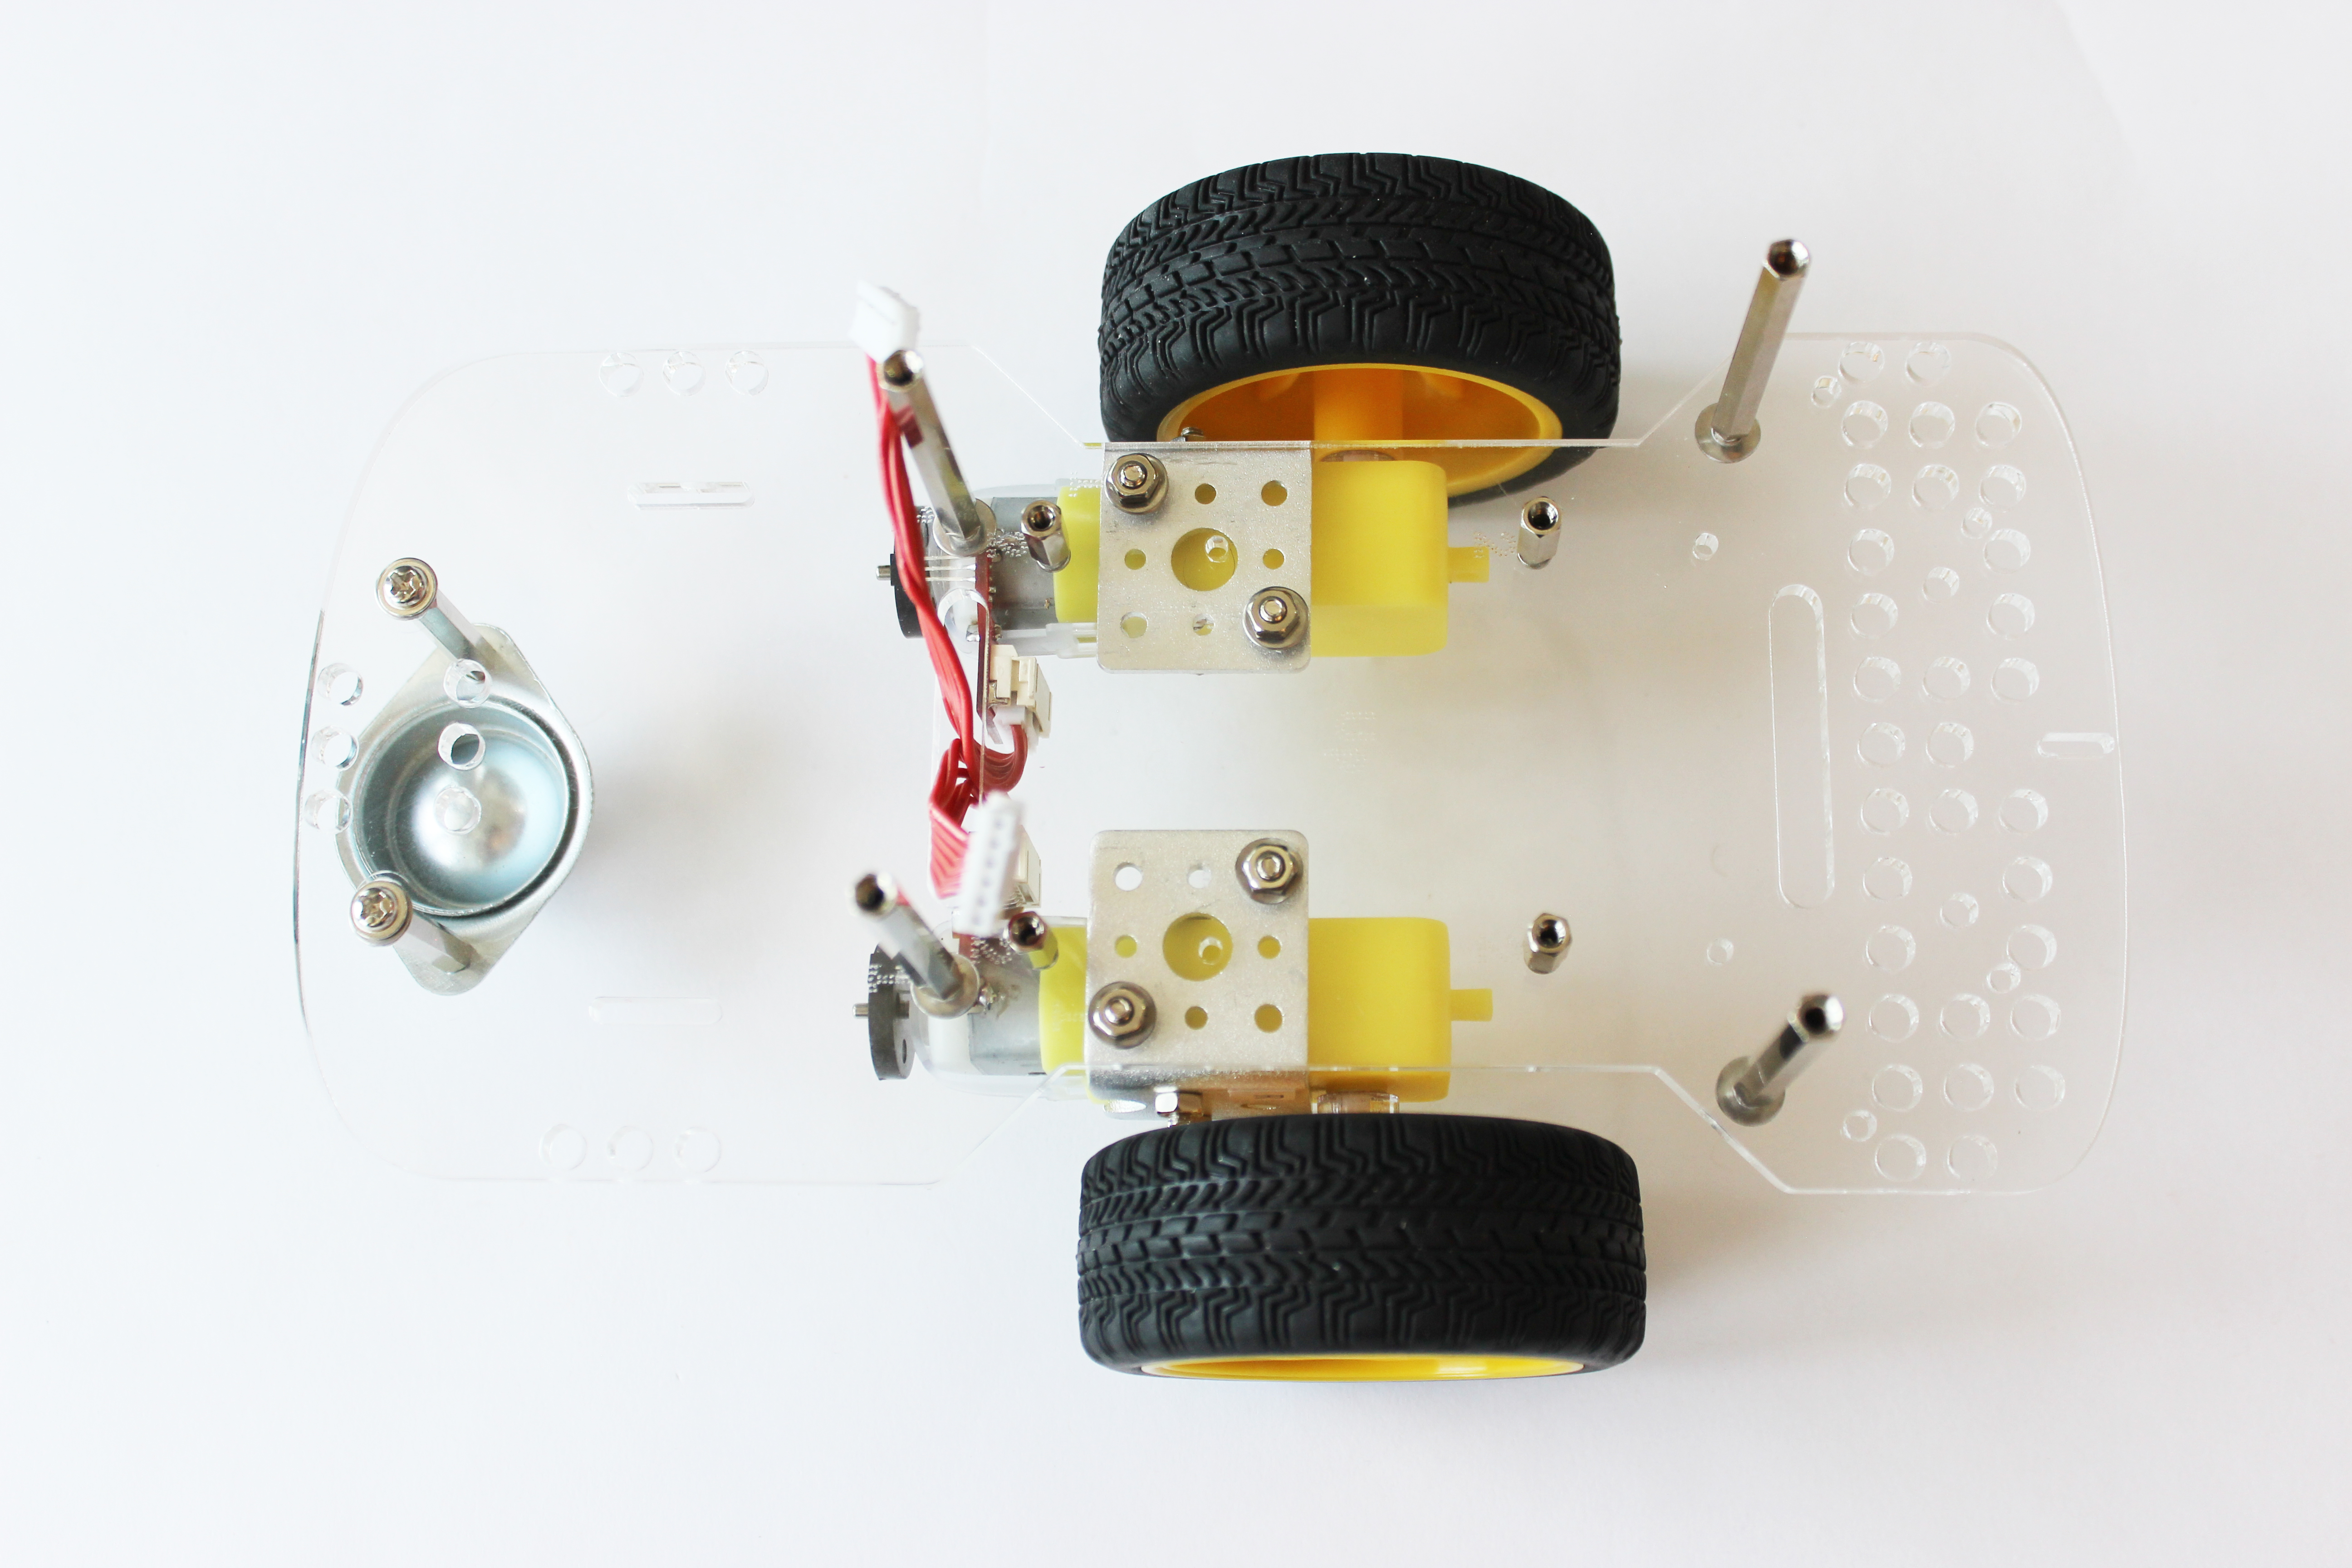
Part 9. Attach the wheels to the motors
What you’ll need:
- Hardware from the large bag: (H) 2 small round acrylic spacers
- 2 wheels
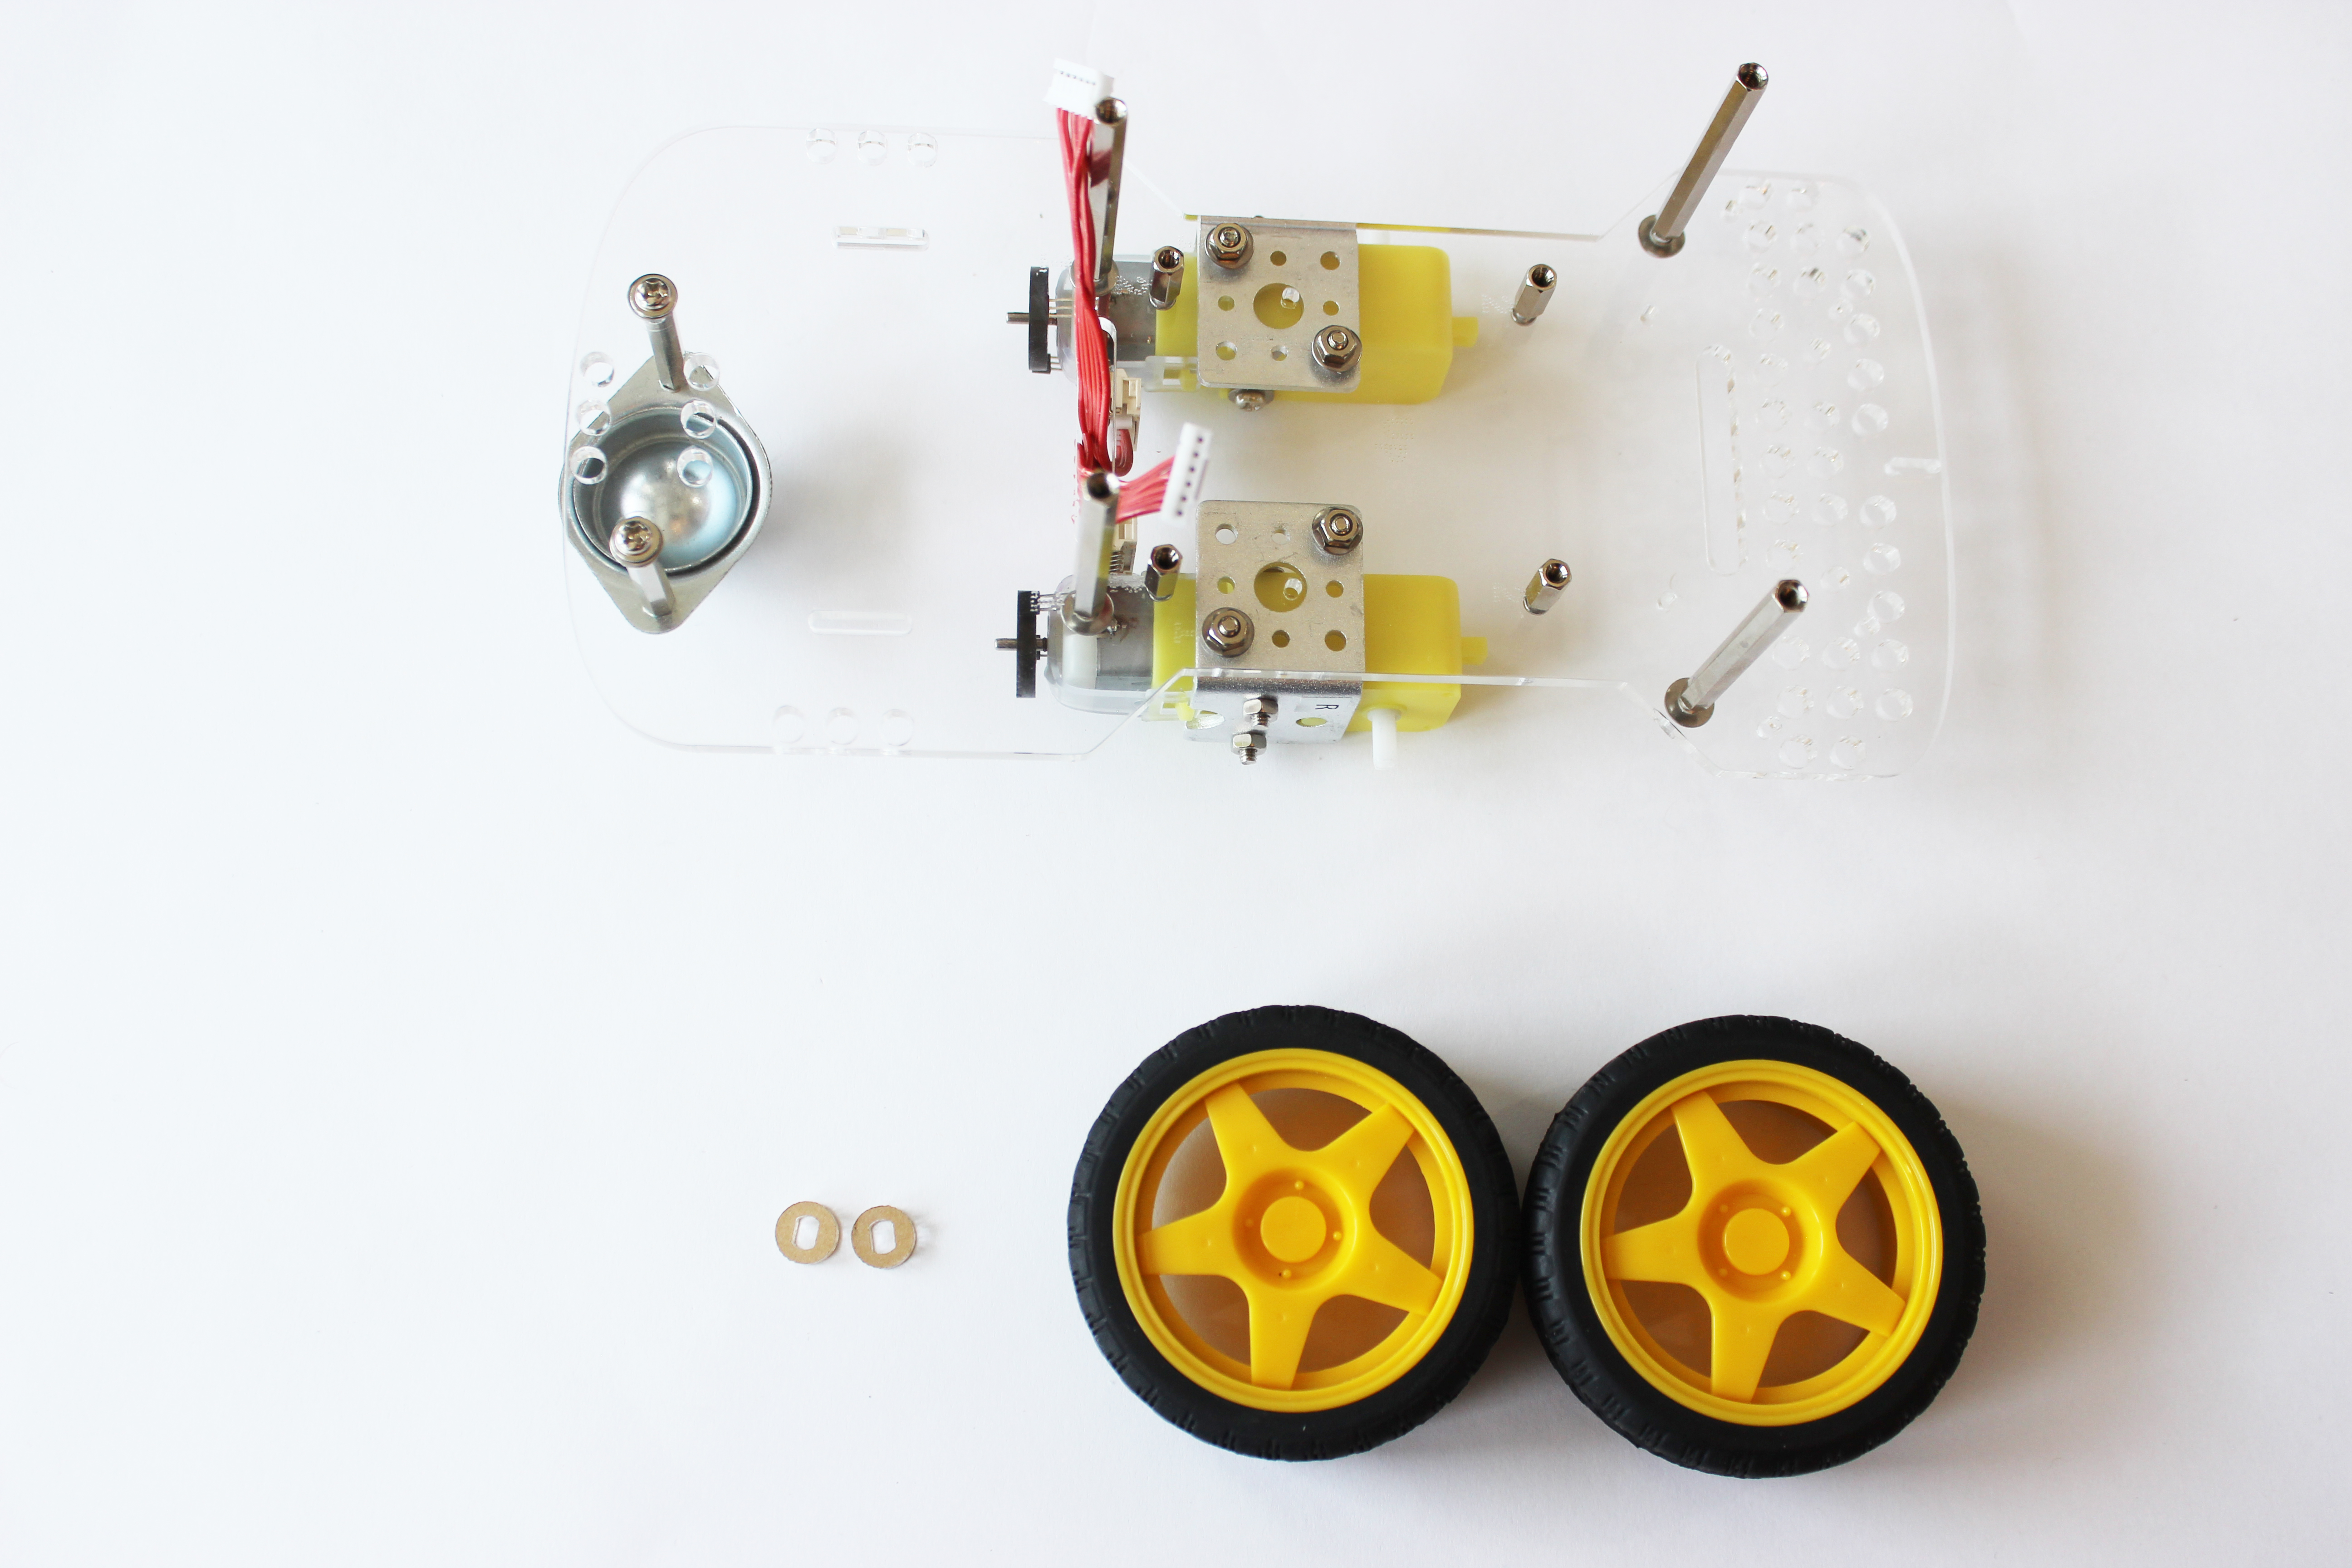
Attach the wheels:
- Slide the two acrylic spacers onto the white plastic axles on the motors.
- Slide the two yellow wheels onto the axles of the motors.
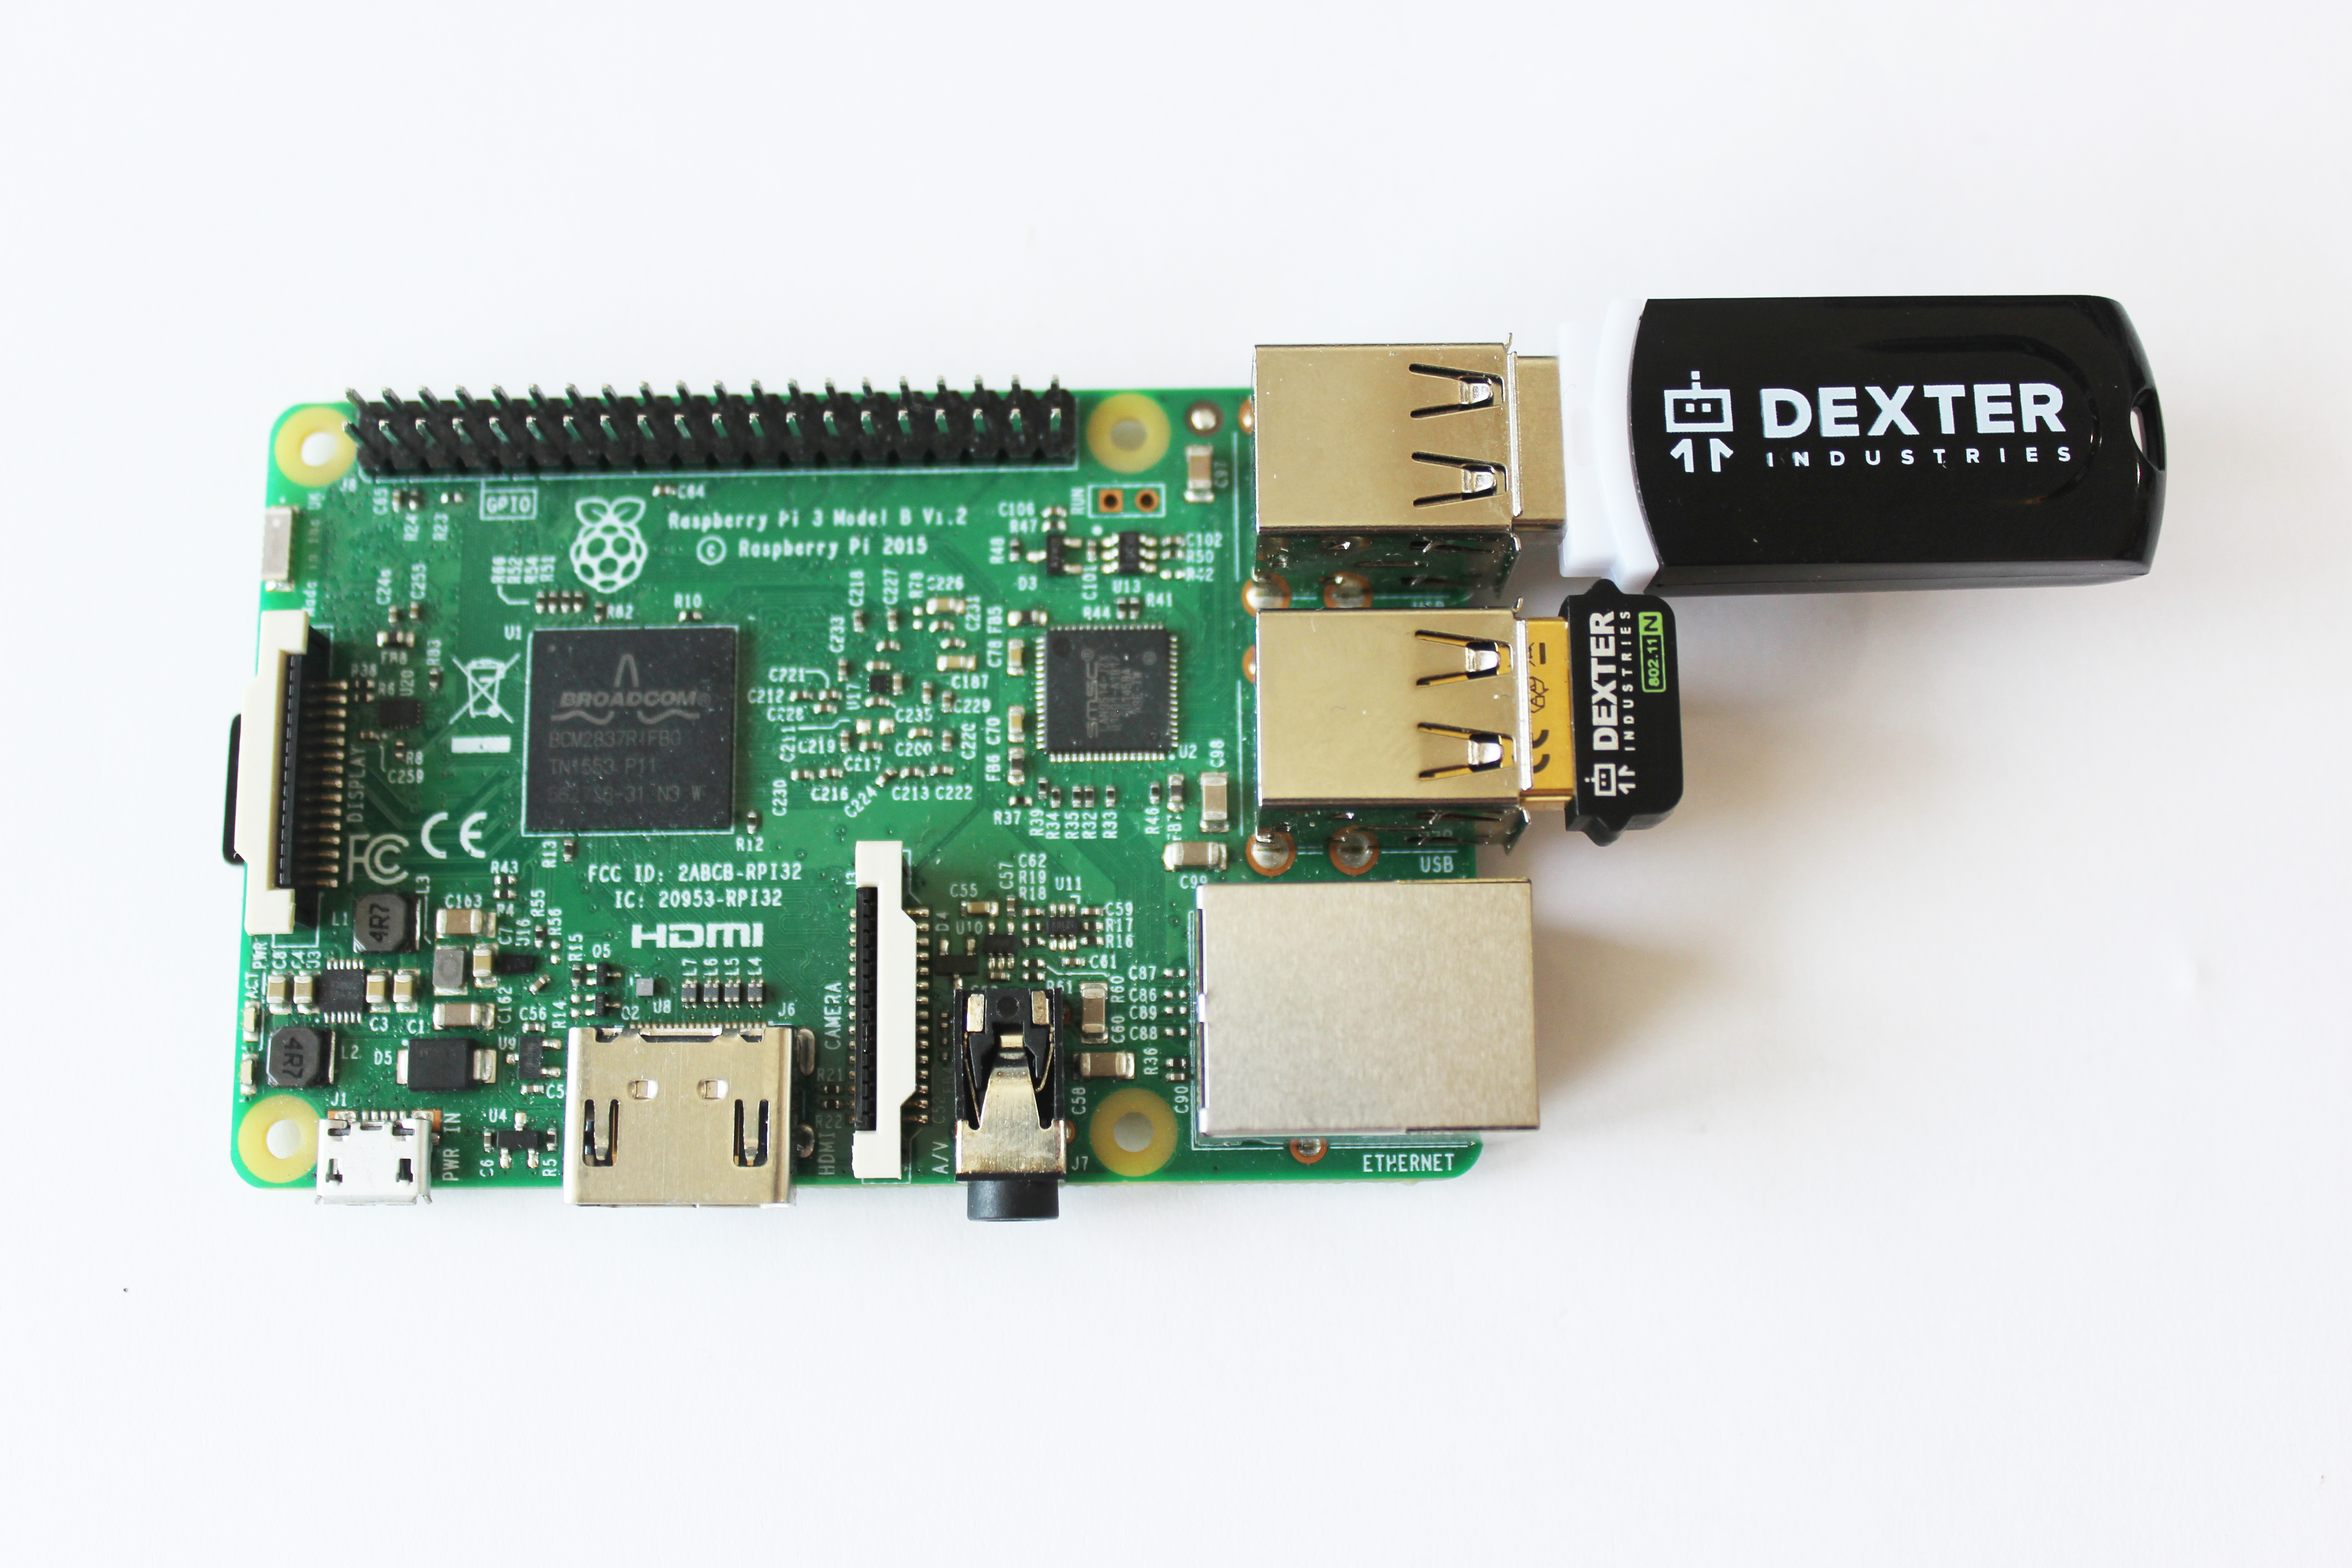
Part 10. Prepare the Raspberry Pi (green board)
What you’ll need:
- Raspberry Pi (the green board)
- Dexter Industries wifi dongle (not needed if you have a Raspberry Pi 3)
- microSD Card with DexterOS (or other Raspberry Pi operating system)
- Dexter Industries USB Drive (if using DexterOS)
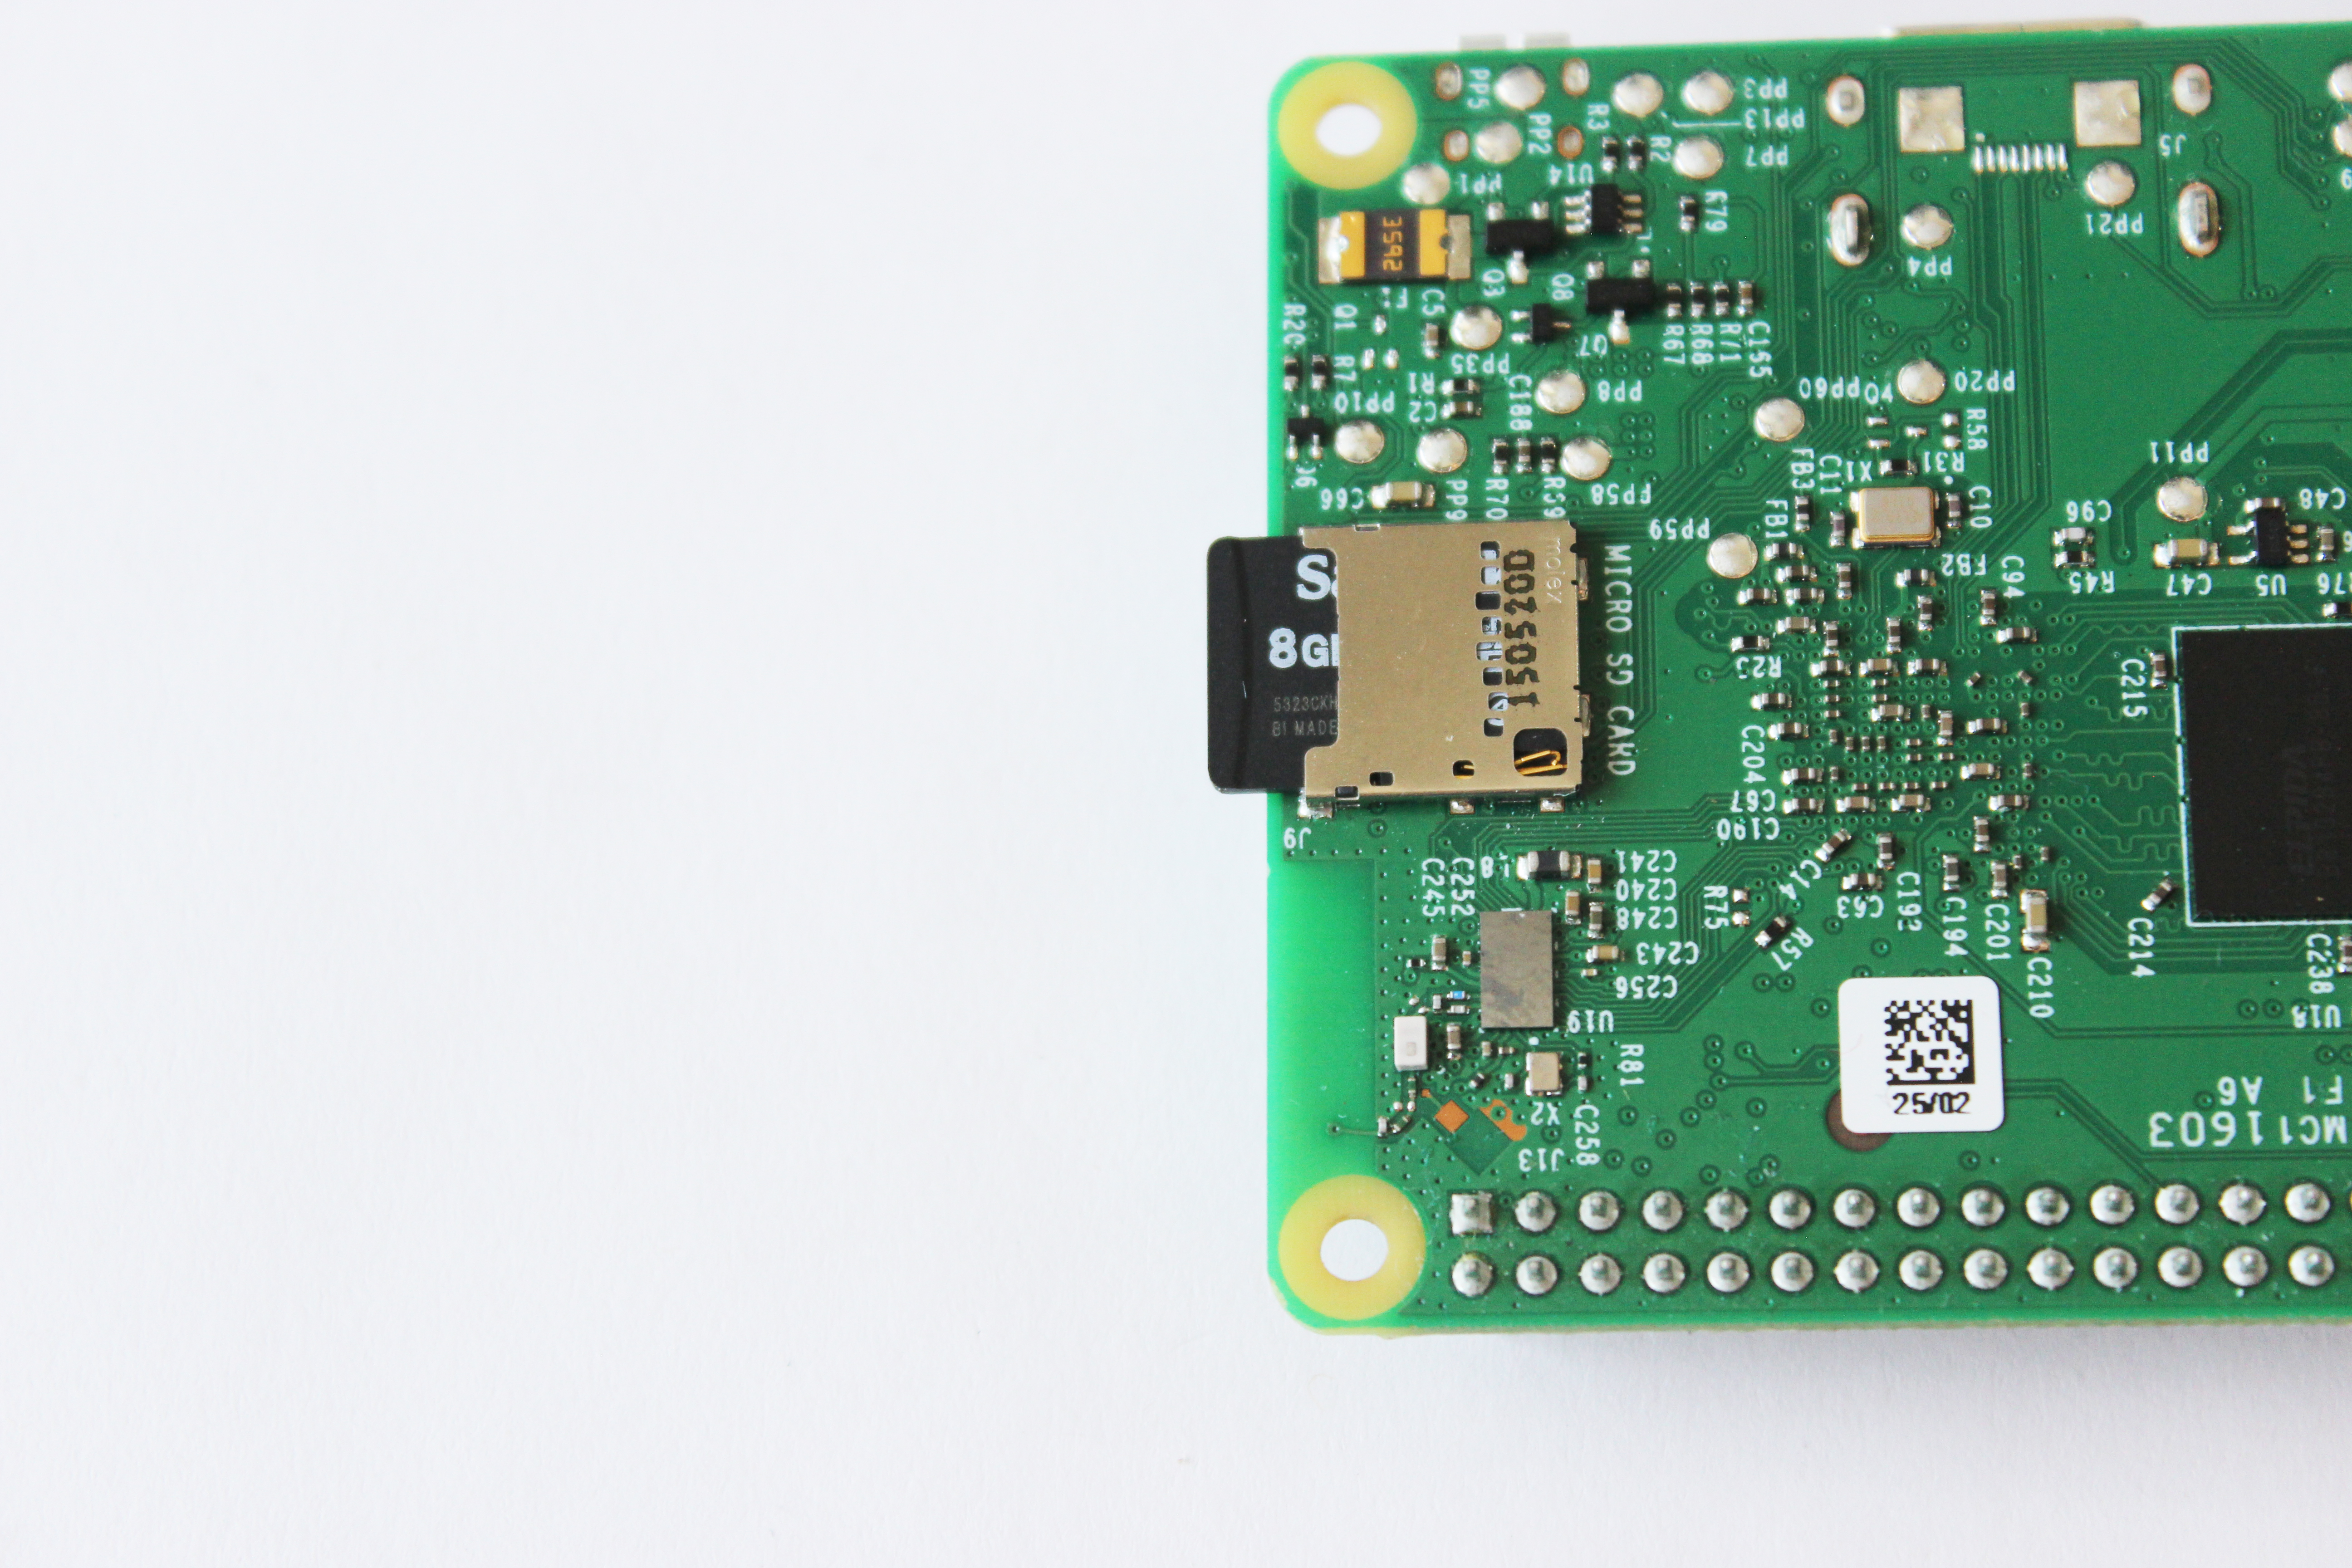
Prepare your Pi:
- Turn the Raspberry Pi upside down, so the metal pins coming out of the Raspberry Pi are pointing down.
- First, slide the SD Card into the slot on the bottom of the Raspberry Pi. Make sure it is in all the way. The SD Card will only fit in one orientation: see the picture below for the proper orientation in the Raspberry Pi.
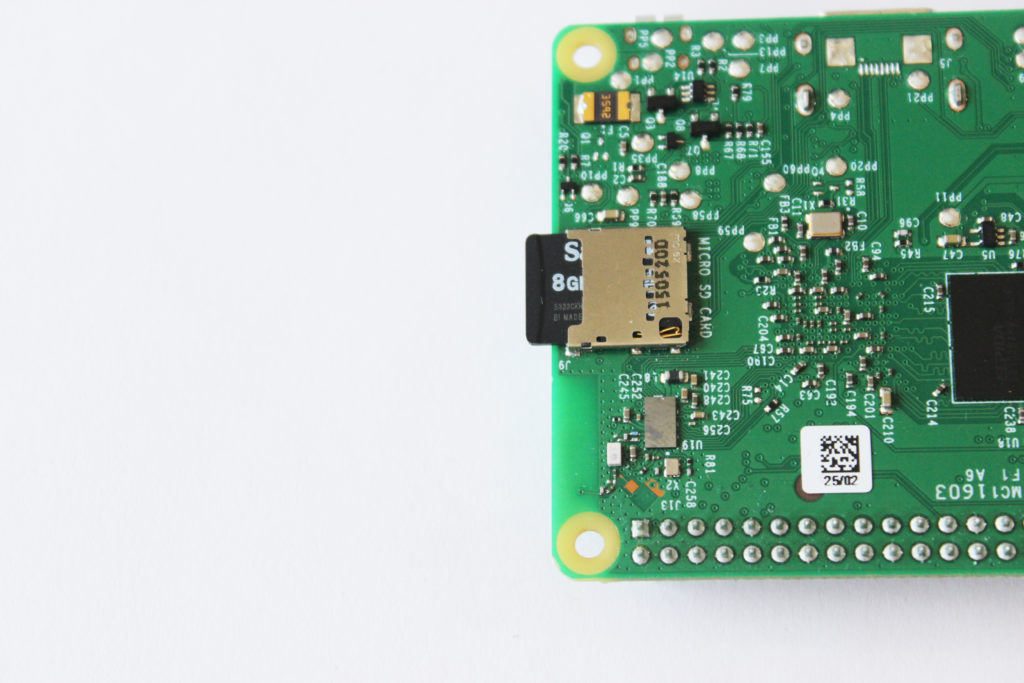
- Turn the Raspberry Pi facing up.
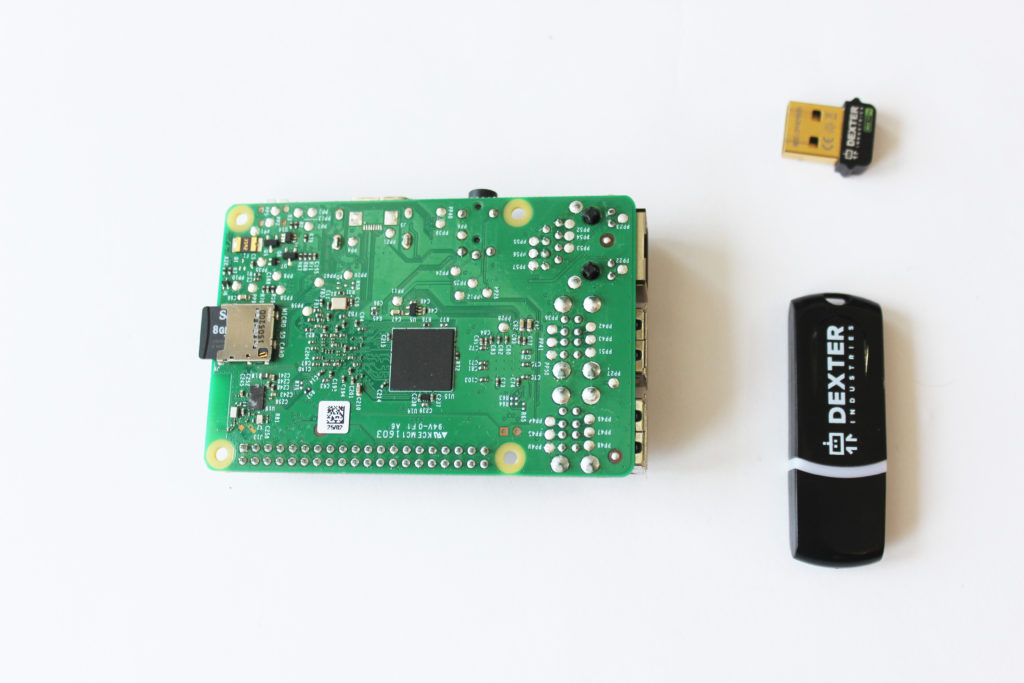
- Insert the Wifi Dongle into any USB port at the end of the Raspberry Pi.
- Insert the USB Drive into any other USB port on the Raspberry Pi.
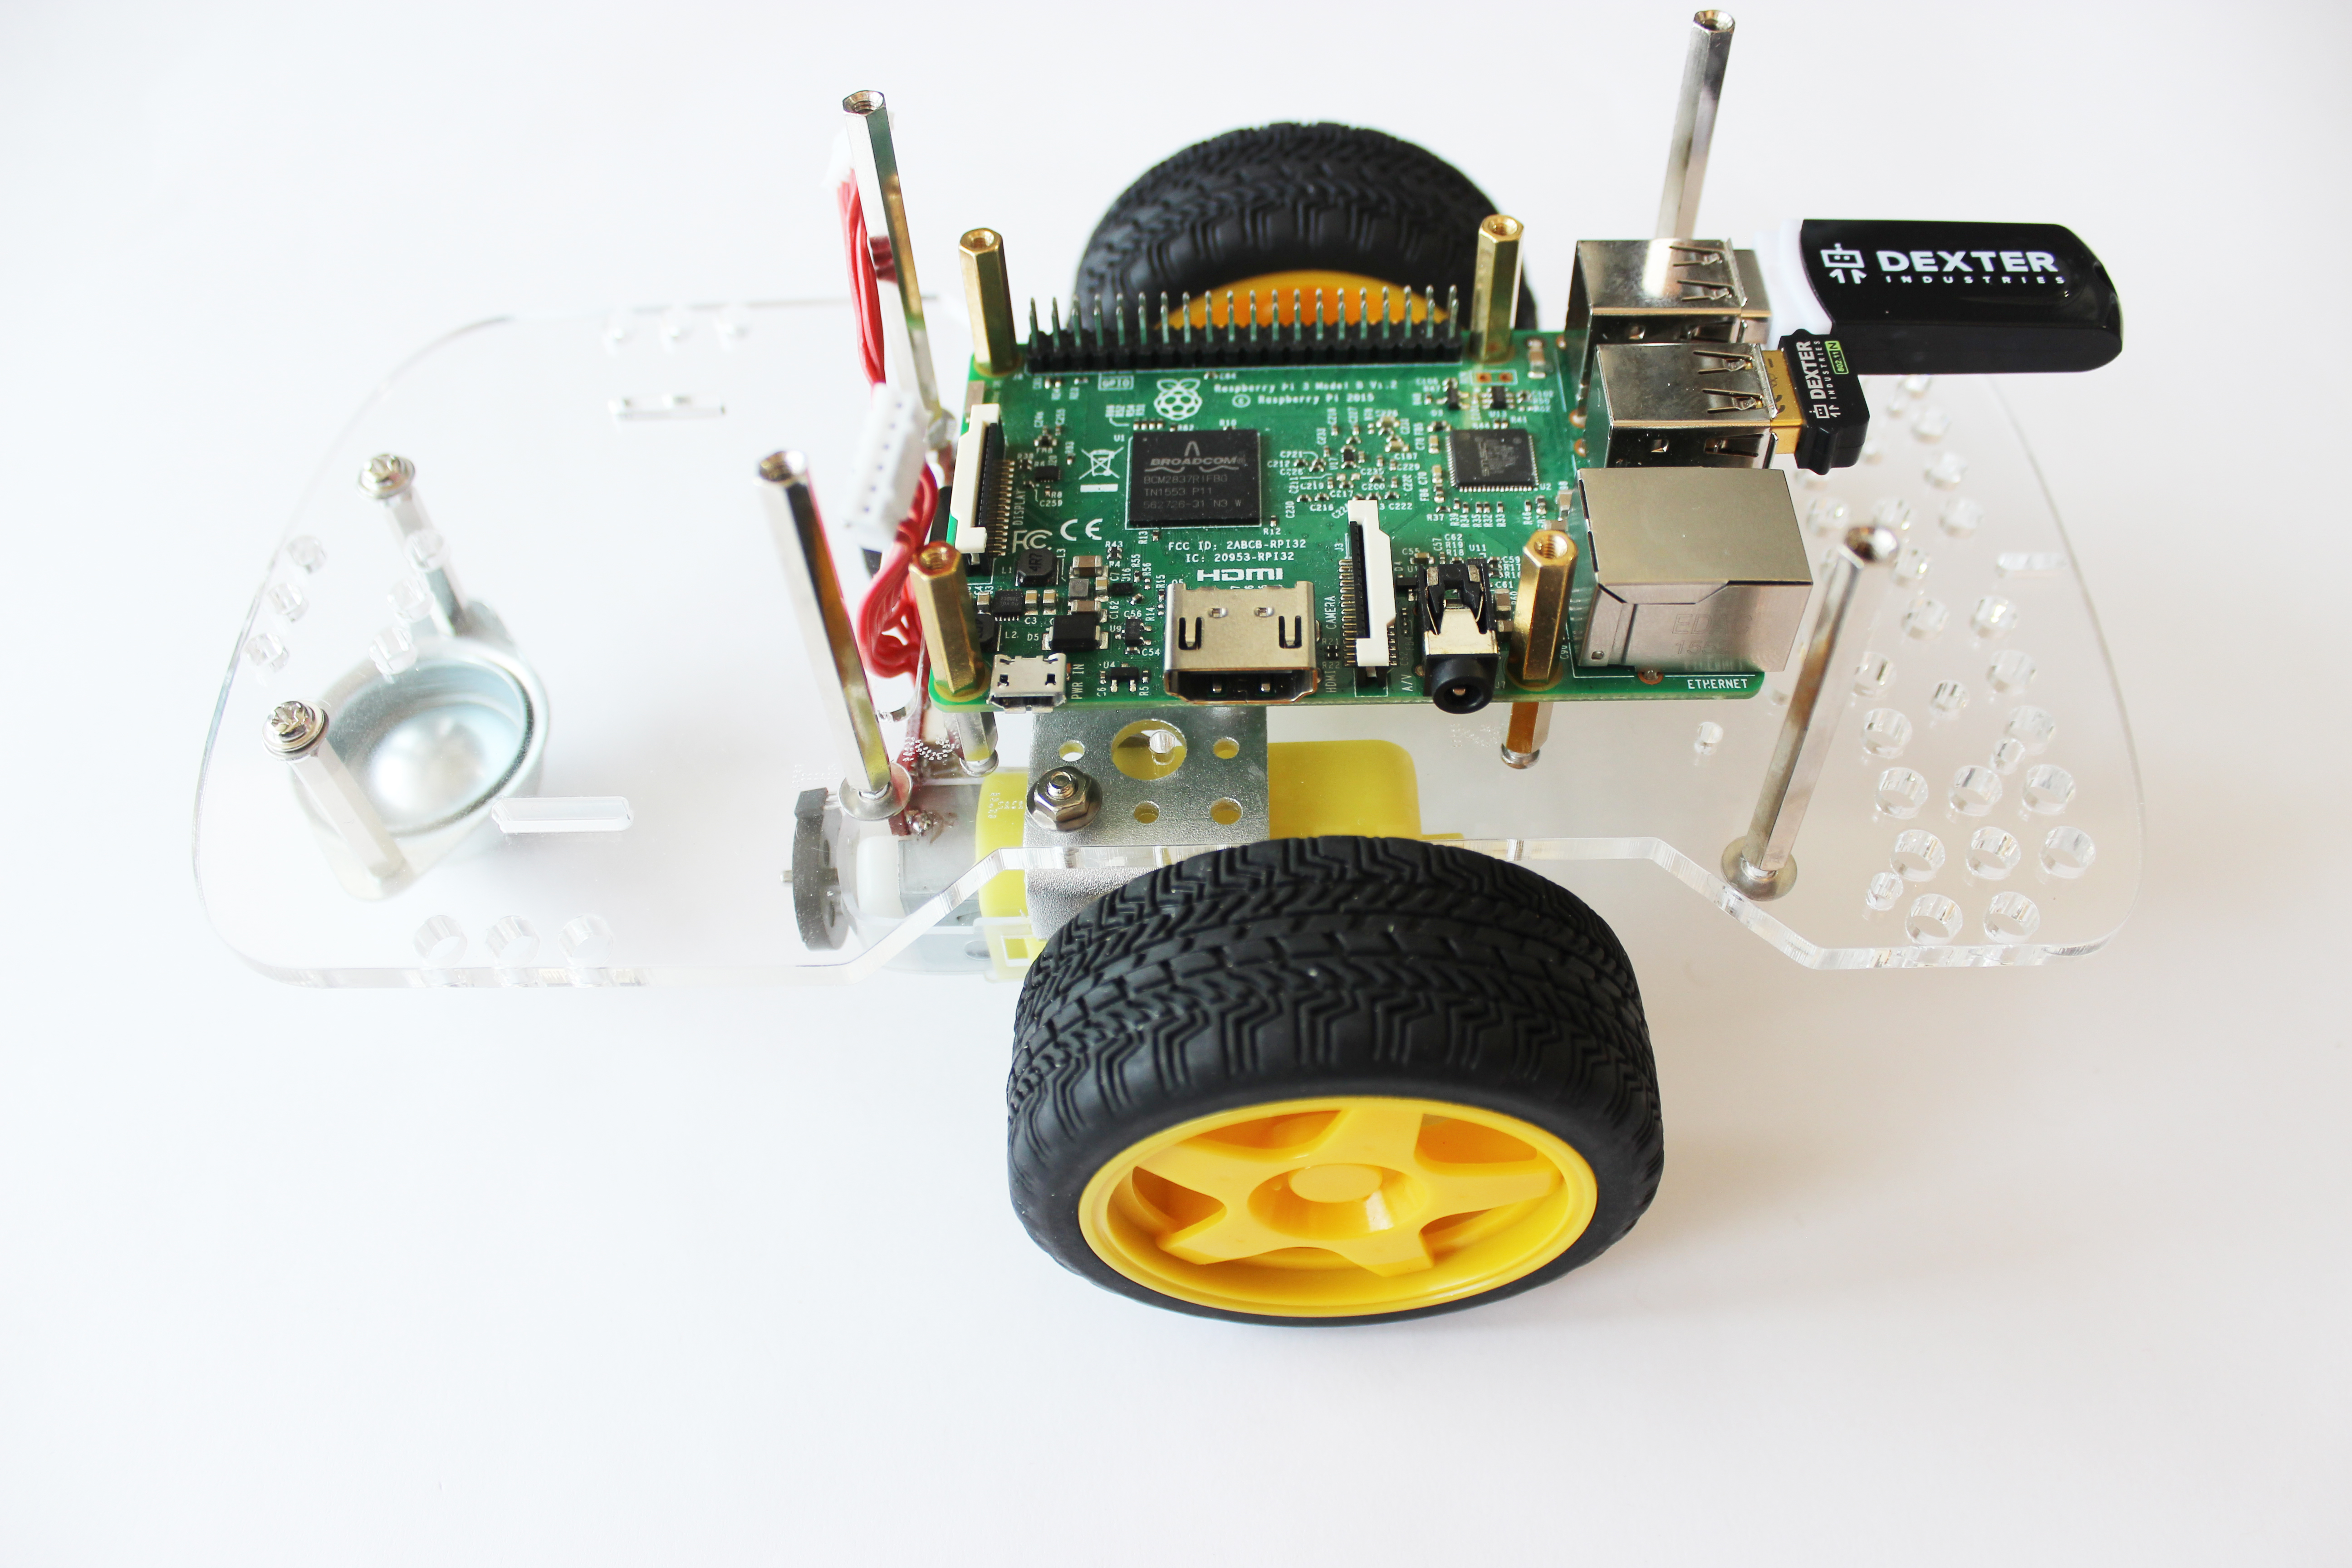
Part 11. Attach the Raspberry Pi to the GoPiGo3 acrylic body
What you’ll need:
- A Raspberry Pi
- (C) 4 gold posts (found in the small hardware bag)
NOTE: If you have the Raspberry Pi Camera and want to assemble it on the robot, go here first to learn how to attach the Camera to the Pi before you proceed with the next step.
To attach the Raspberry Pi to your robot:
- Line the Raspberry Pi up over the short silver posts sticking up out of the acrylic body. The pins on the Raspberry Pi should be pointing upwards (as shown in the picture), and the end with the SD card you inserted in the previous step should face towards the red motor cables.
- Screw the gold posts through the Raspberry Pi and into the short silver posts.
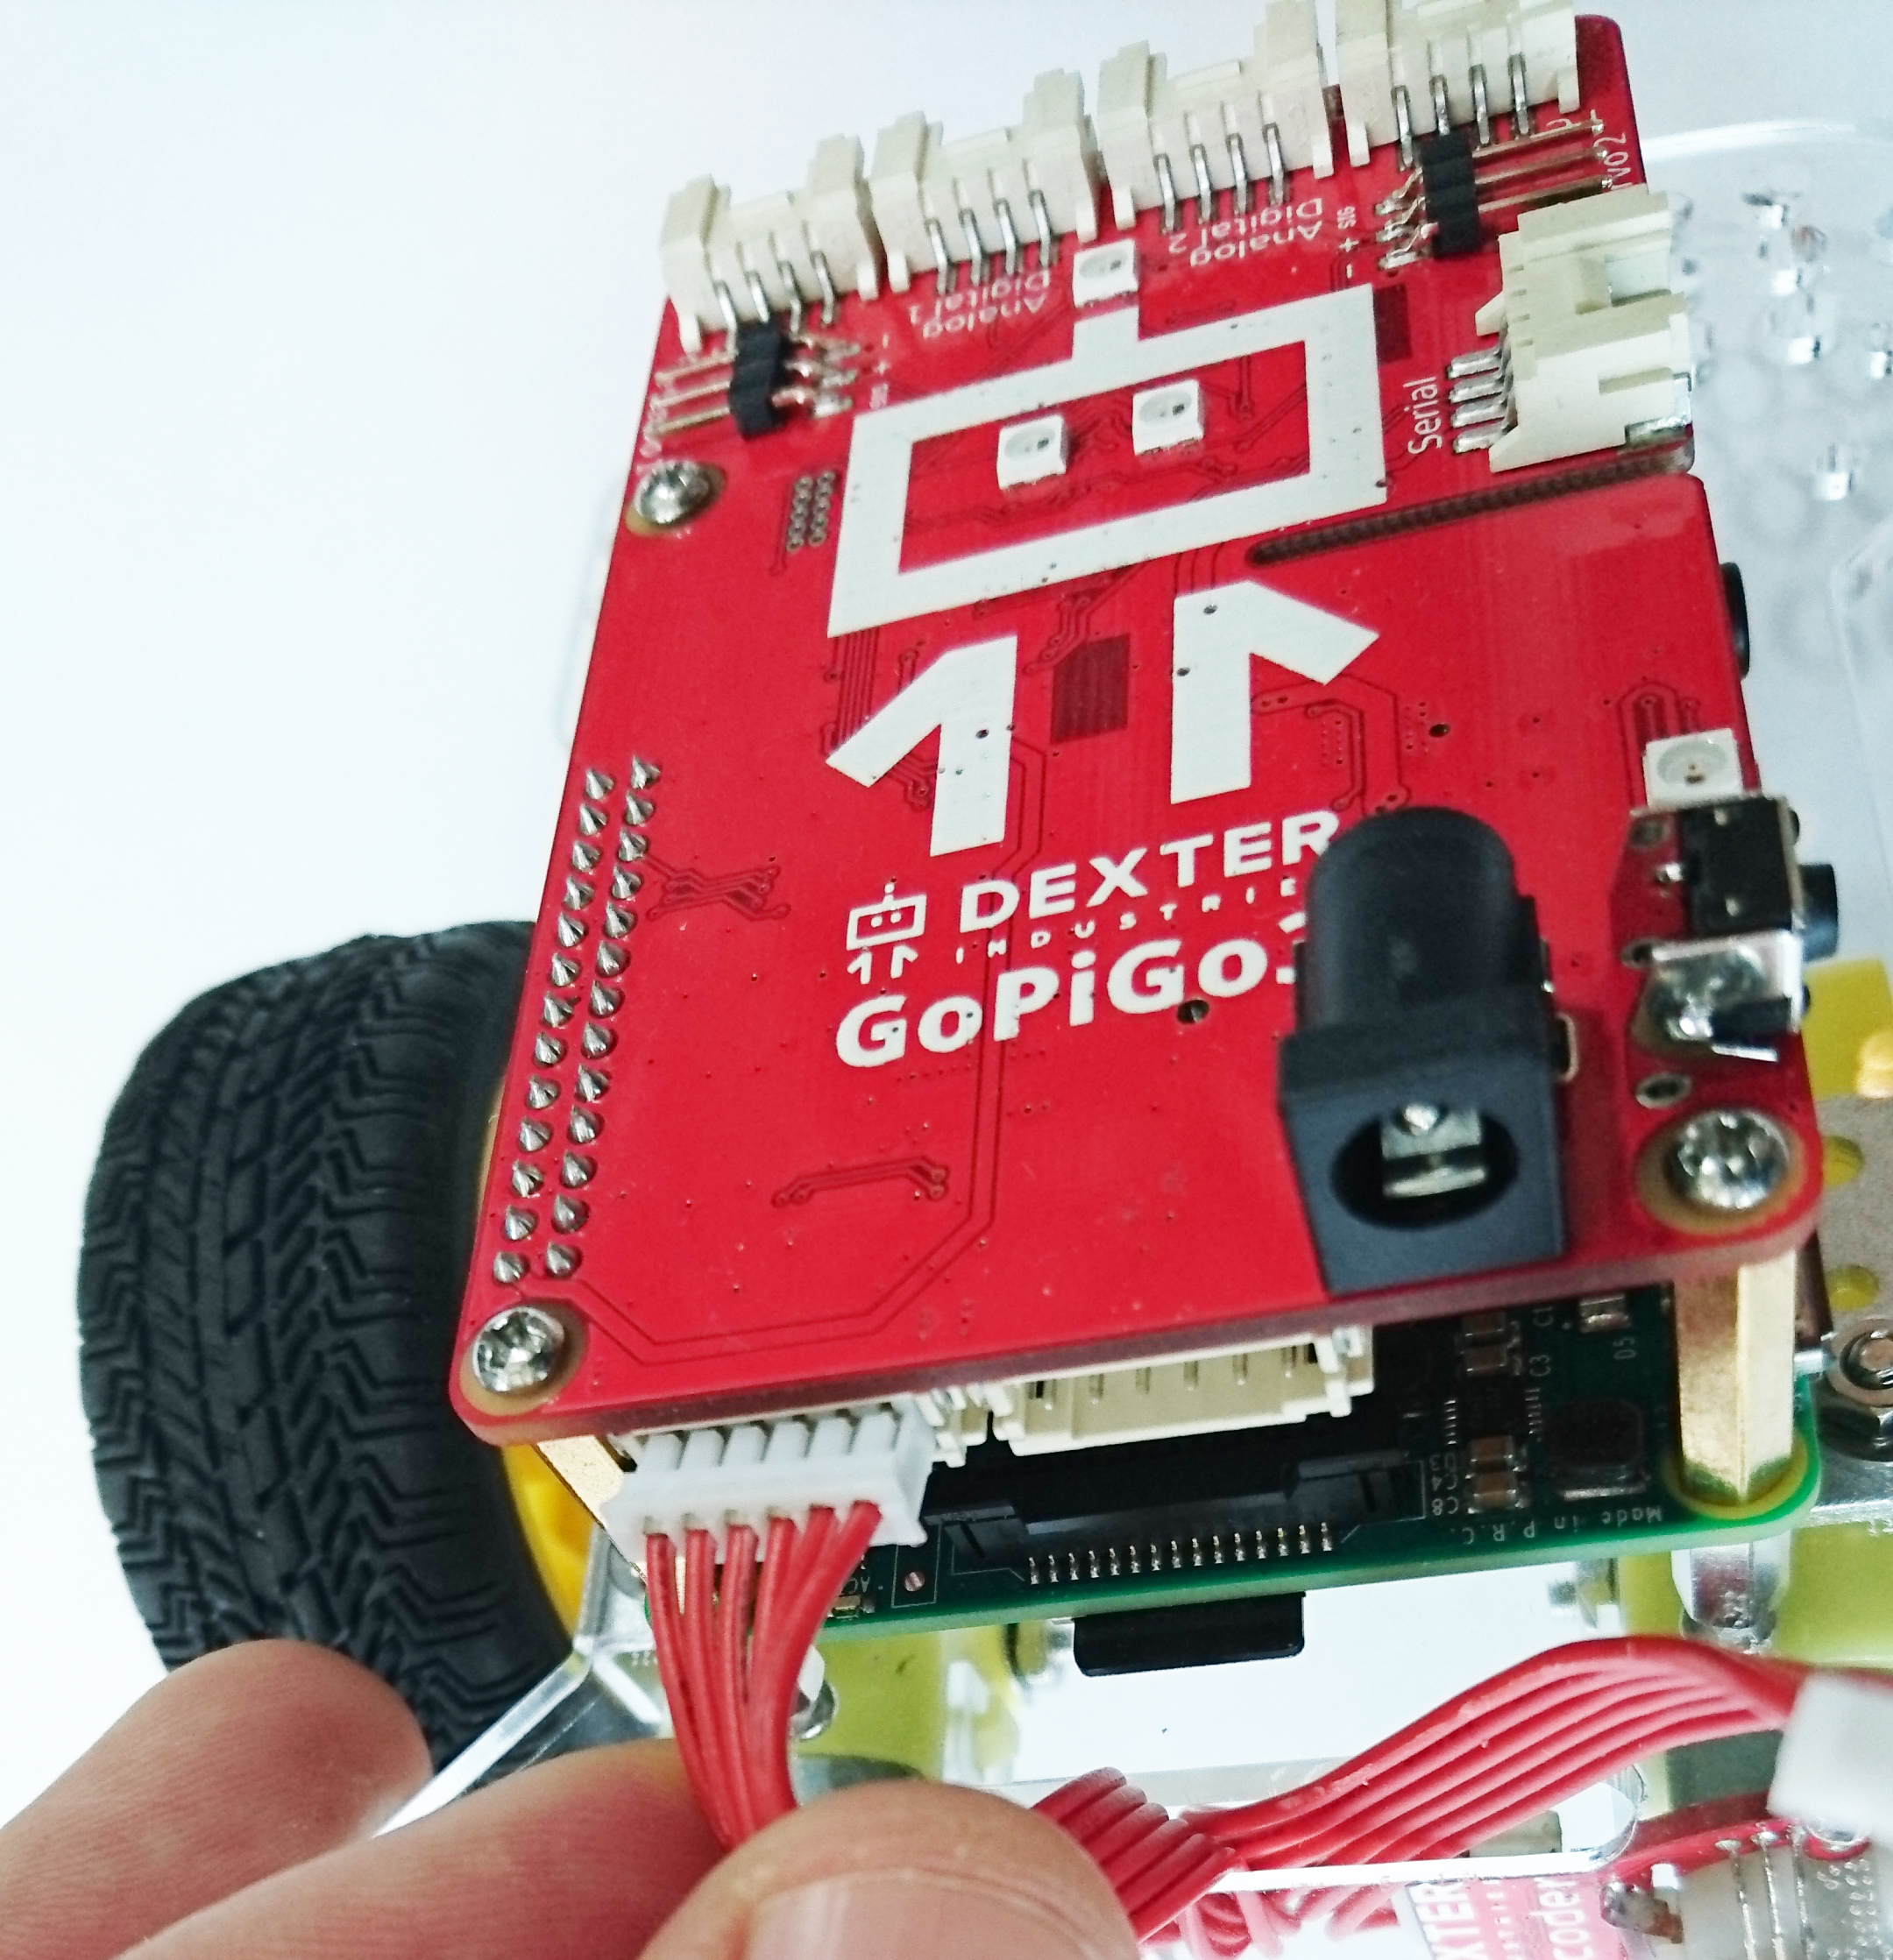
Part 12. Attach the GoPiGo3 board (red board) to the Raspberry Pi
What you’ll need:
- GoPiGo3 Circuit Board – The red board.
- (B) 4 mini screws – These are found in the small hardware bag.
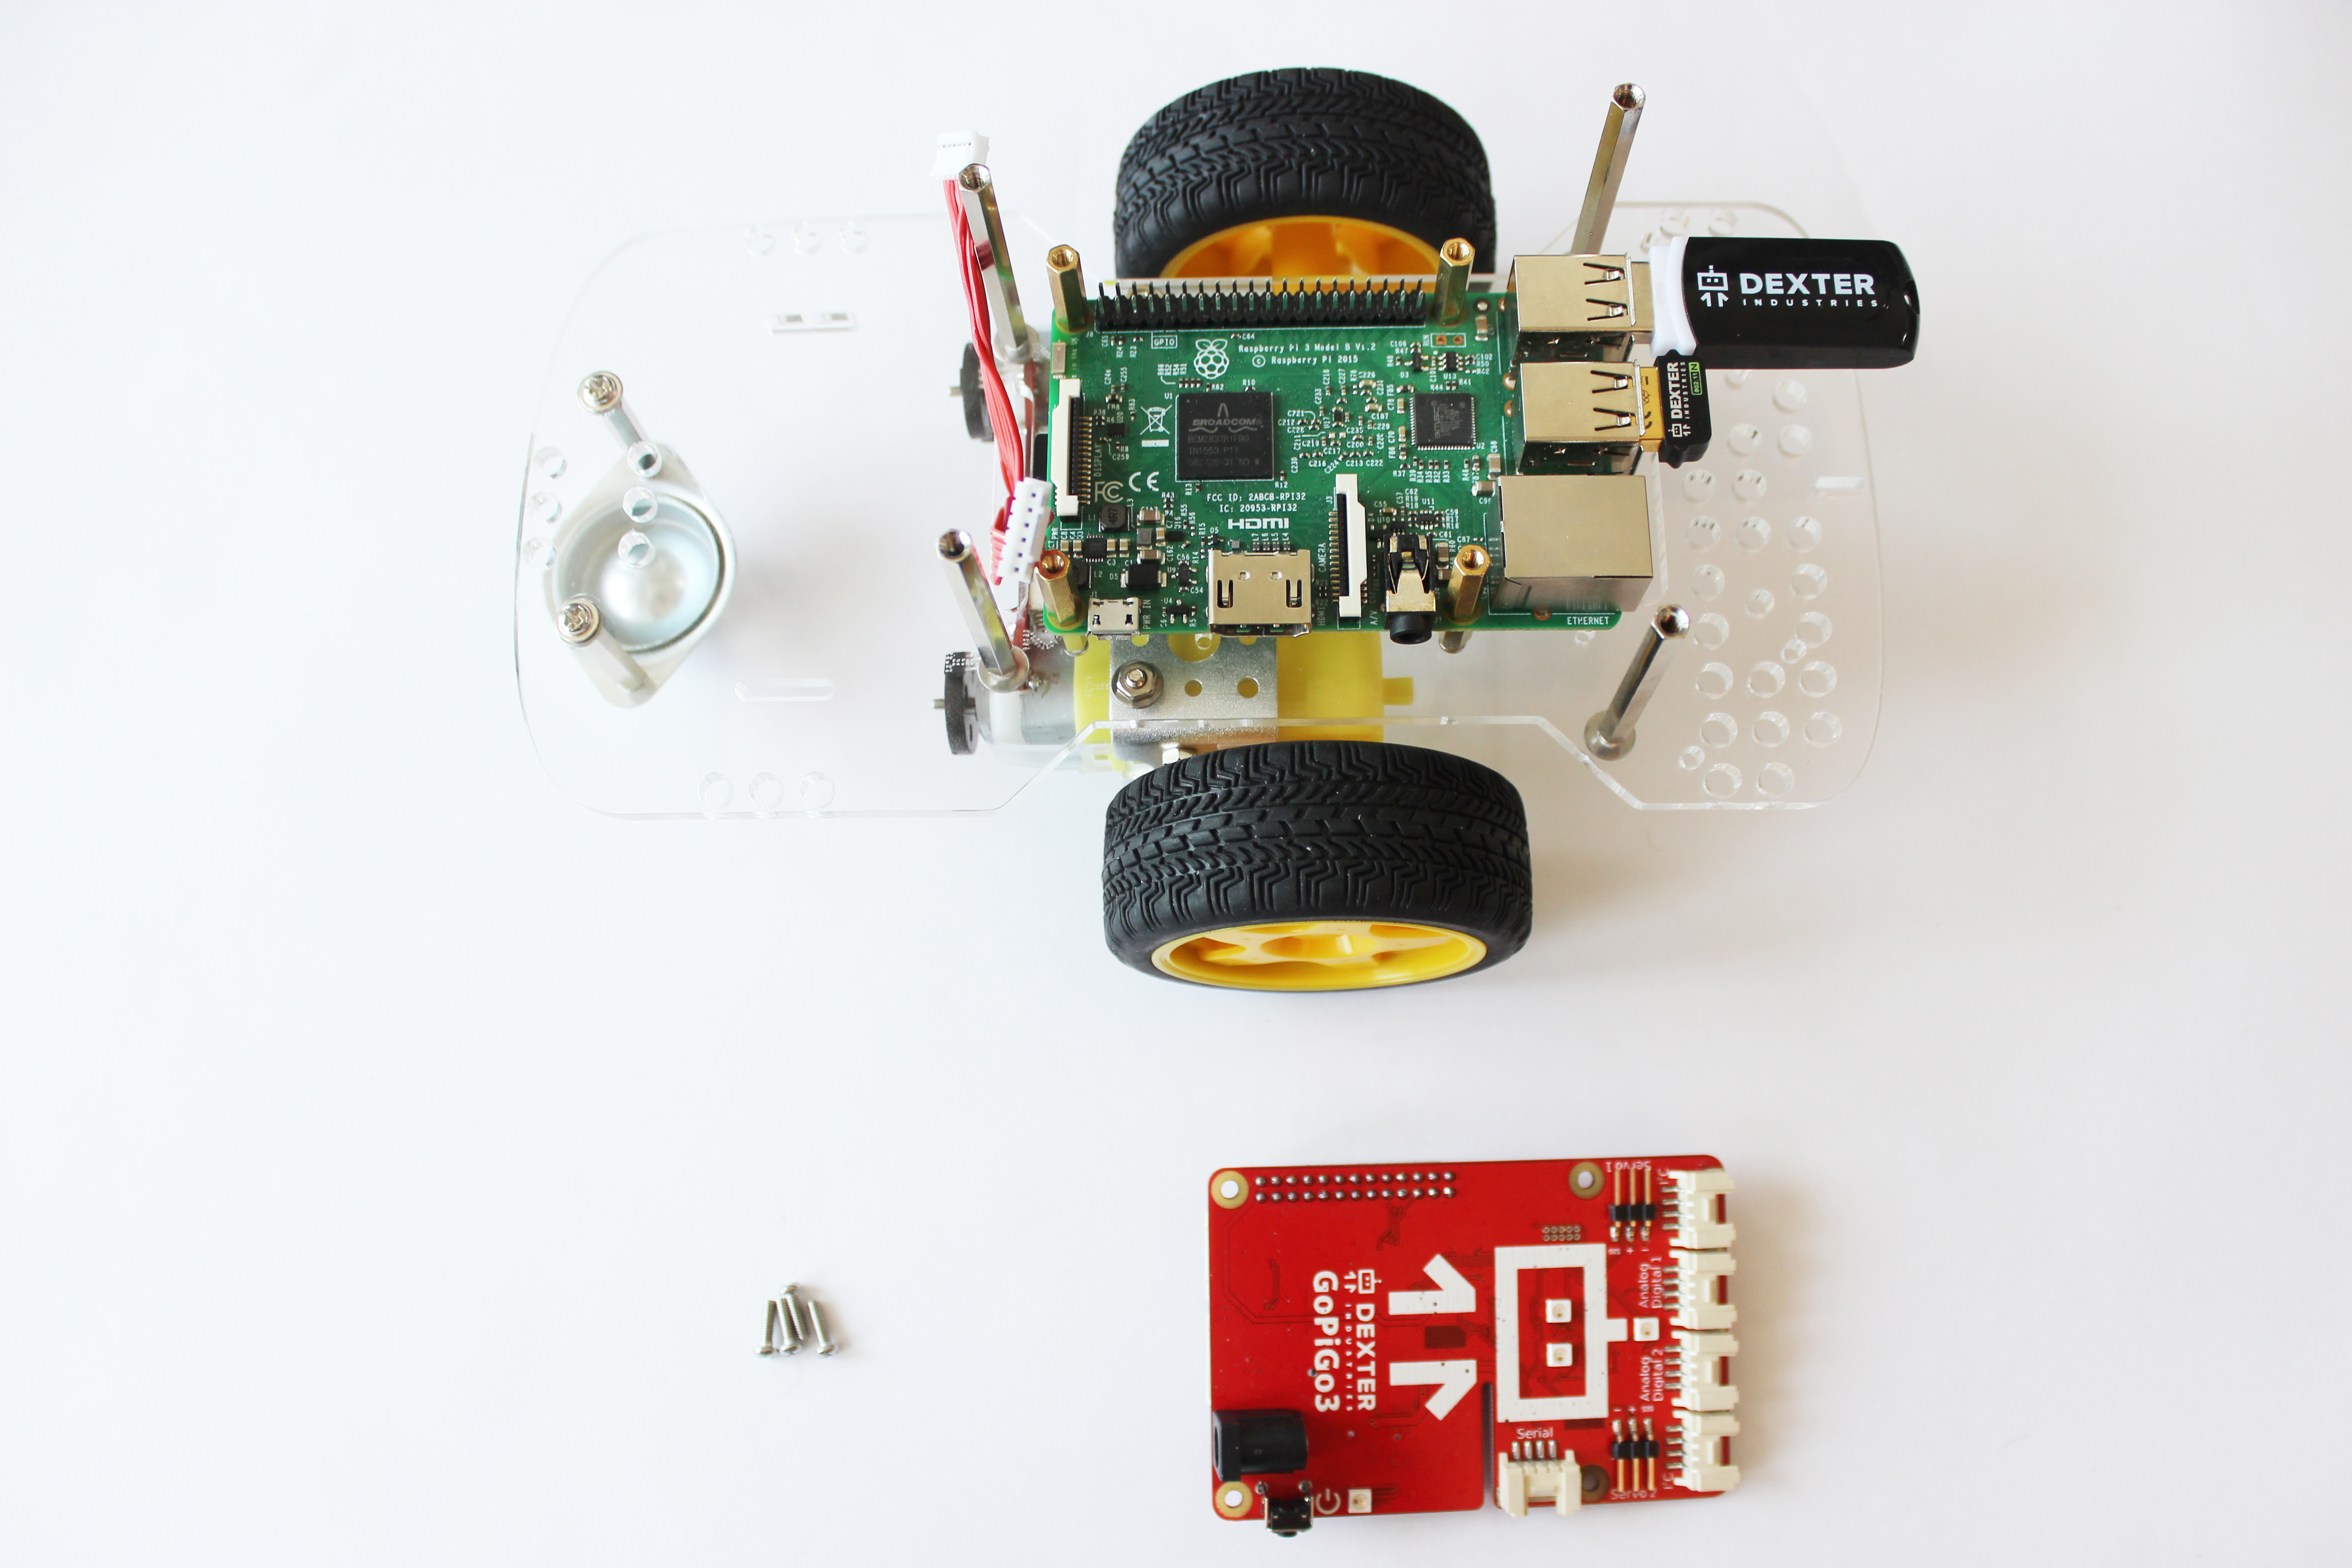
Prepare the GoPiGo3 Board: Take the Protective Foam Off the Pins
Be sure to take the foam off of the pins on the GoPiGo3. The GoPiGo3 is shipped with foam on the GPIO pins to prevent them from being bent. Be sure to remove the foam before proceeding to use your GoPiGo3!
Attaching the GoPiGo:
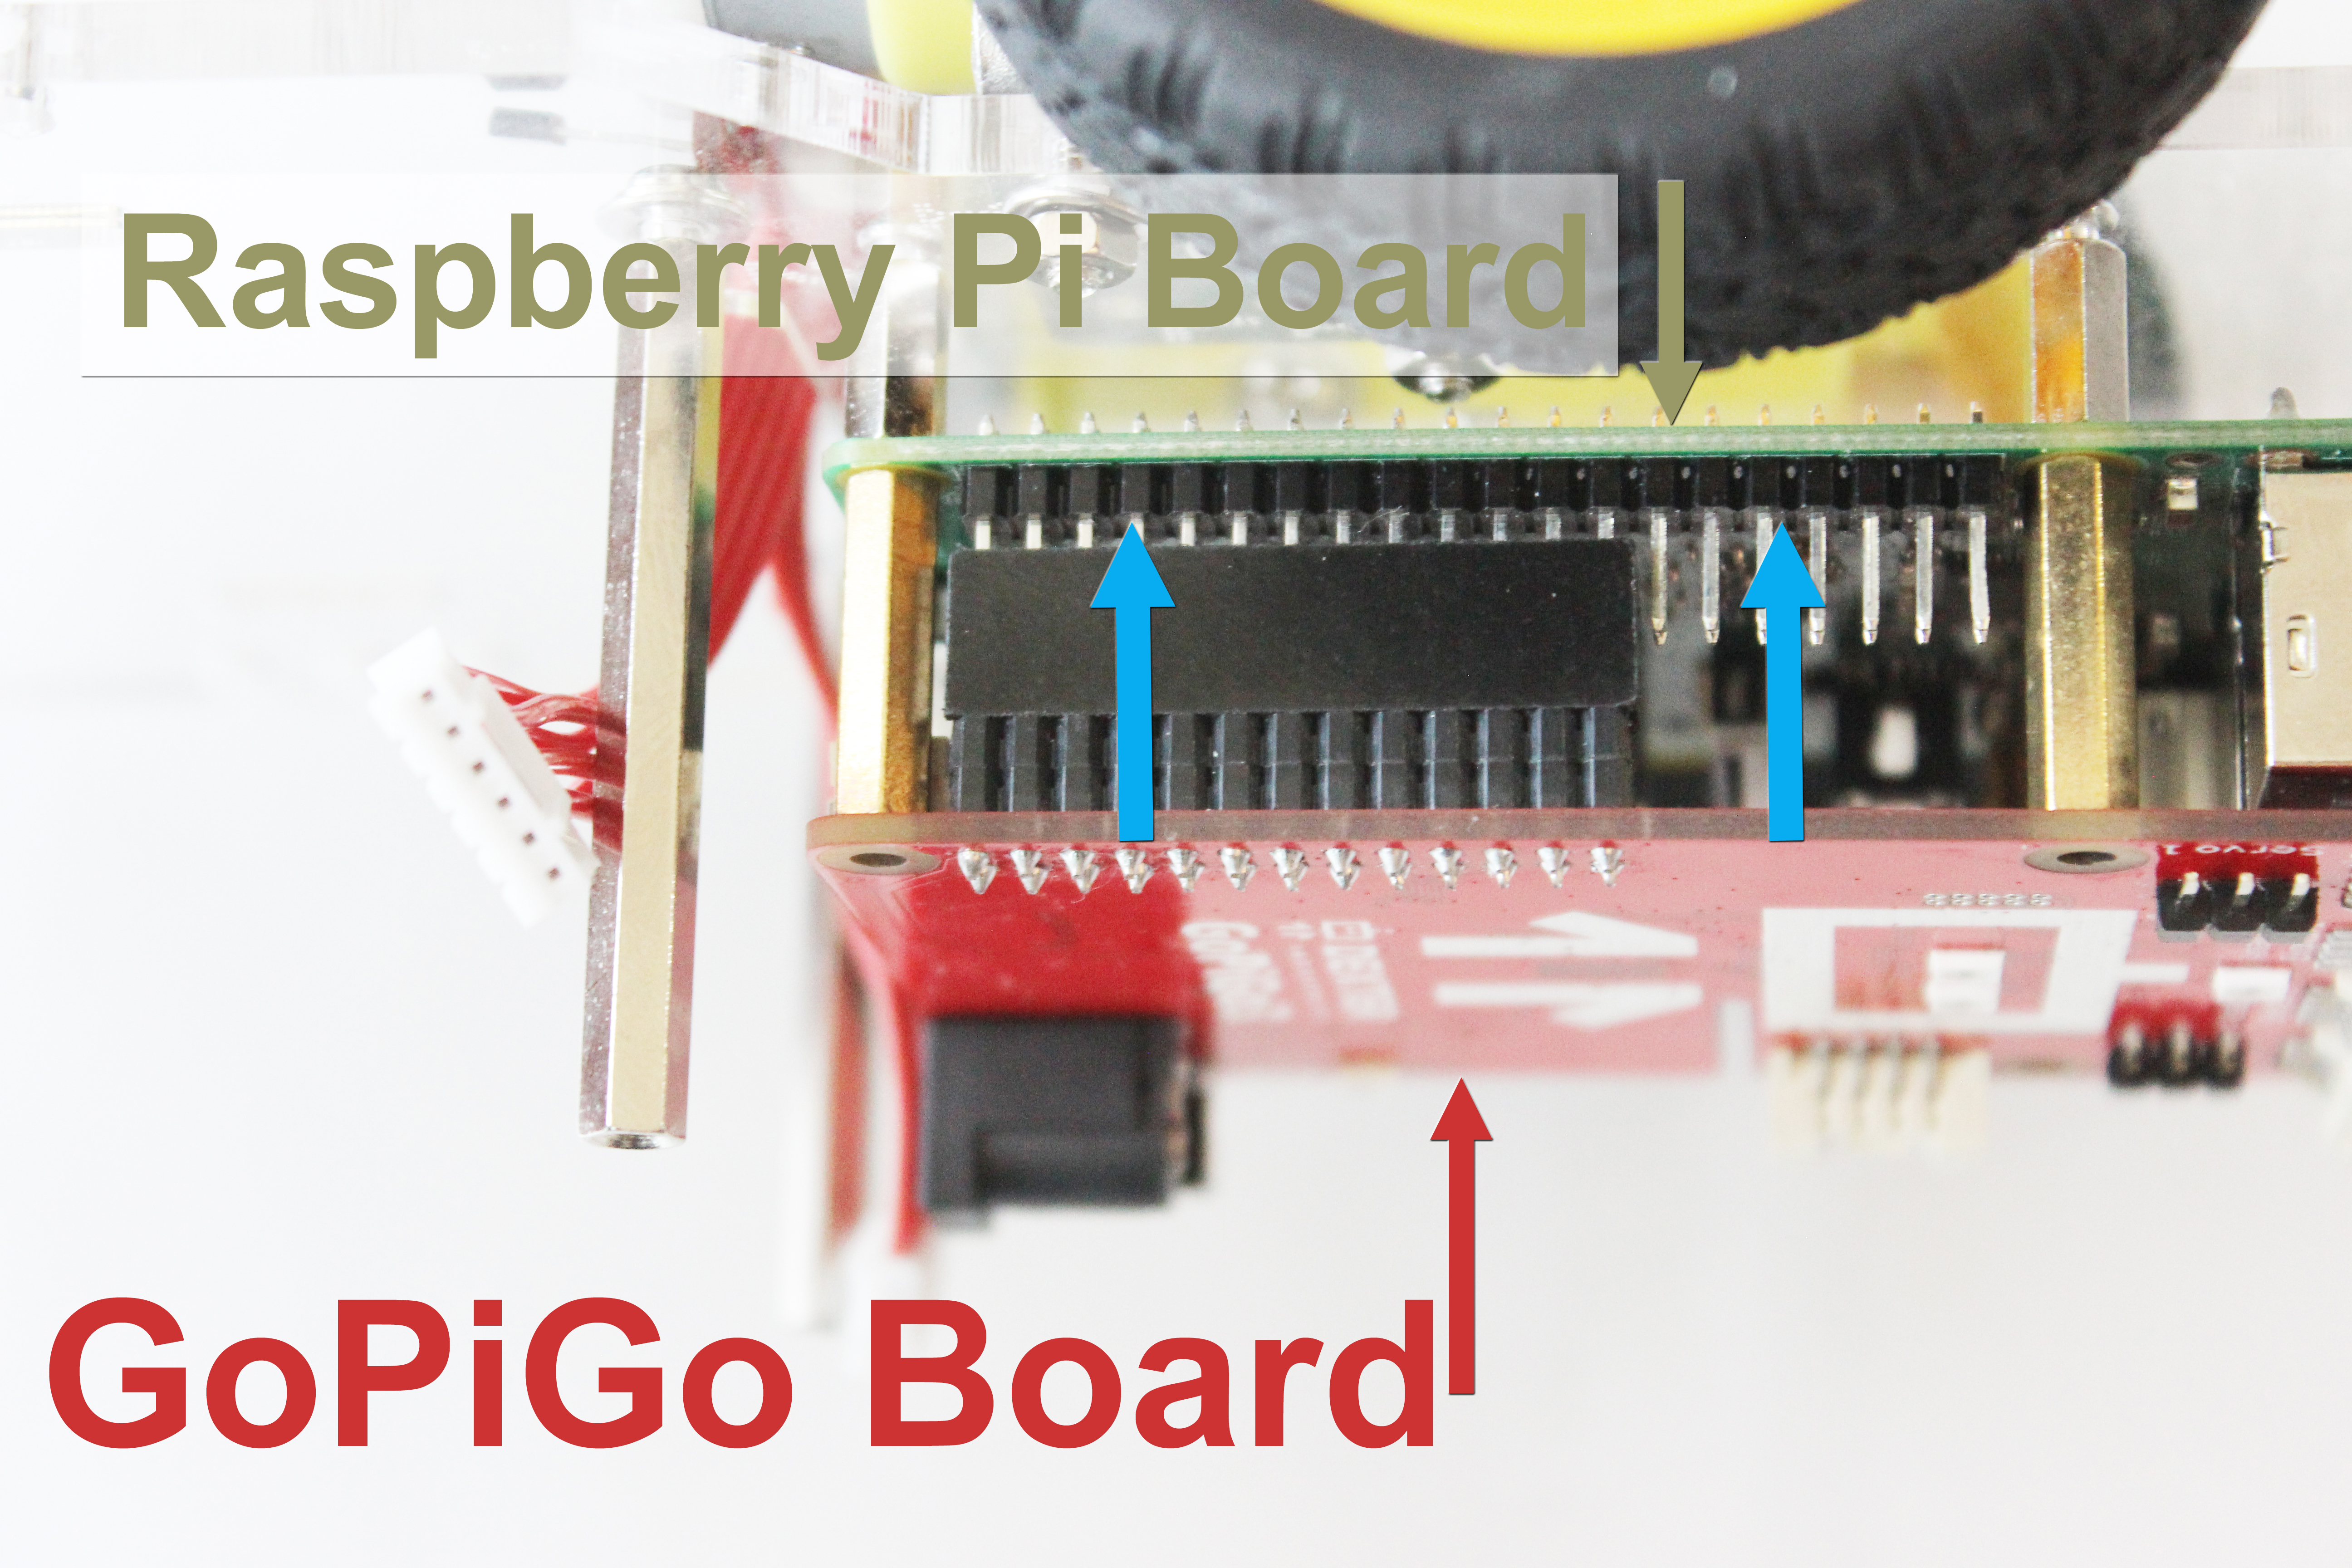
- Line the black female port on the GoPiGo3 red board up to the Raspberry Pi pins sticking up, and slide the GoPiGo3 board onto the Raspberry Pi. Press down until the board slides on securely.

- Use the 4 screws to secure the GoPiGo3 board to the Raspberry Pi (through the Pi board and screwed into the gold posts.
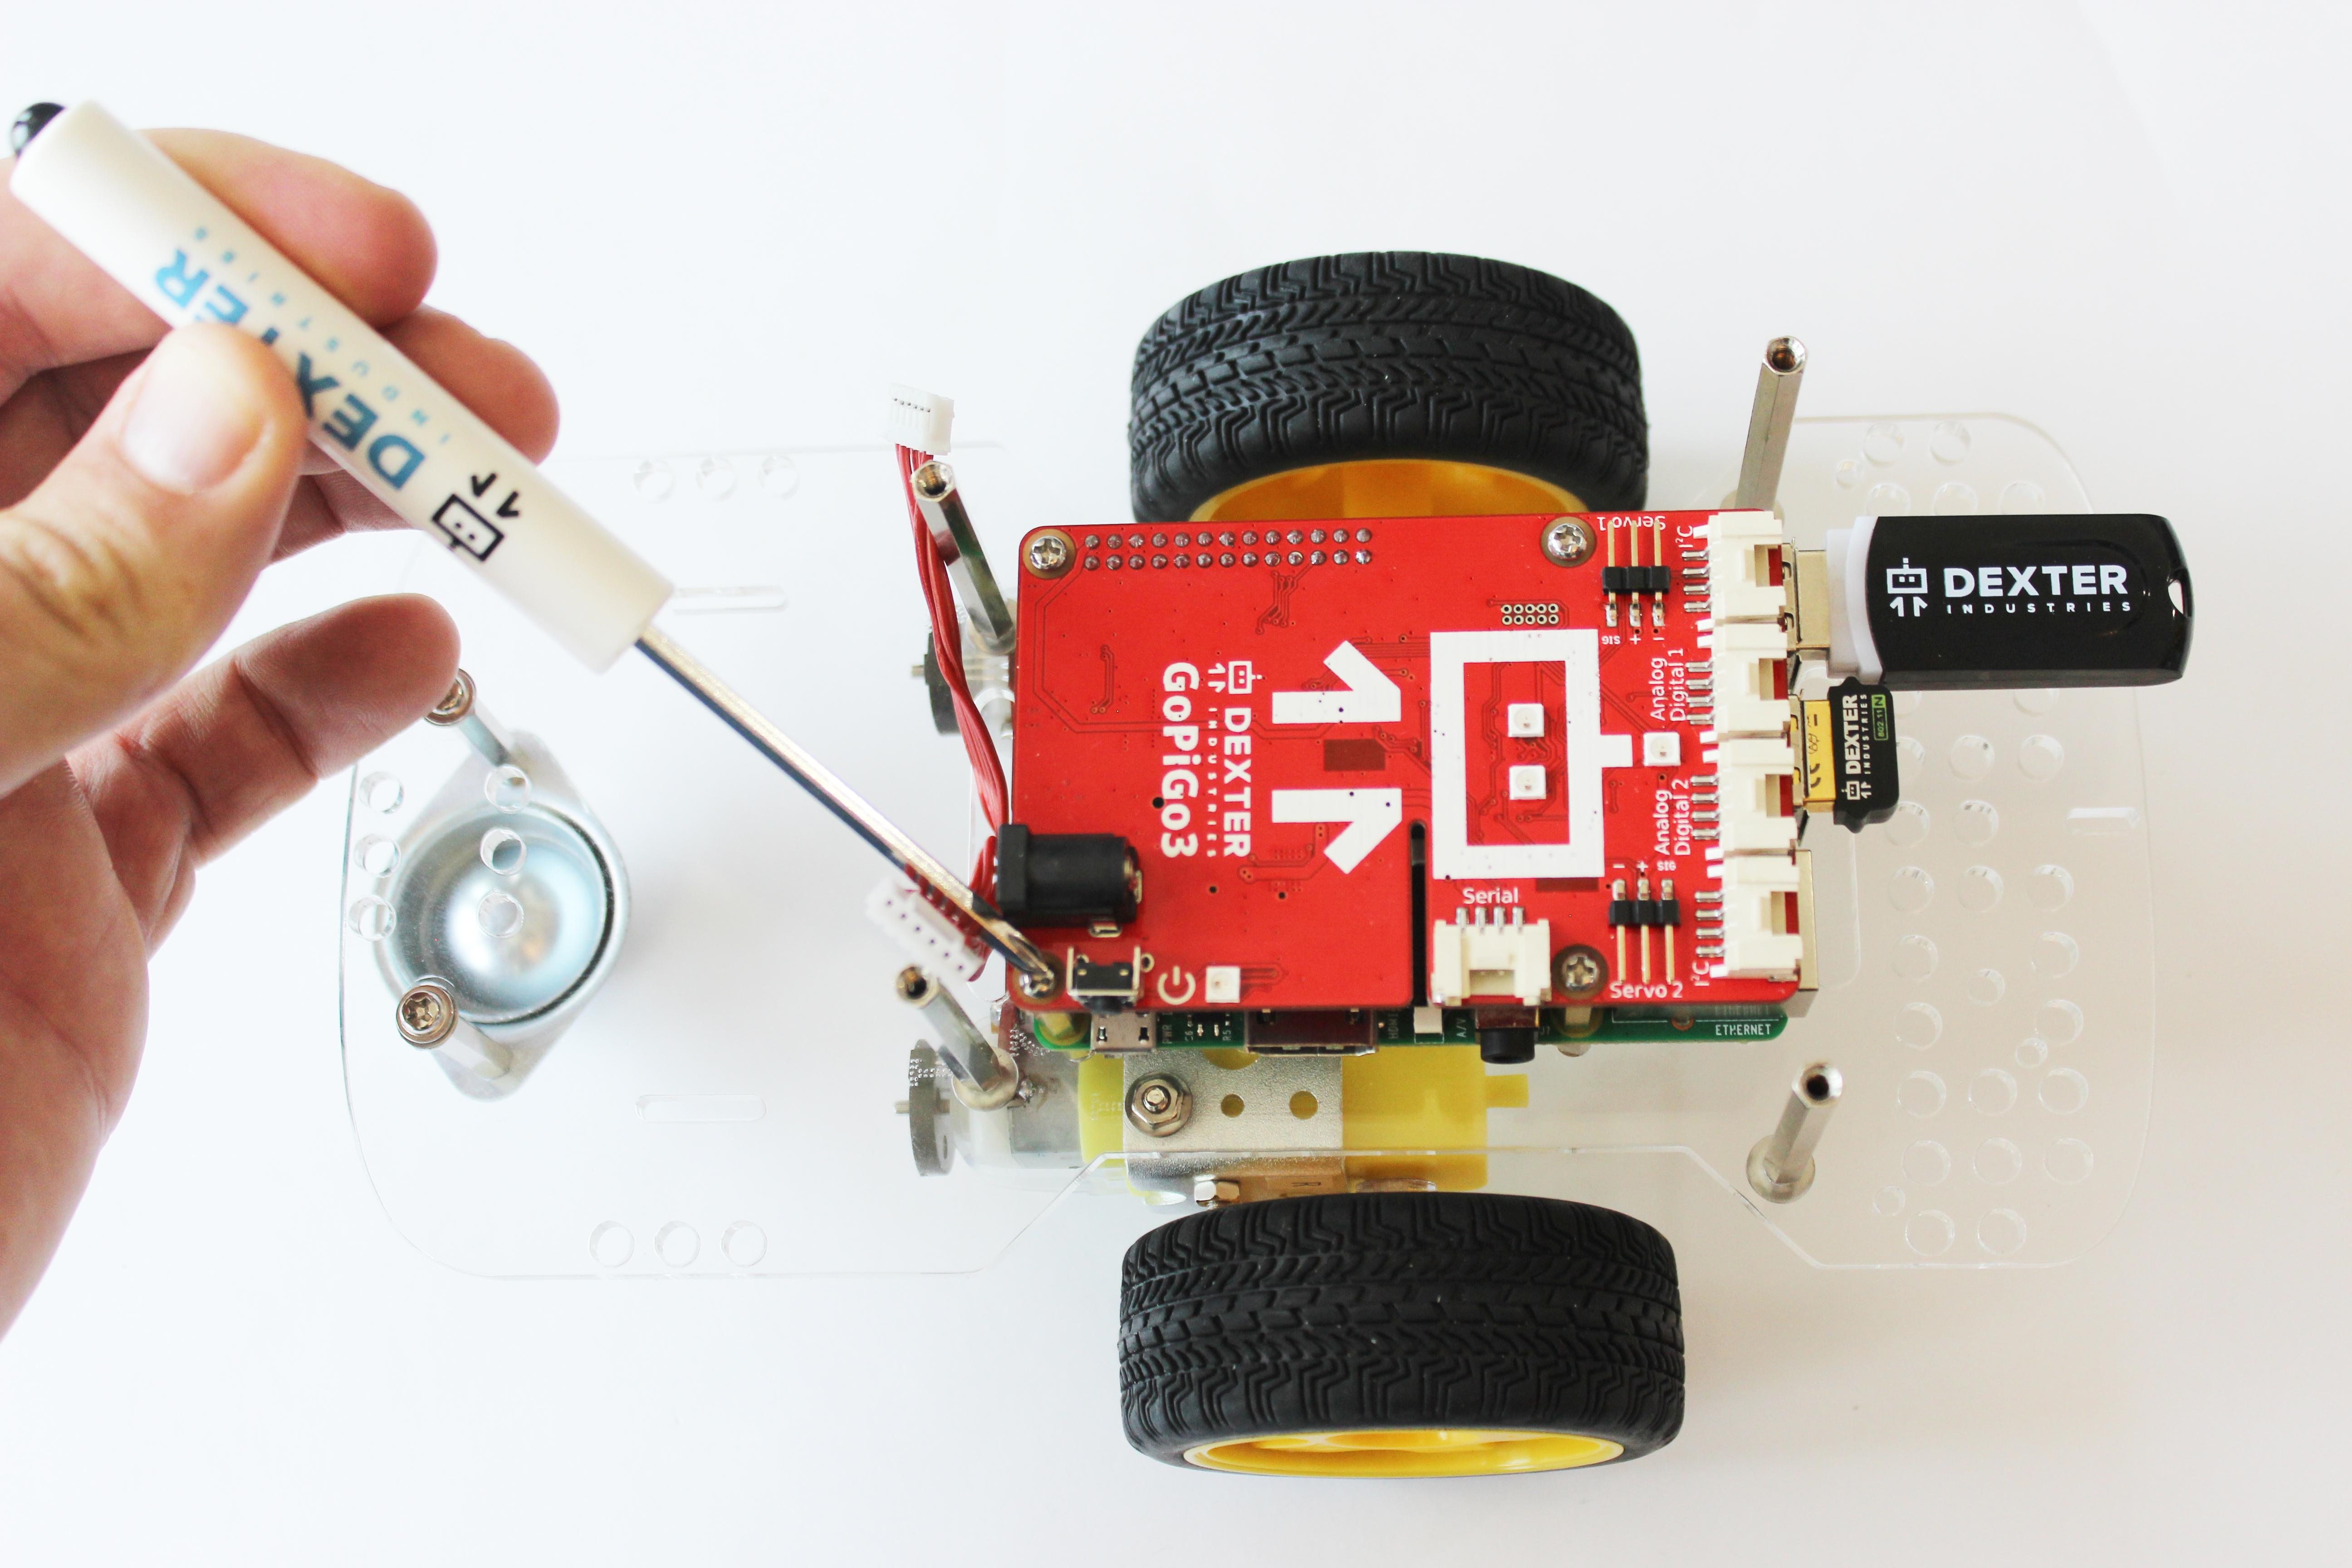
Part 13. Connect the motors to the GoPiGo3 board
- Connect the motor cables to the GoPiGo3 Board. Note that the cables can only be oriented in one direction. The connectors need to be pushed in fully.
- It is very important to ensure that the right motor is connected to the right motor port on the board, and the left motor to the left motor port on the board.

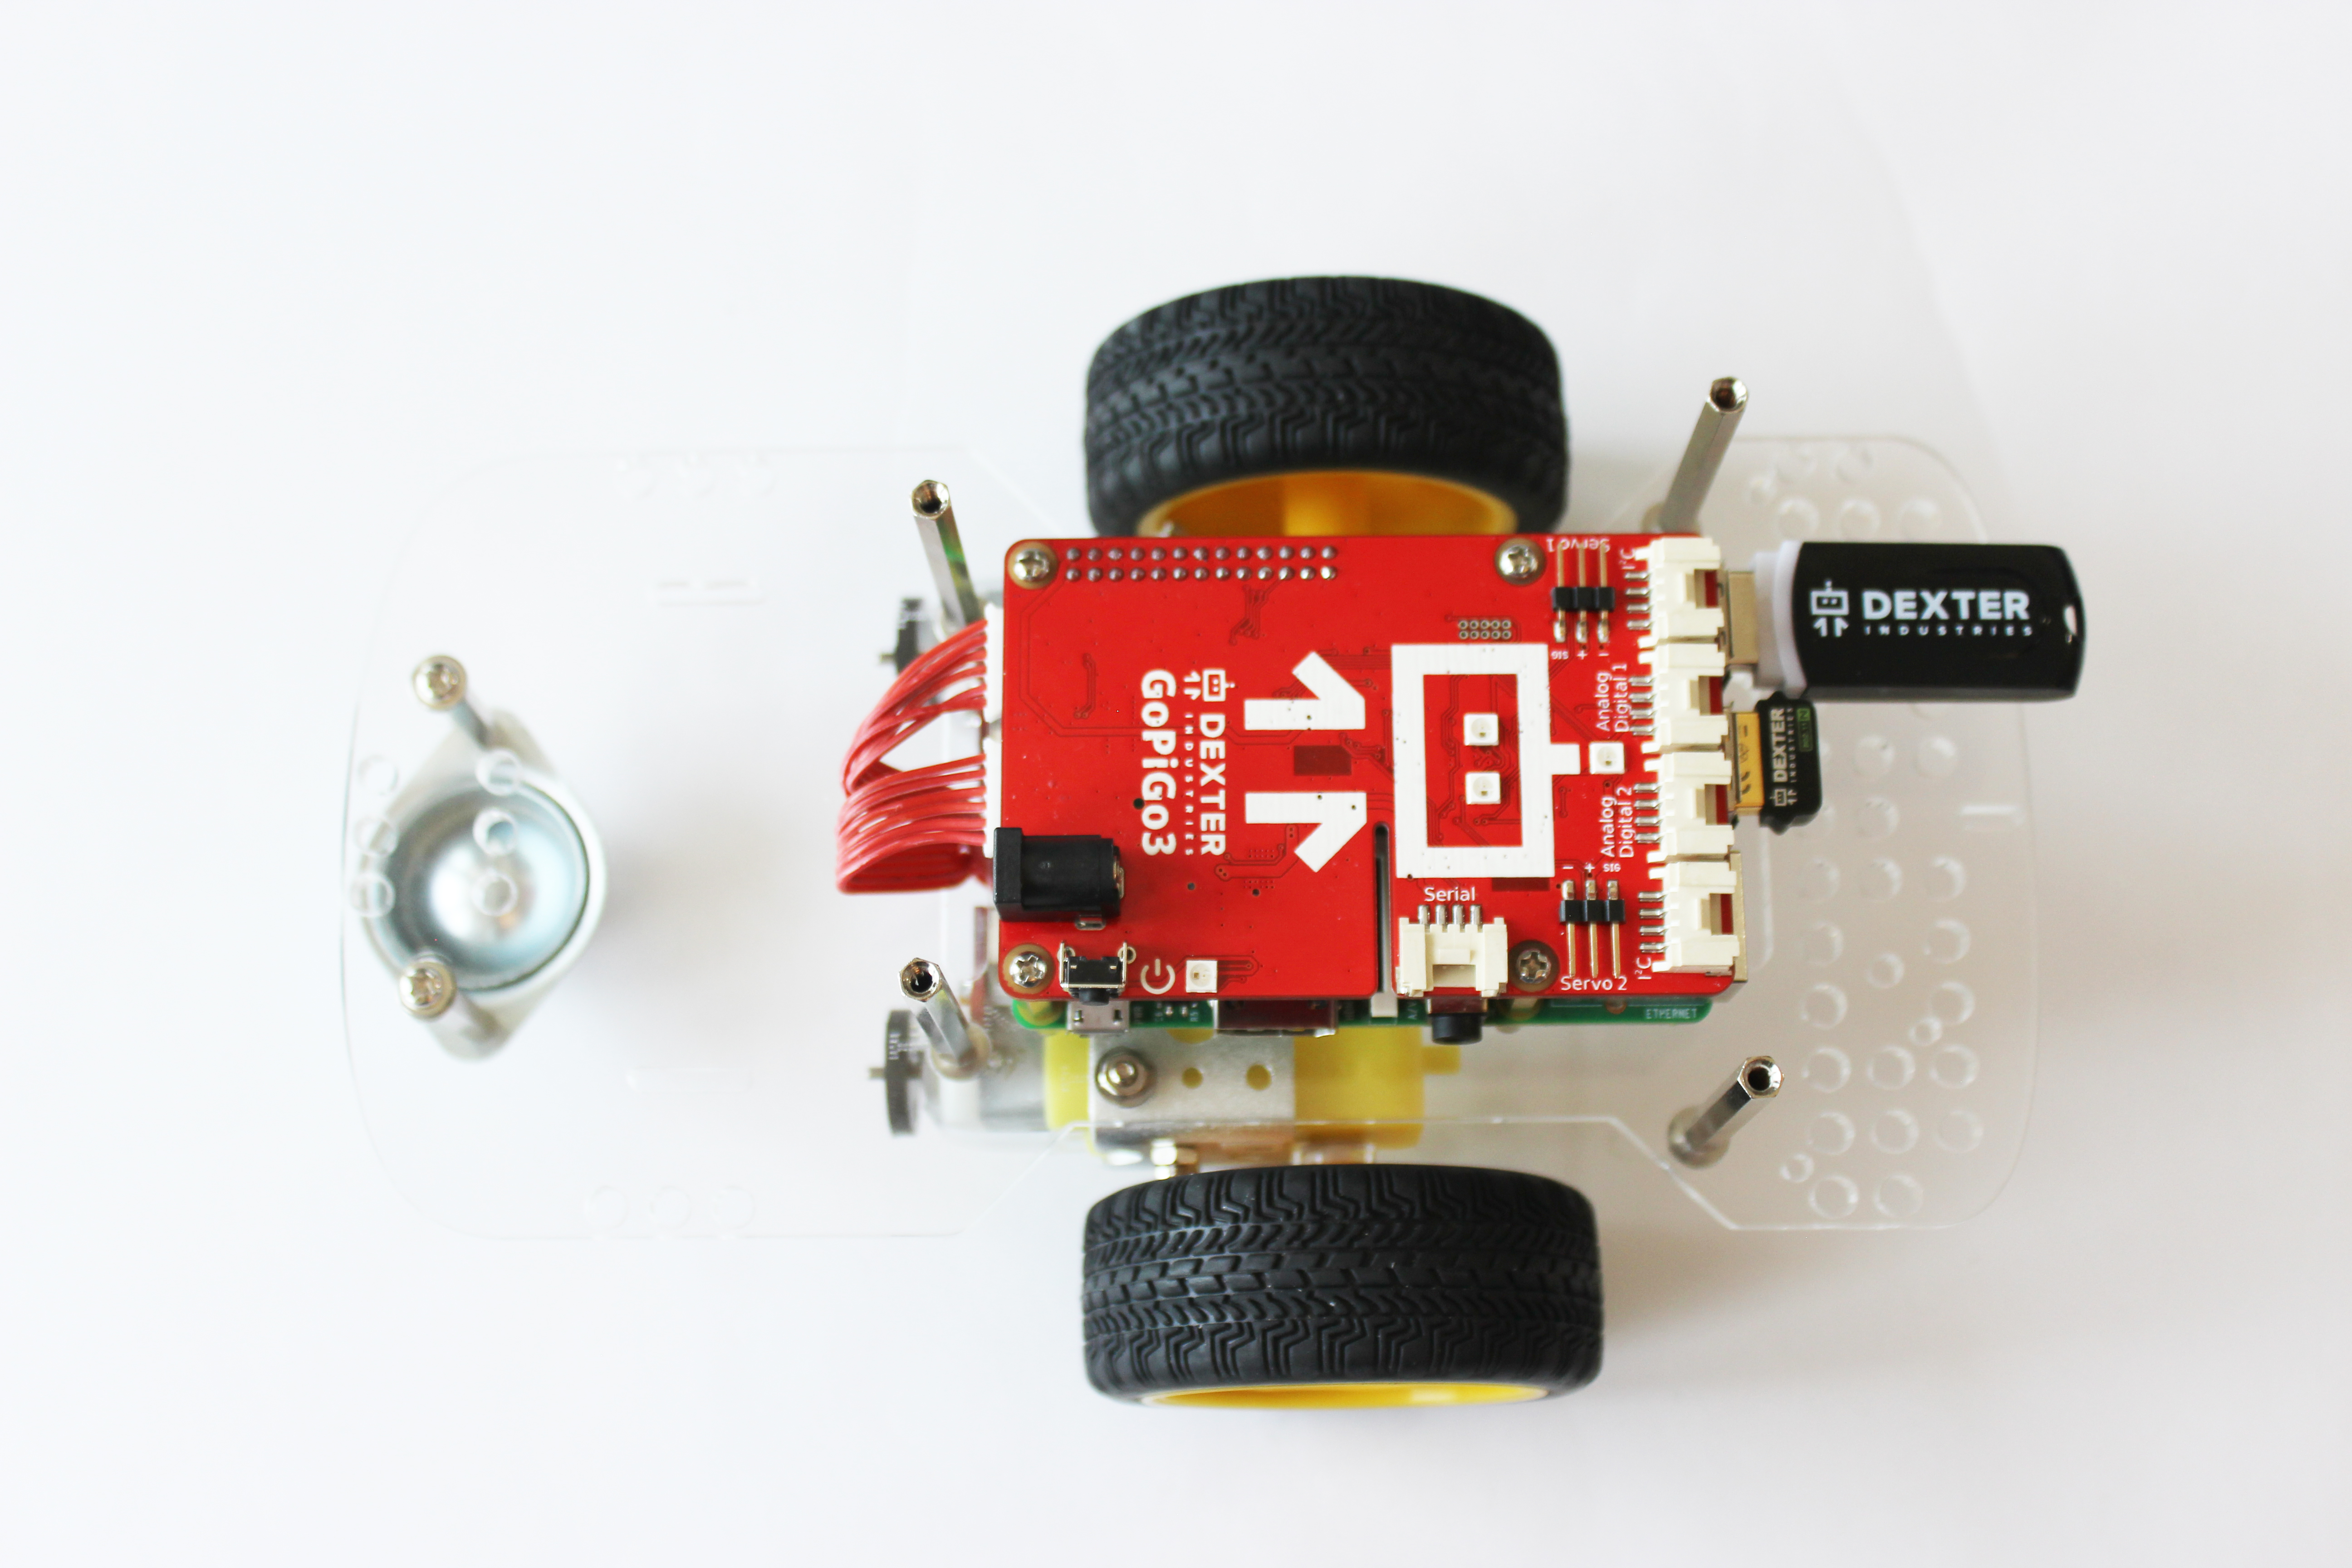
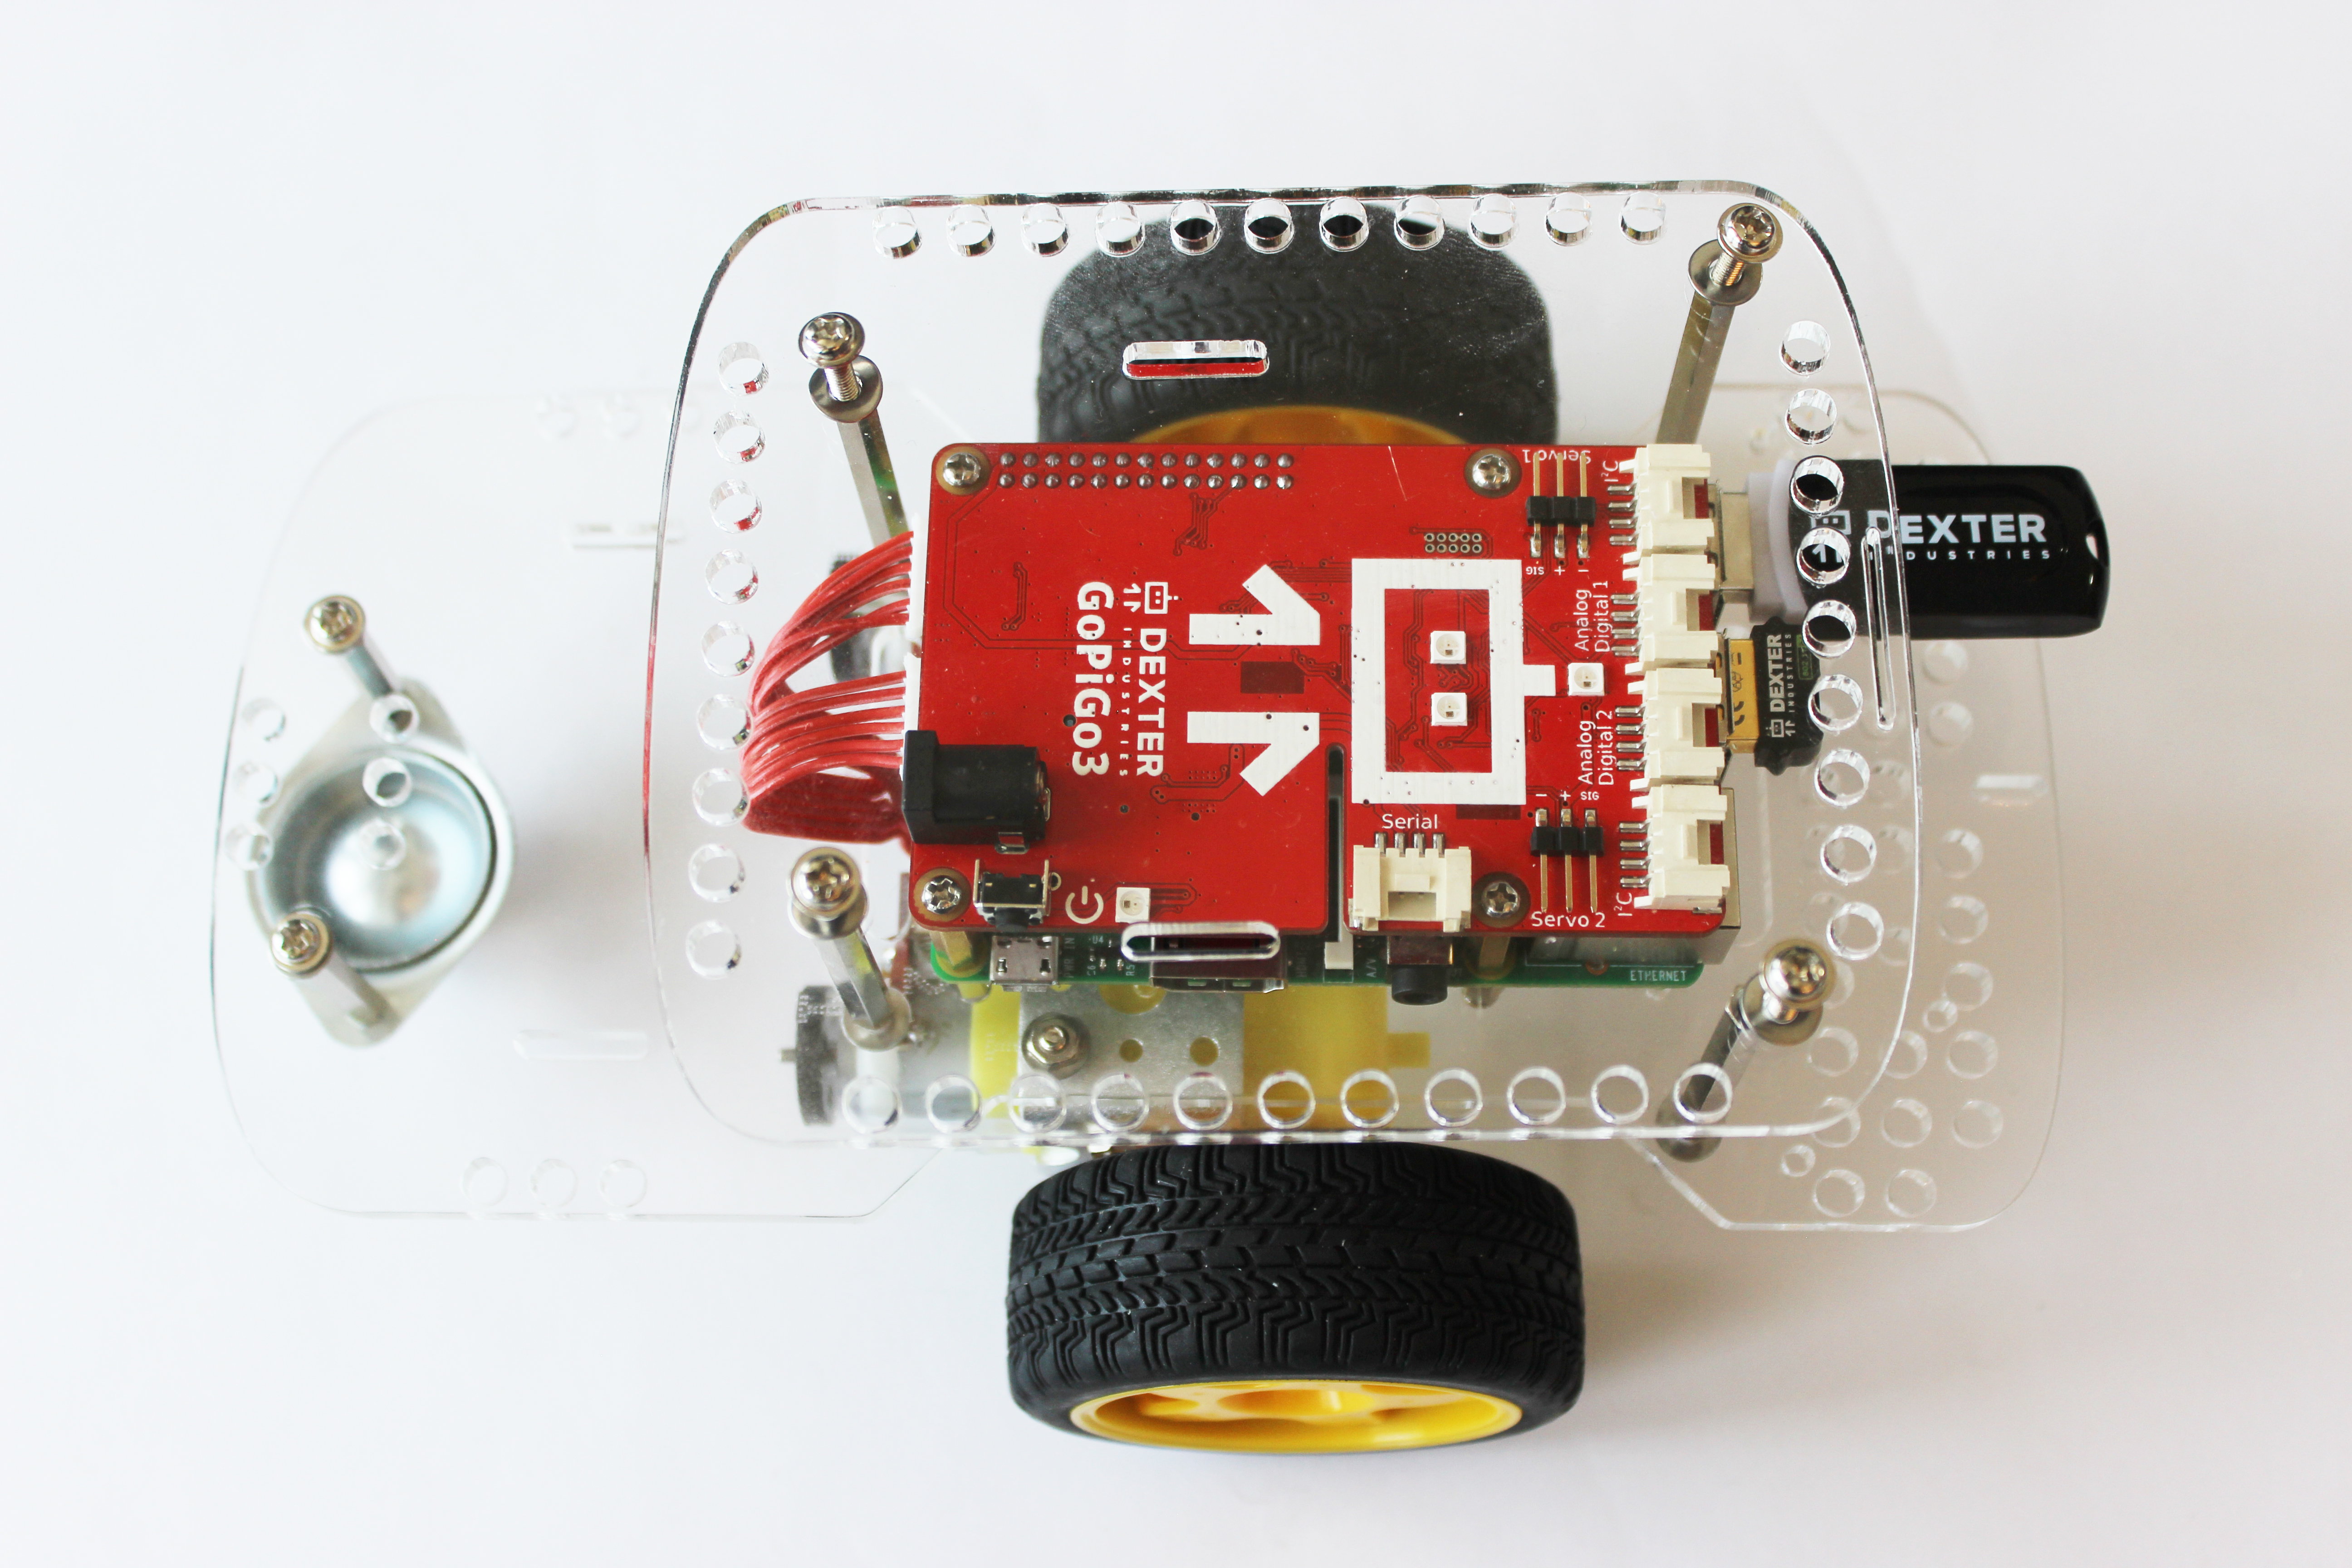
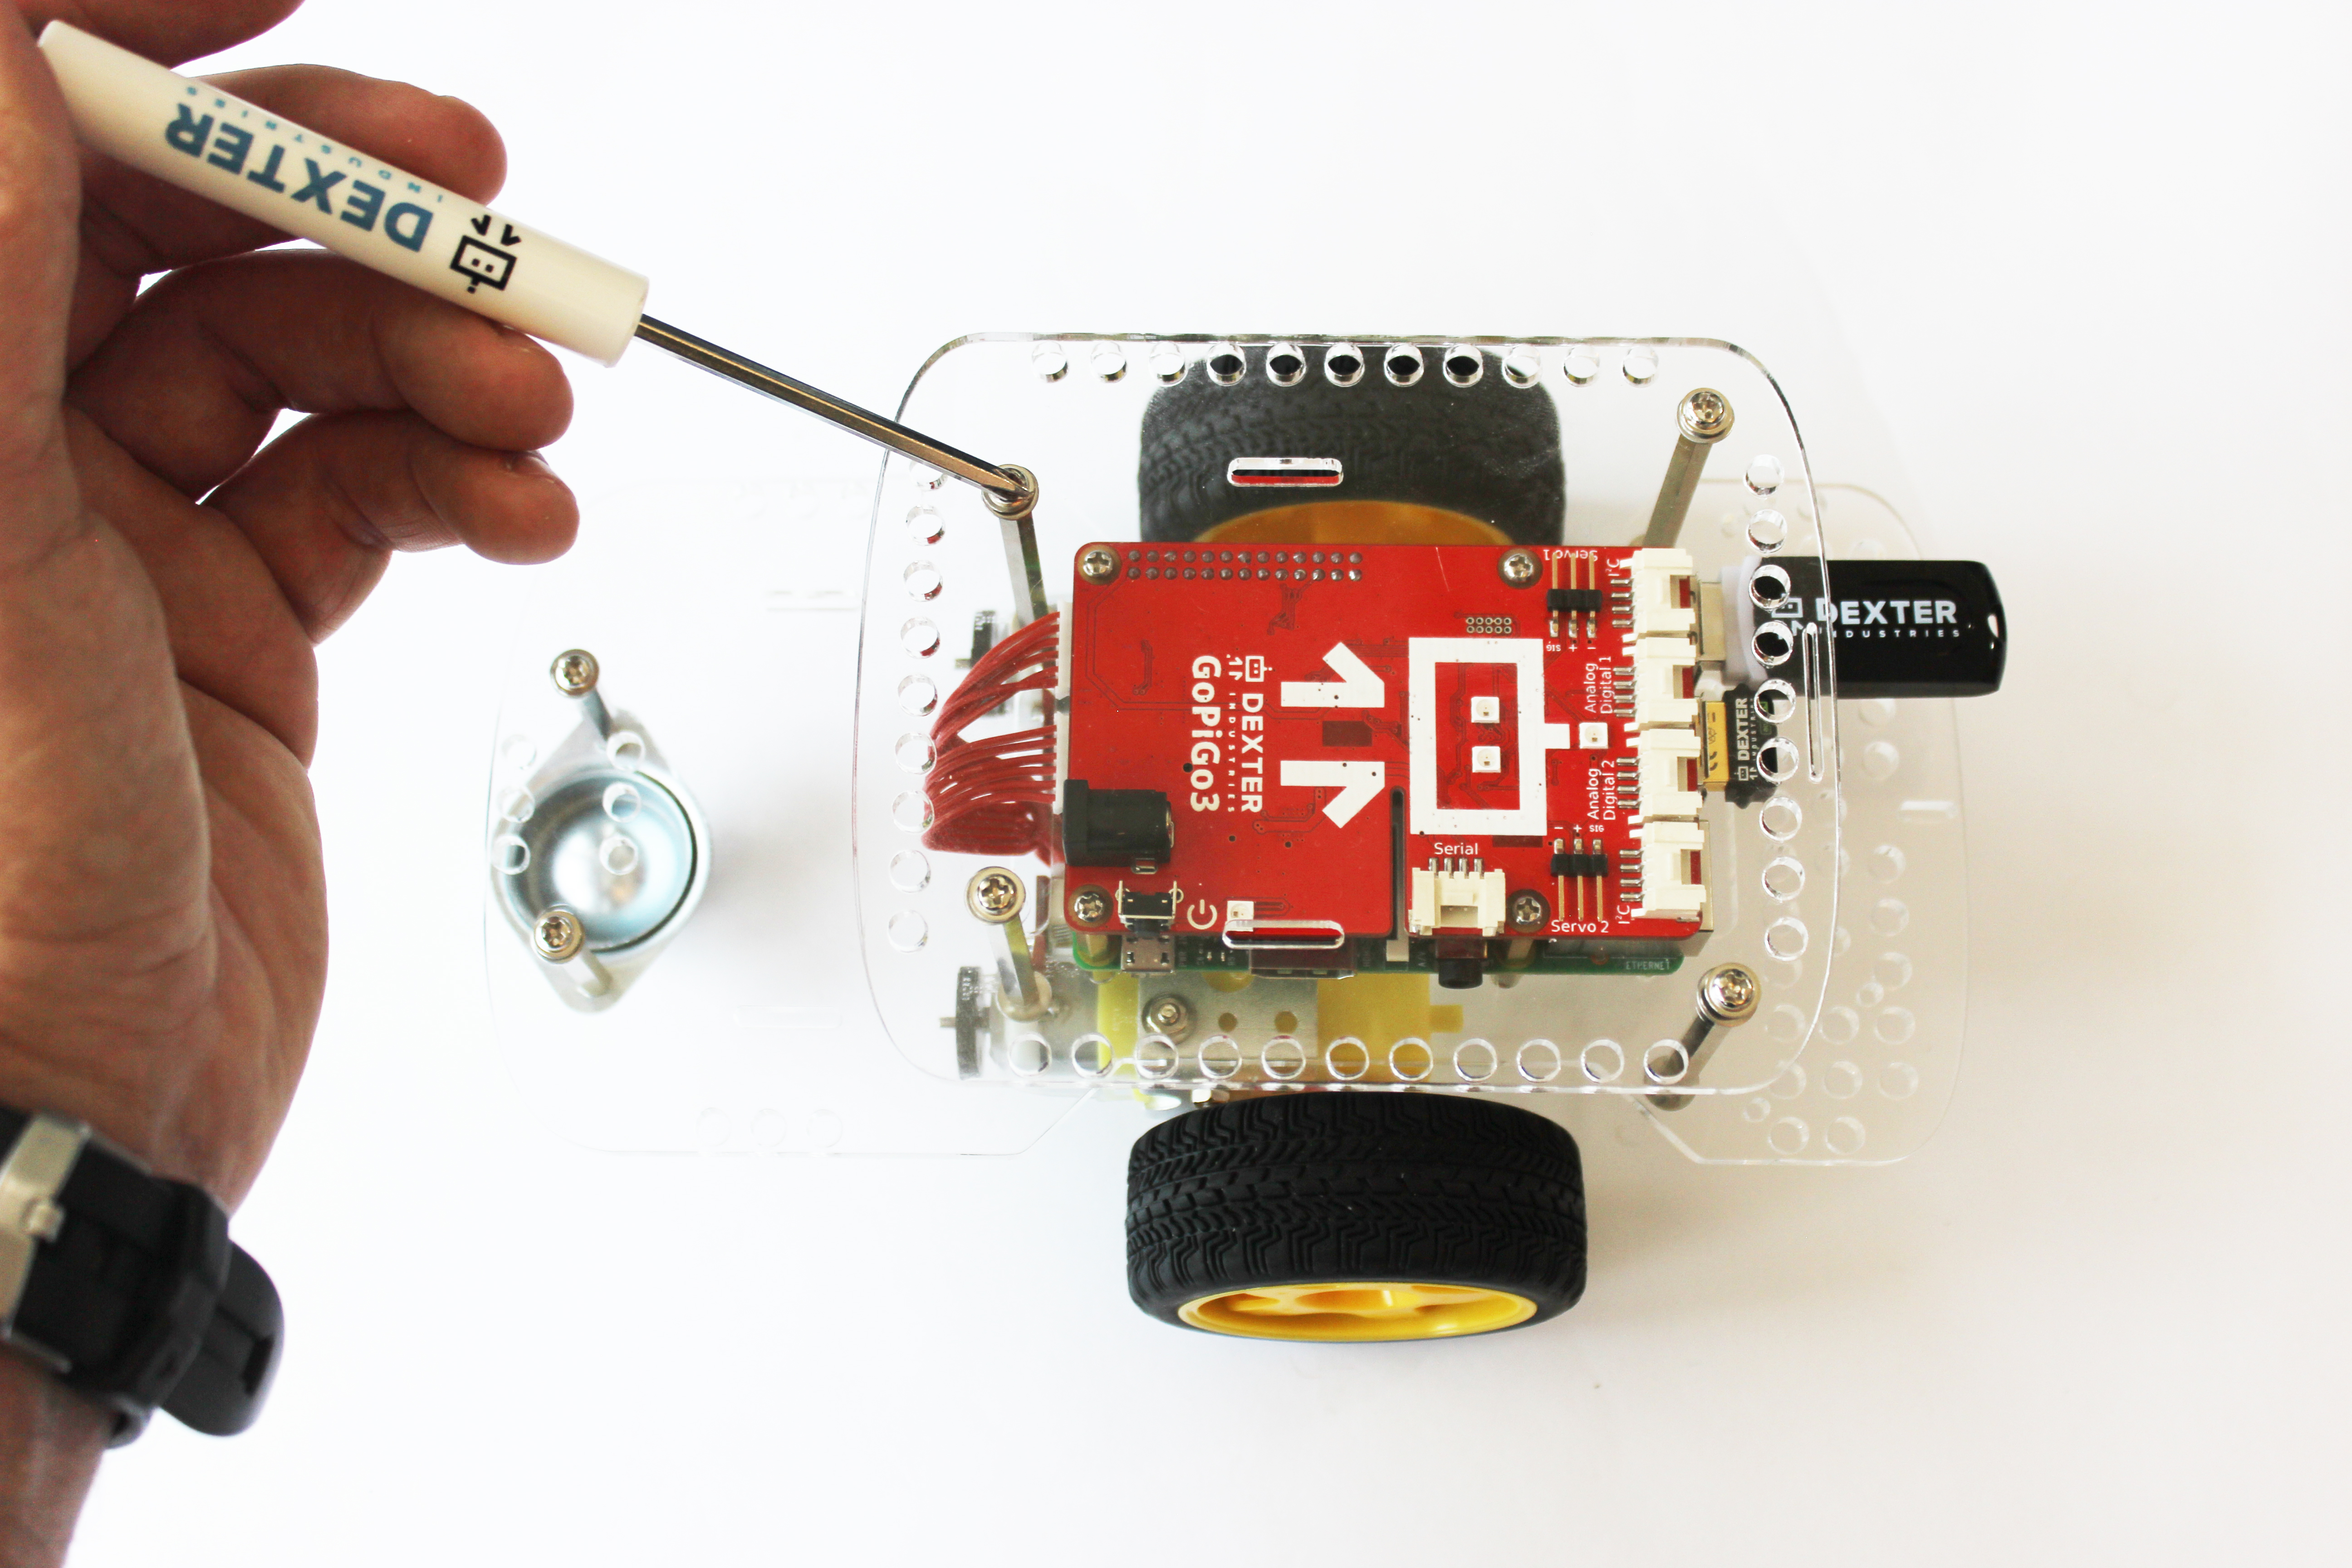
Part 14. Attach the top acrylic canopy
What you’ll need:
- Hardware from the large bag: (E) 4 washers, (D) 4 short screws
- Acrylic canopy
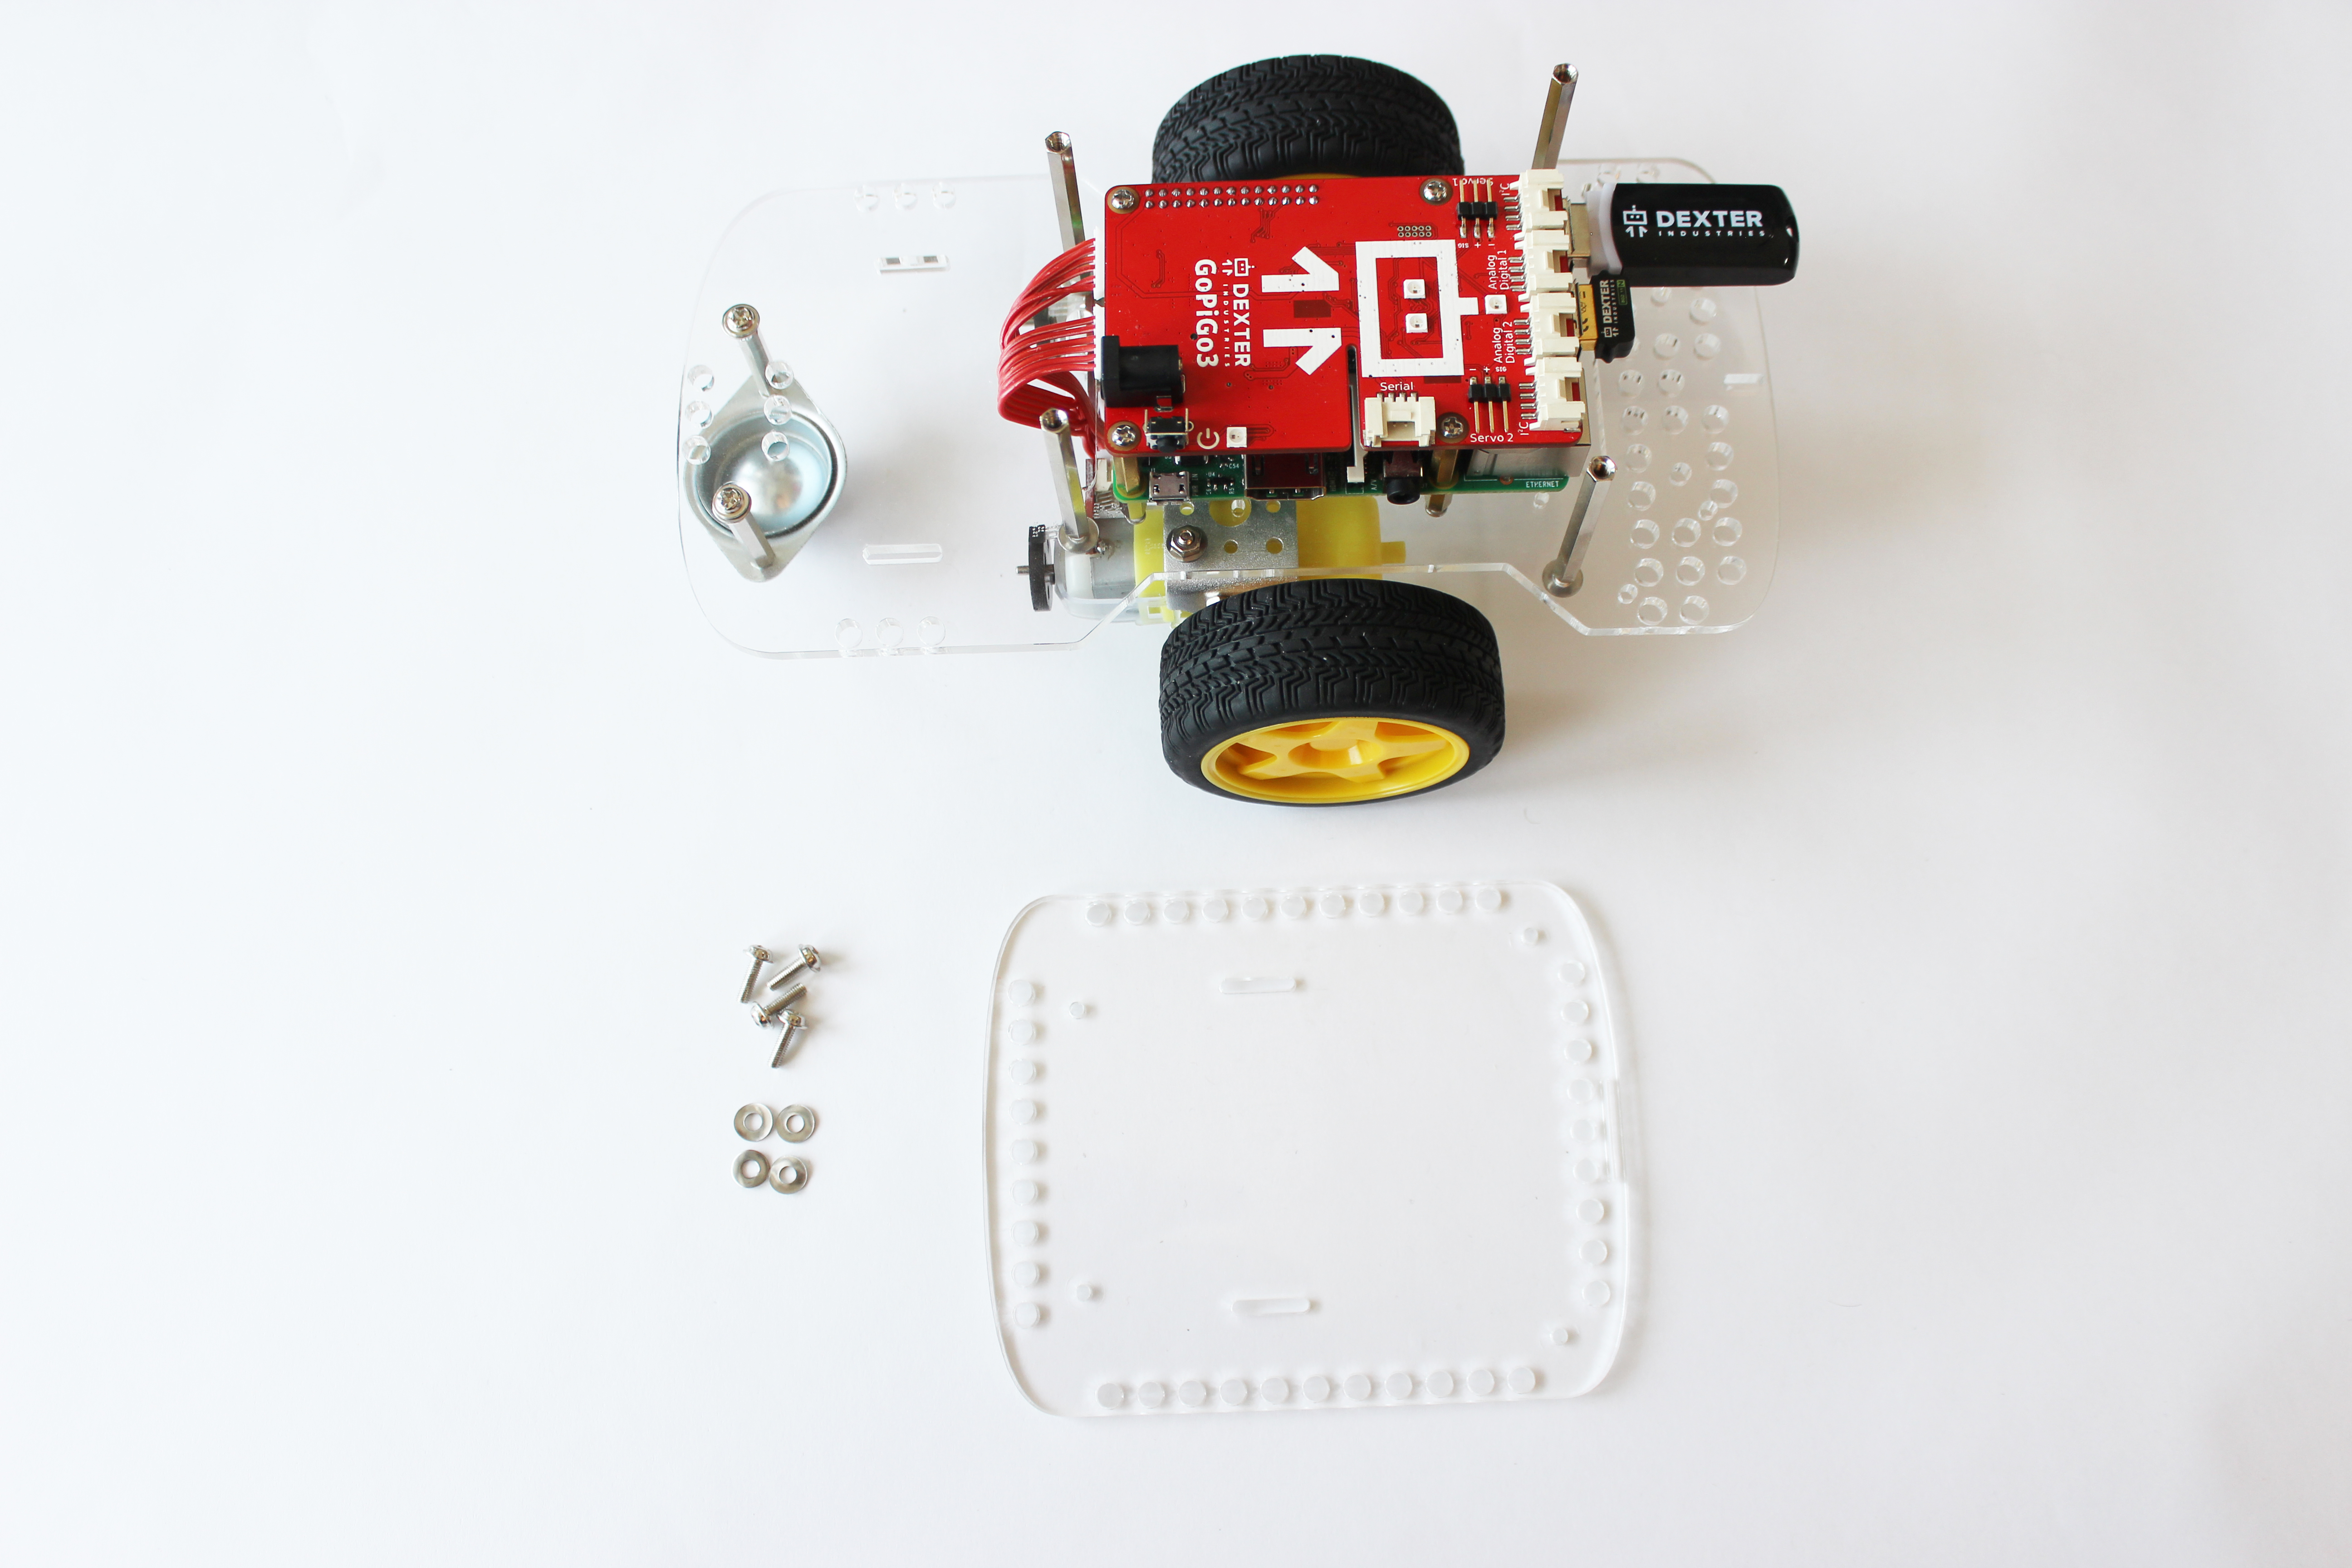
Attach the top:
- Place one washer on each screw.
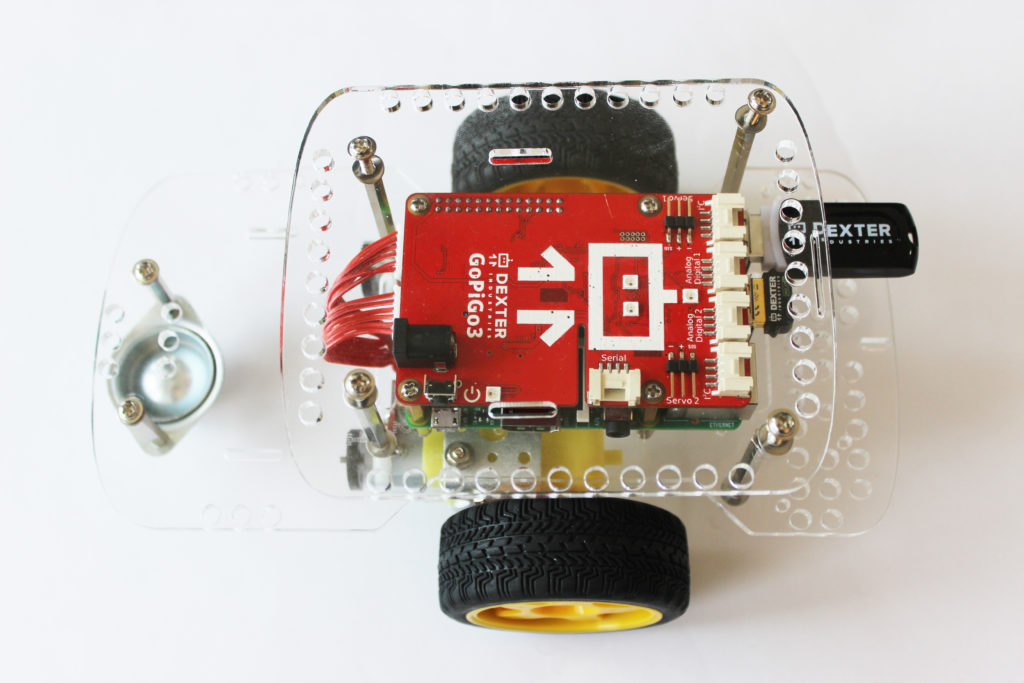
- Place the acrylic canopy on top of the four tall silver posts. There is a small slot cutout on the acrylic for a camera that should be towards the front of the GoPiGo, and the two battery pack slot cutouts should face towards the back.
- Secure the acrylic canopy in place with the screws.
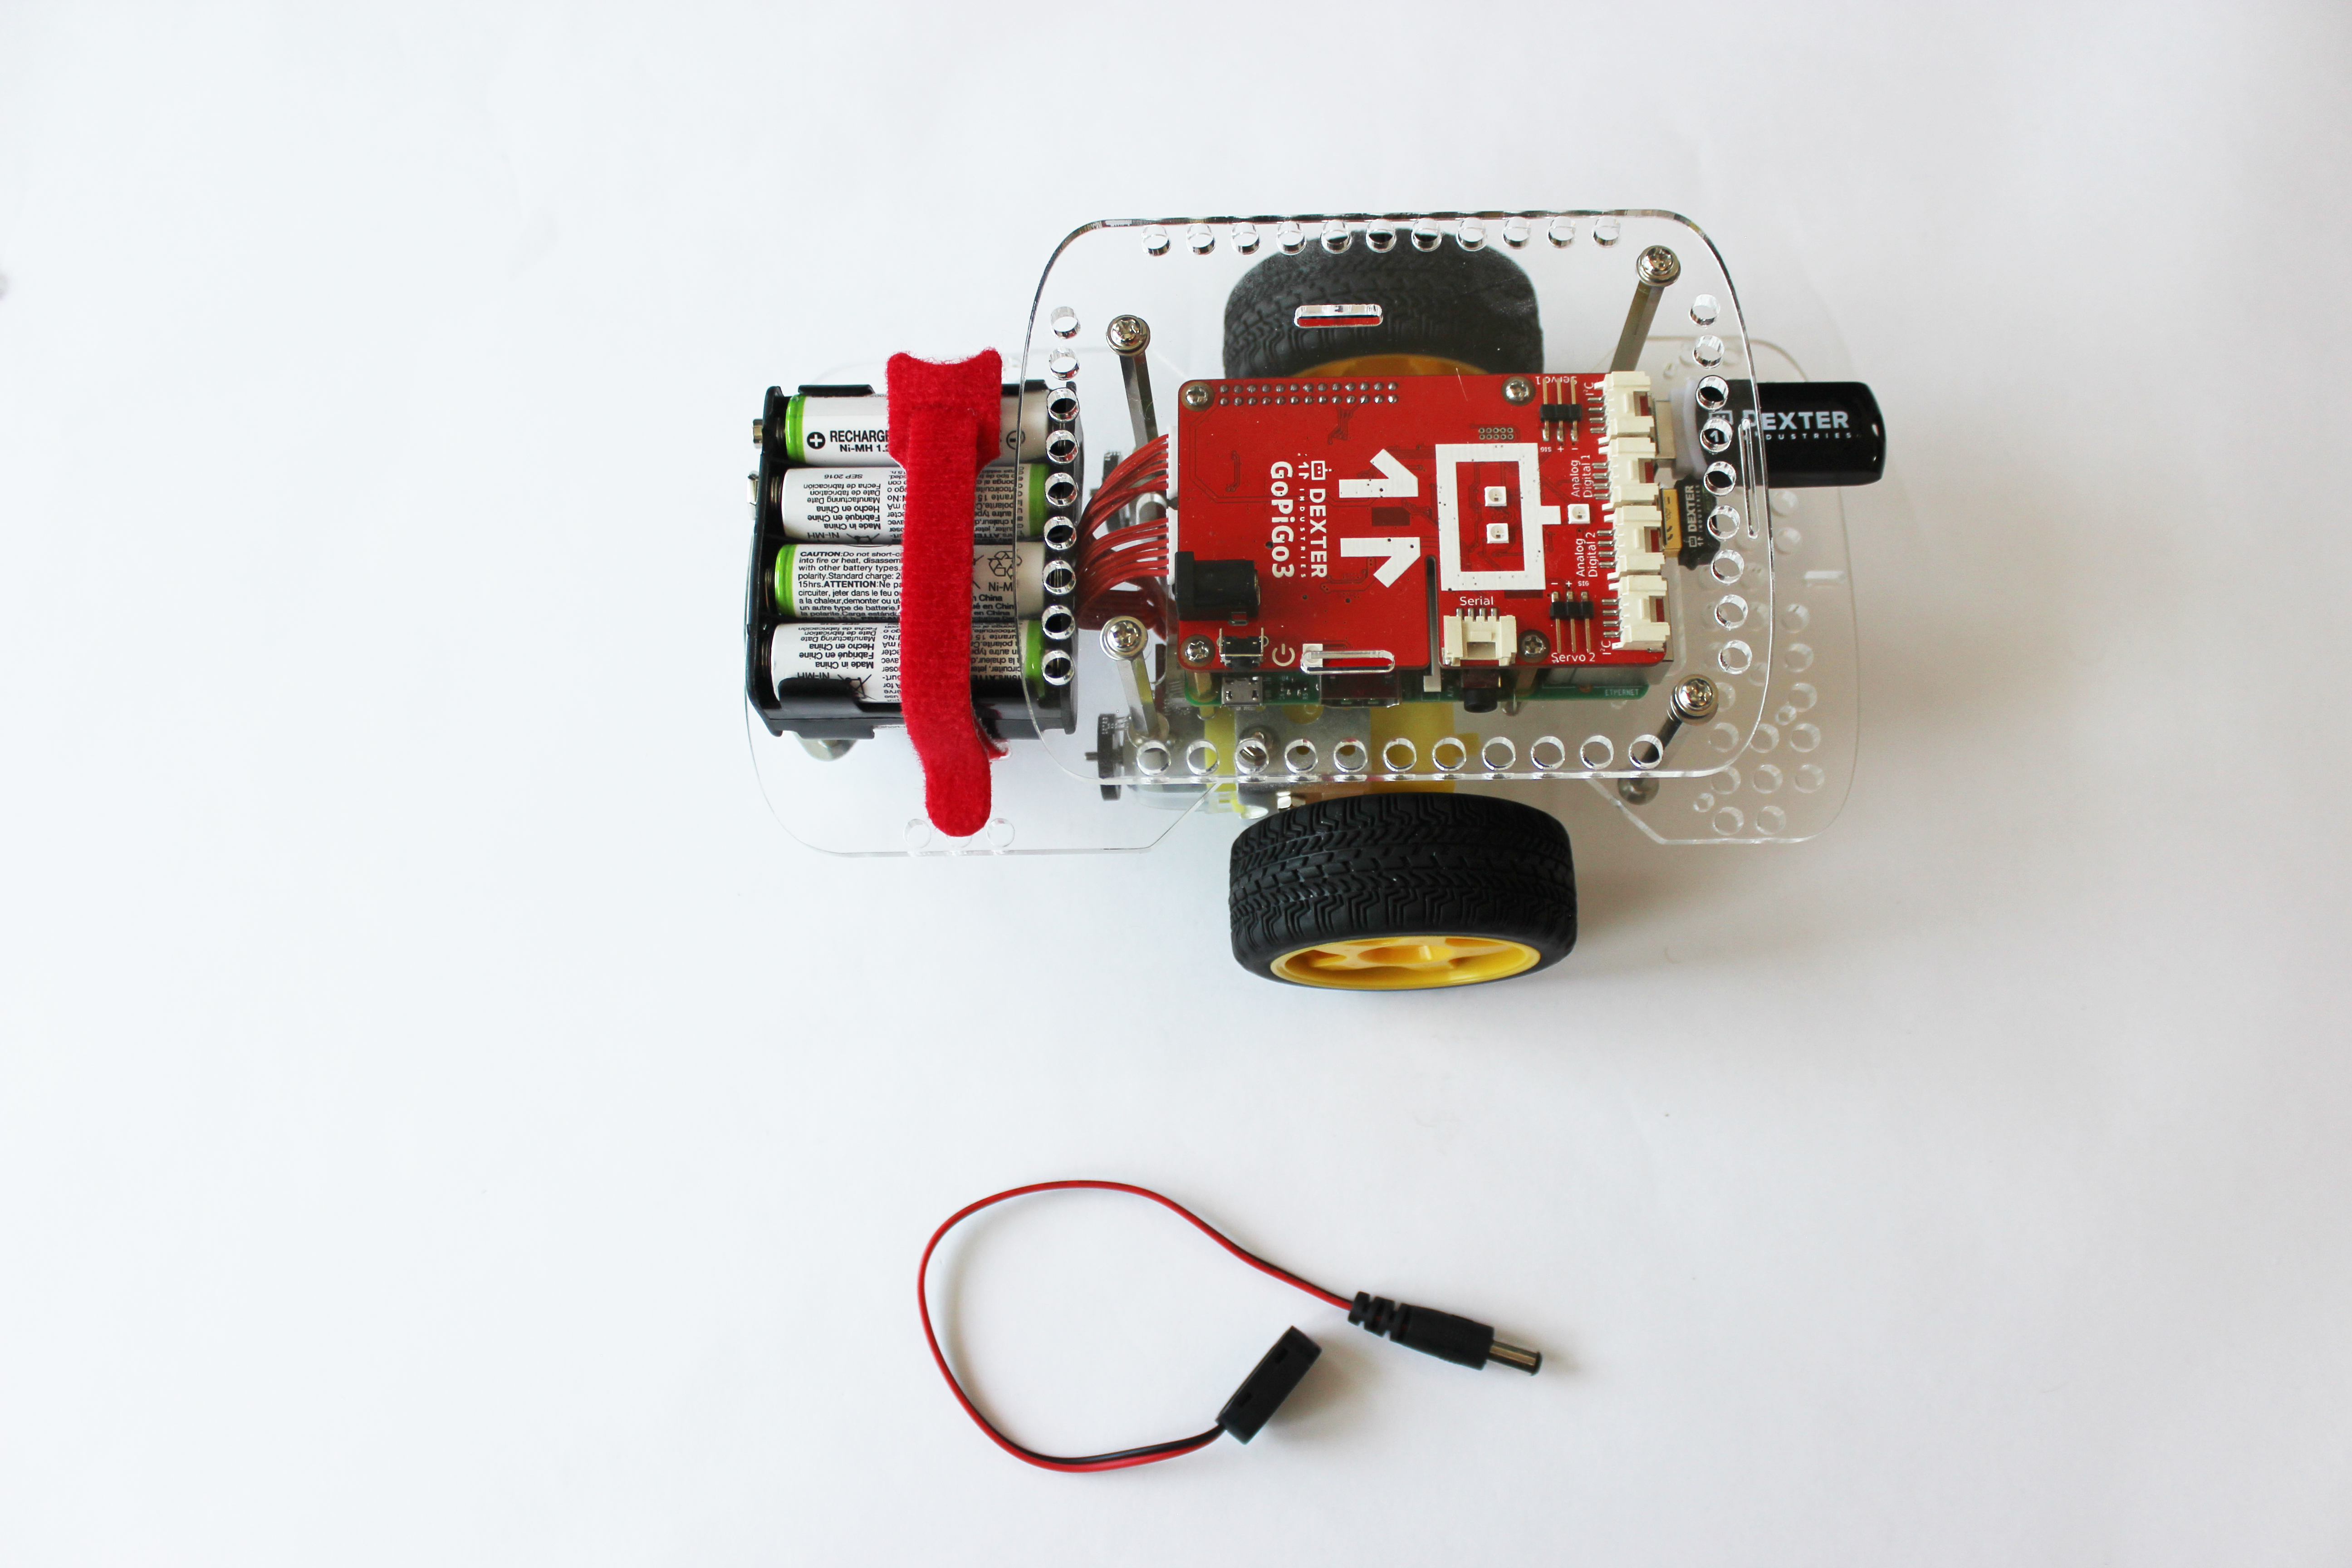
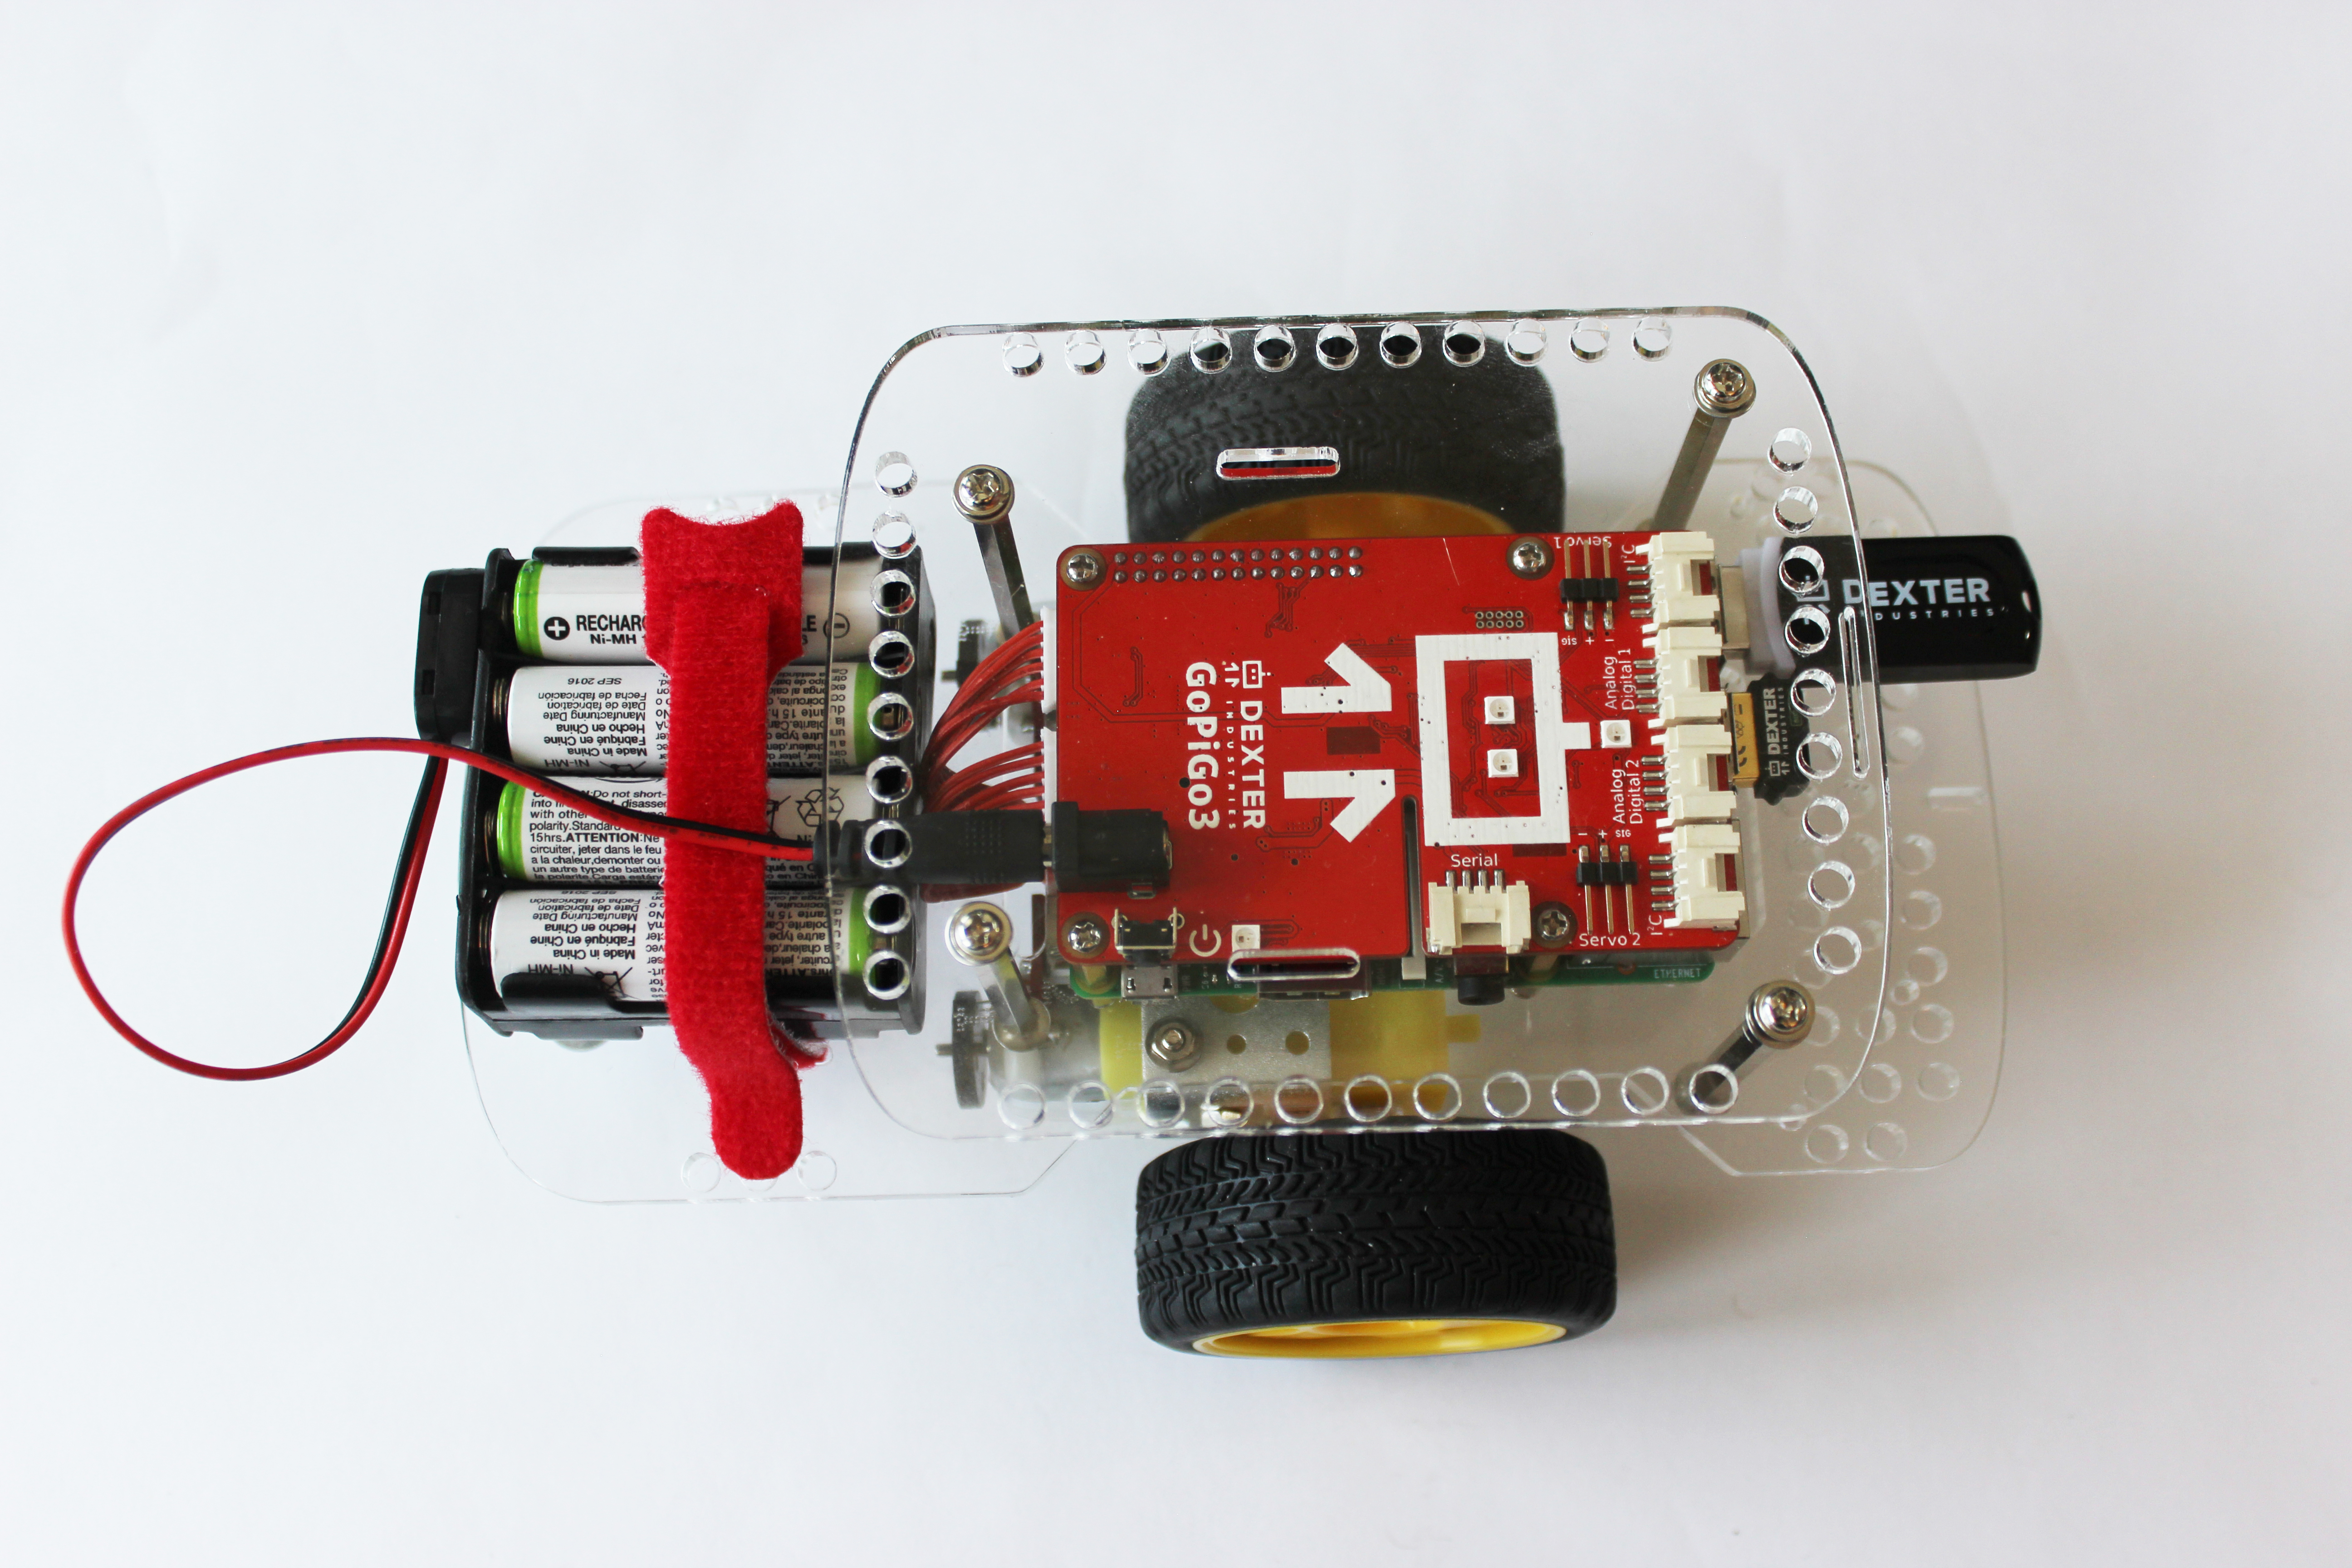
Part 15. Connect the battery pack
What you’ll need:
- Battery Pack
- Battery Pack Cable
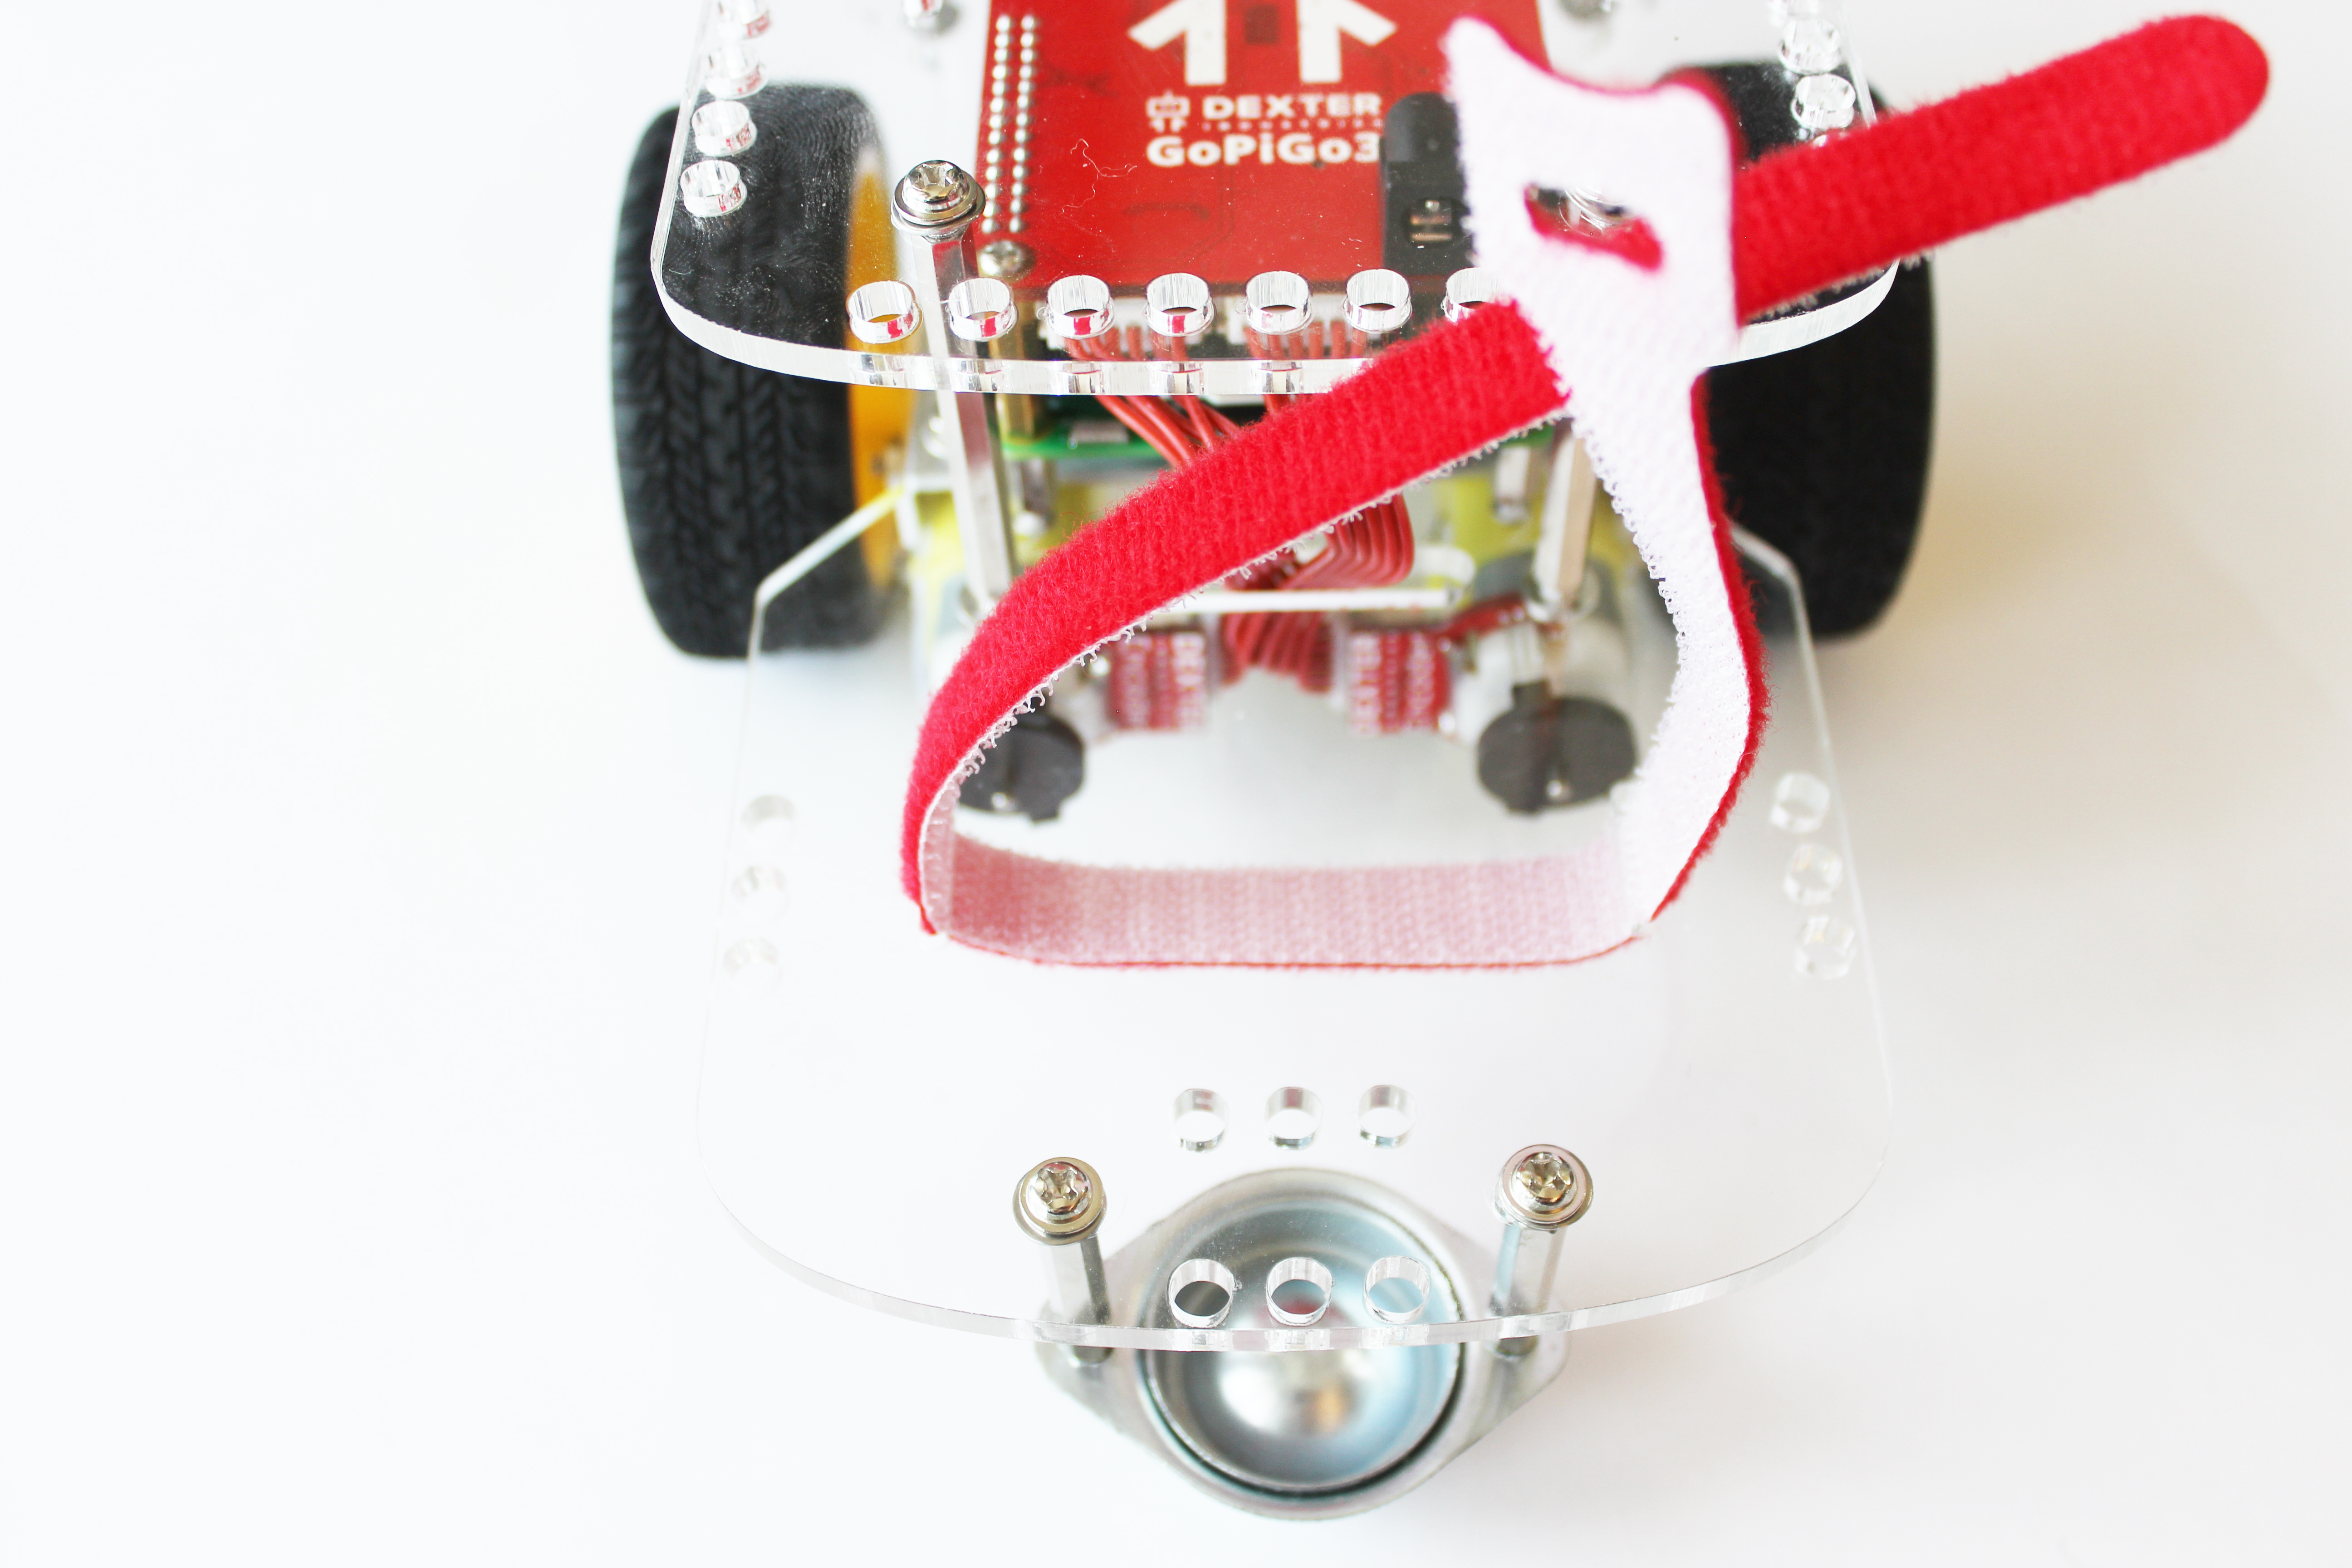
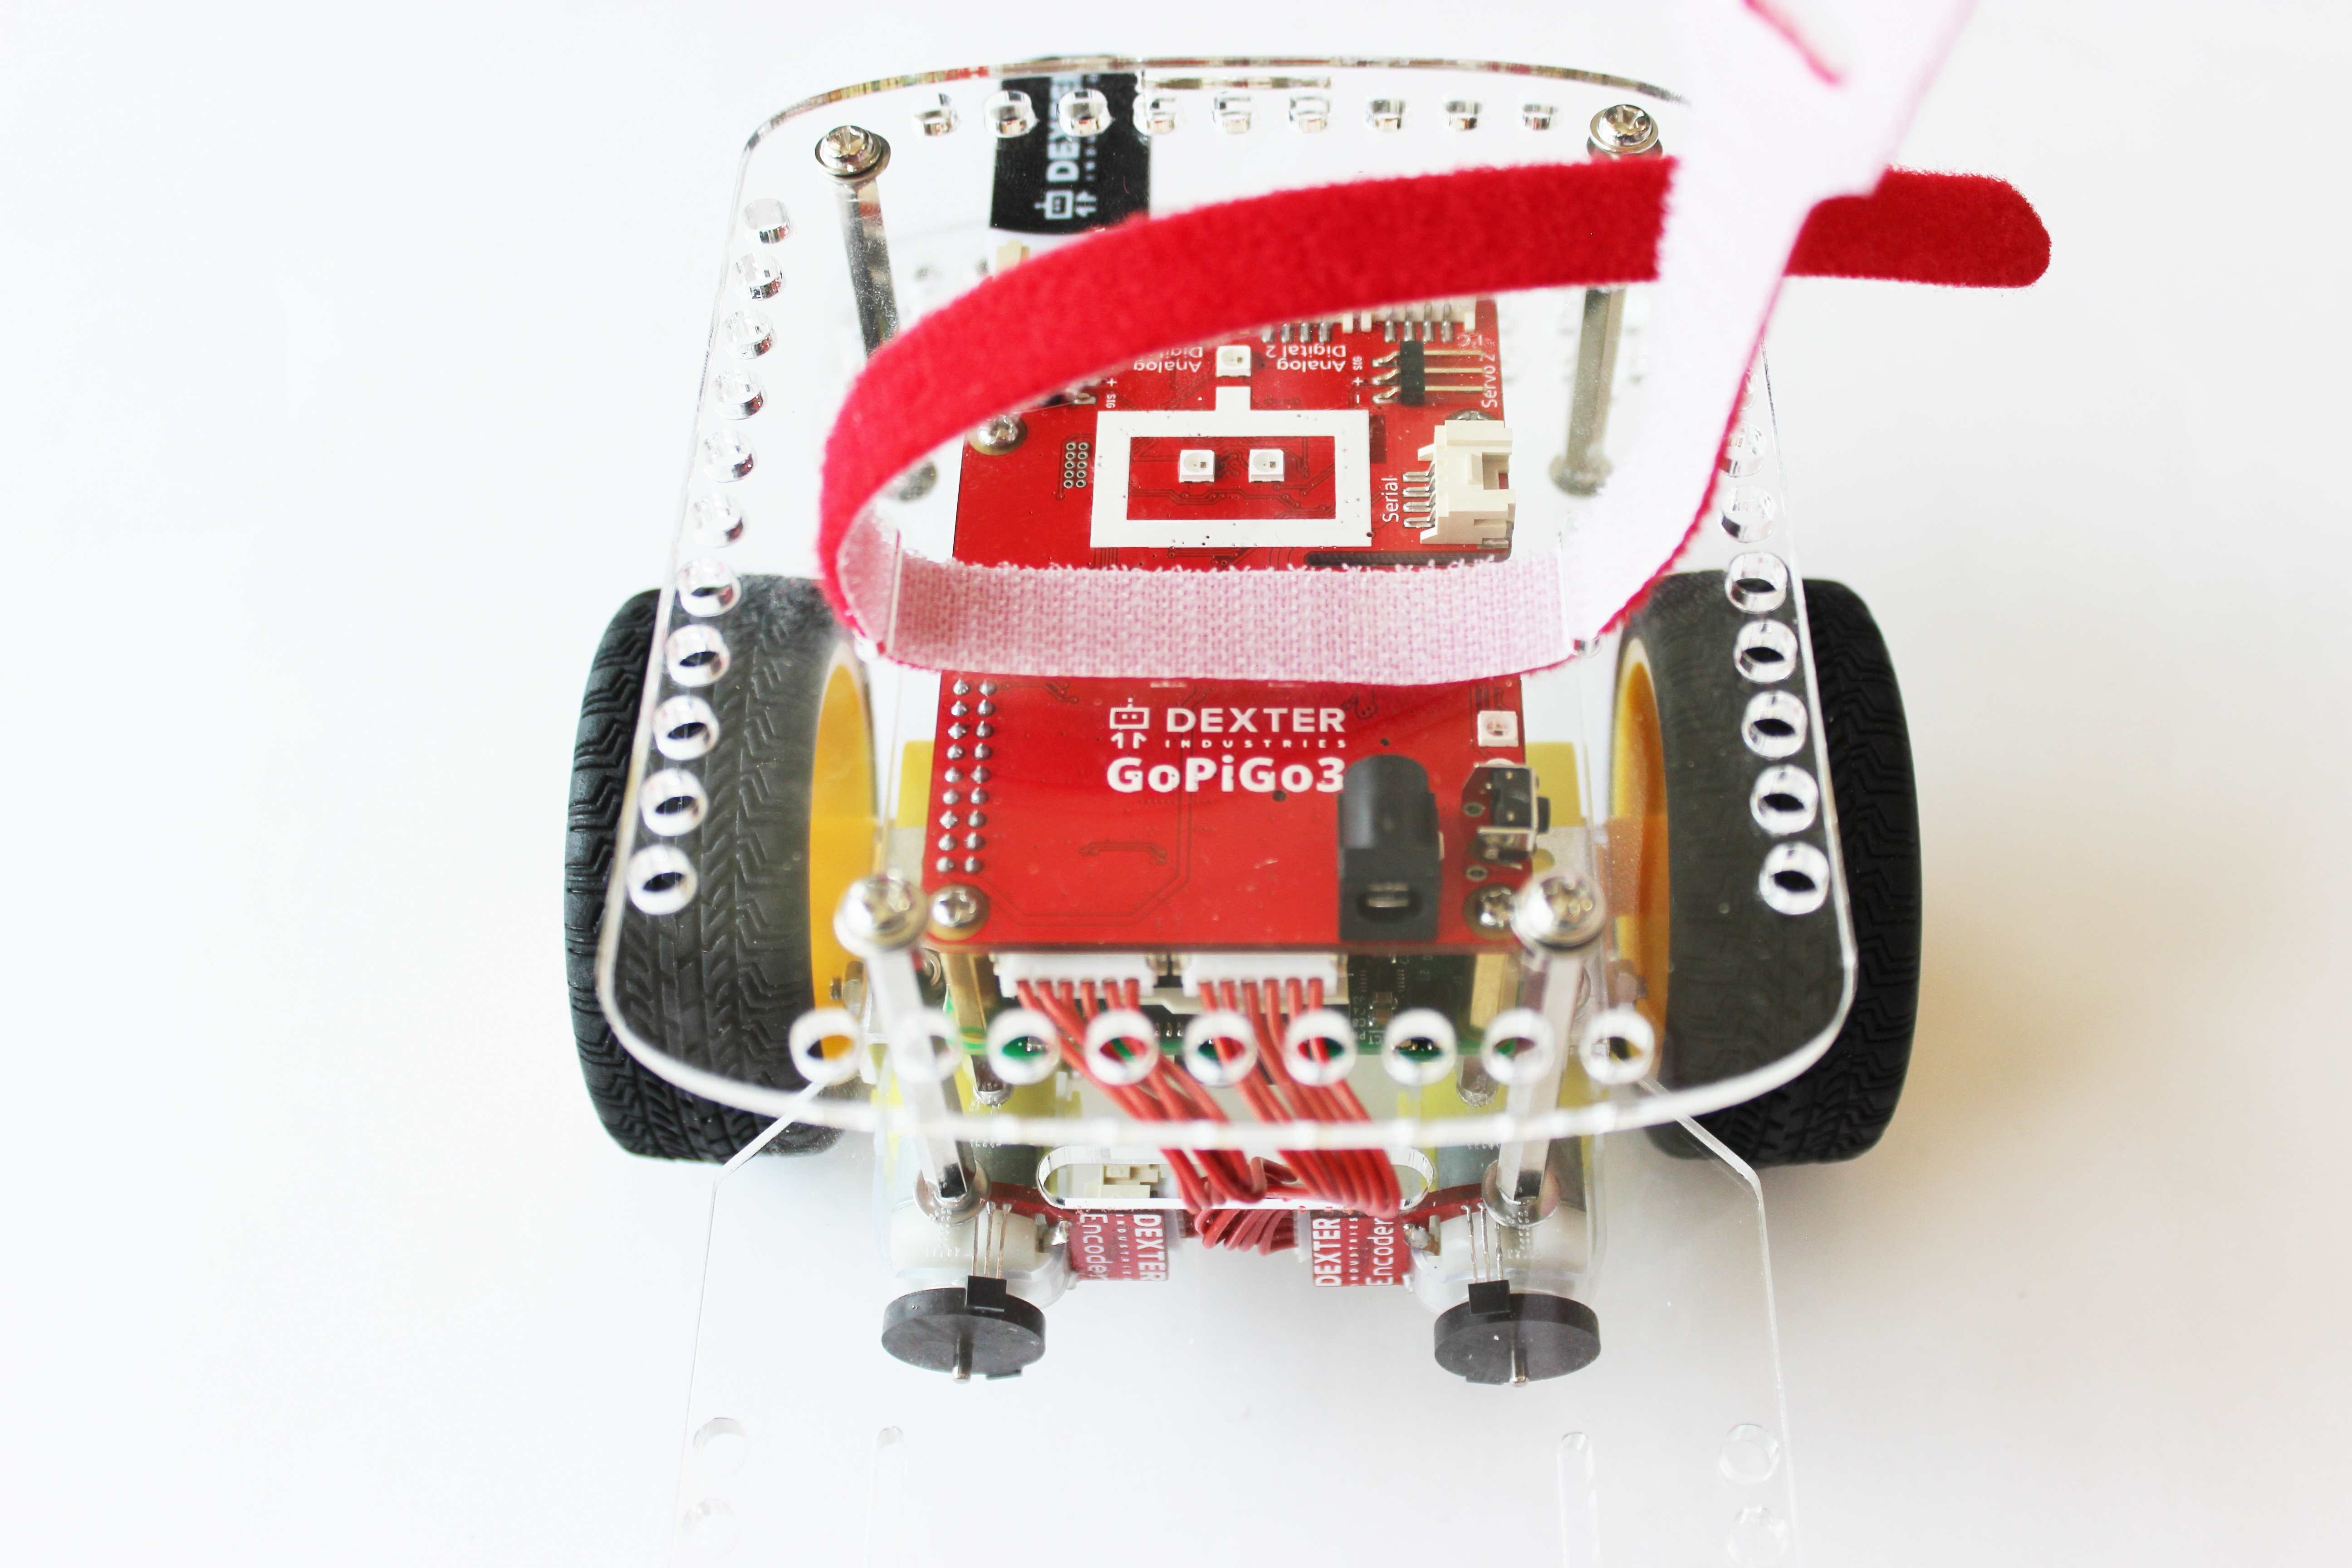
- Velcro Strap
- 8 AA batteries
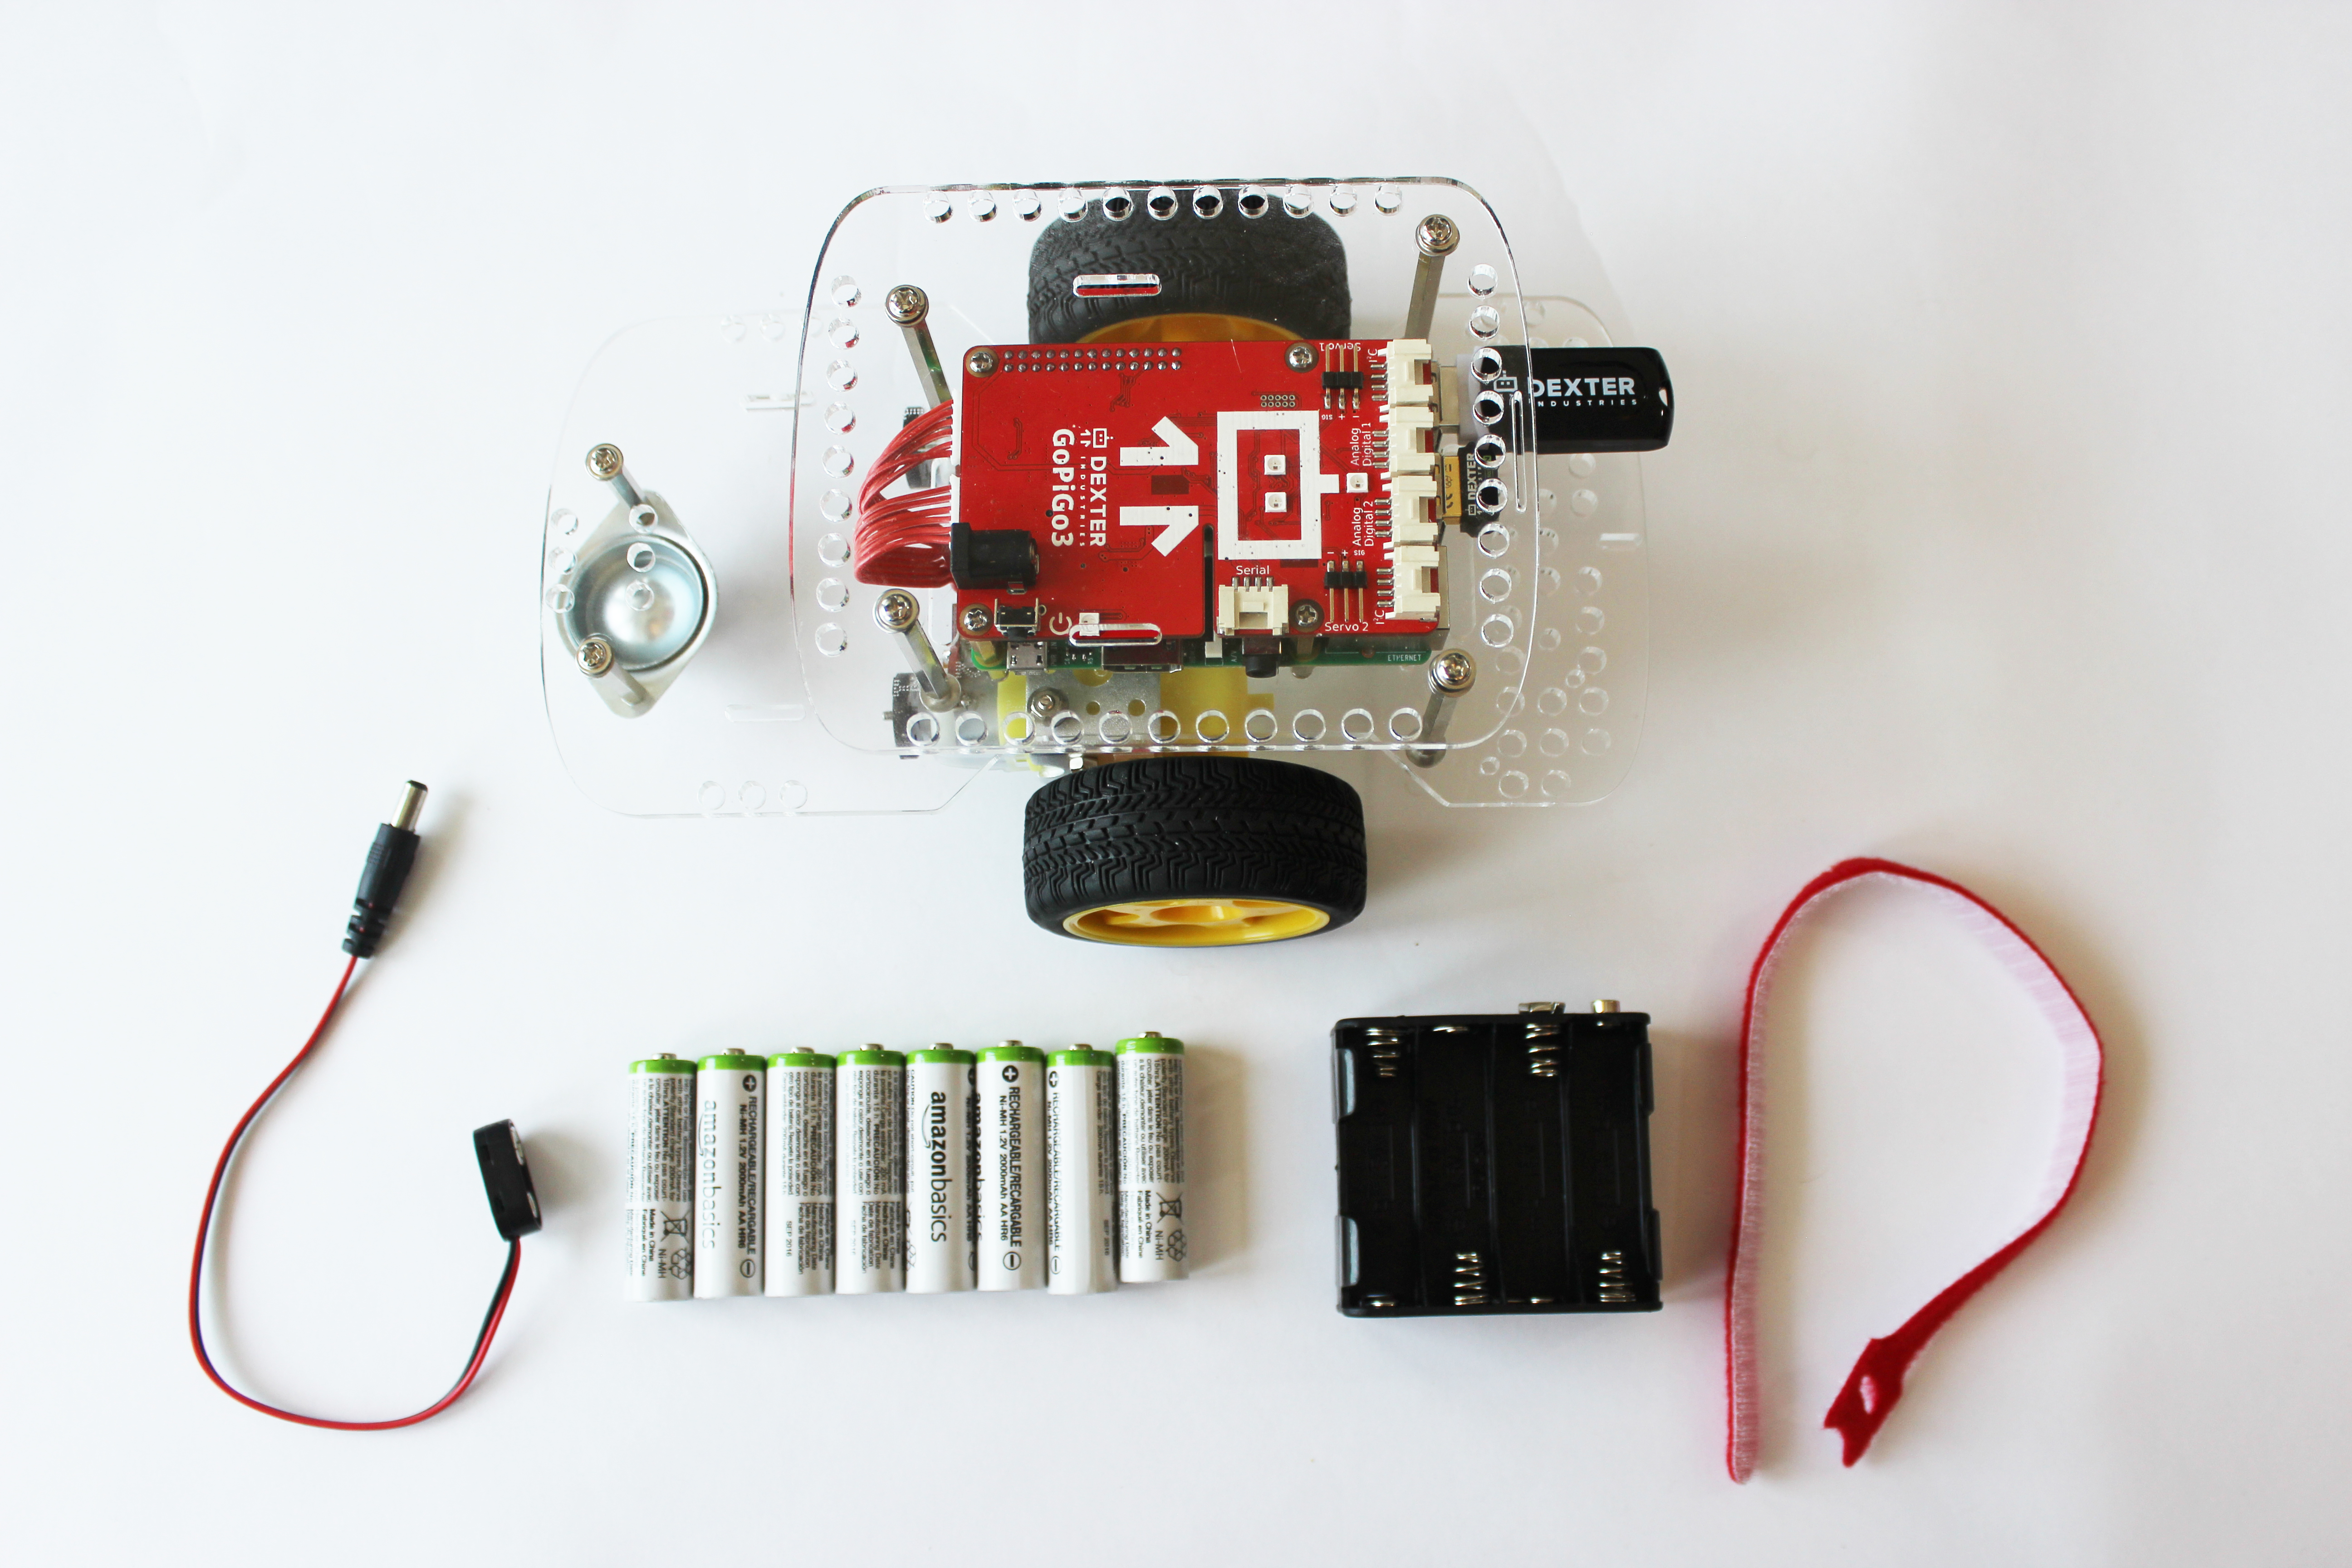
Connect the power:
- Place the 8 AA batteries into the battery pack.
- Thread the velcro strap through the battery strap cutouts on the GoPiGo3 acrylic body.
- Place the battery cable in the black power port of the GoPiGo3 Board (next to the power button).
- Secure the battery pack to the GoPiGo3 with the velcro as shown.

- Connect the battery pack to the battery cable.
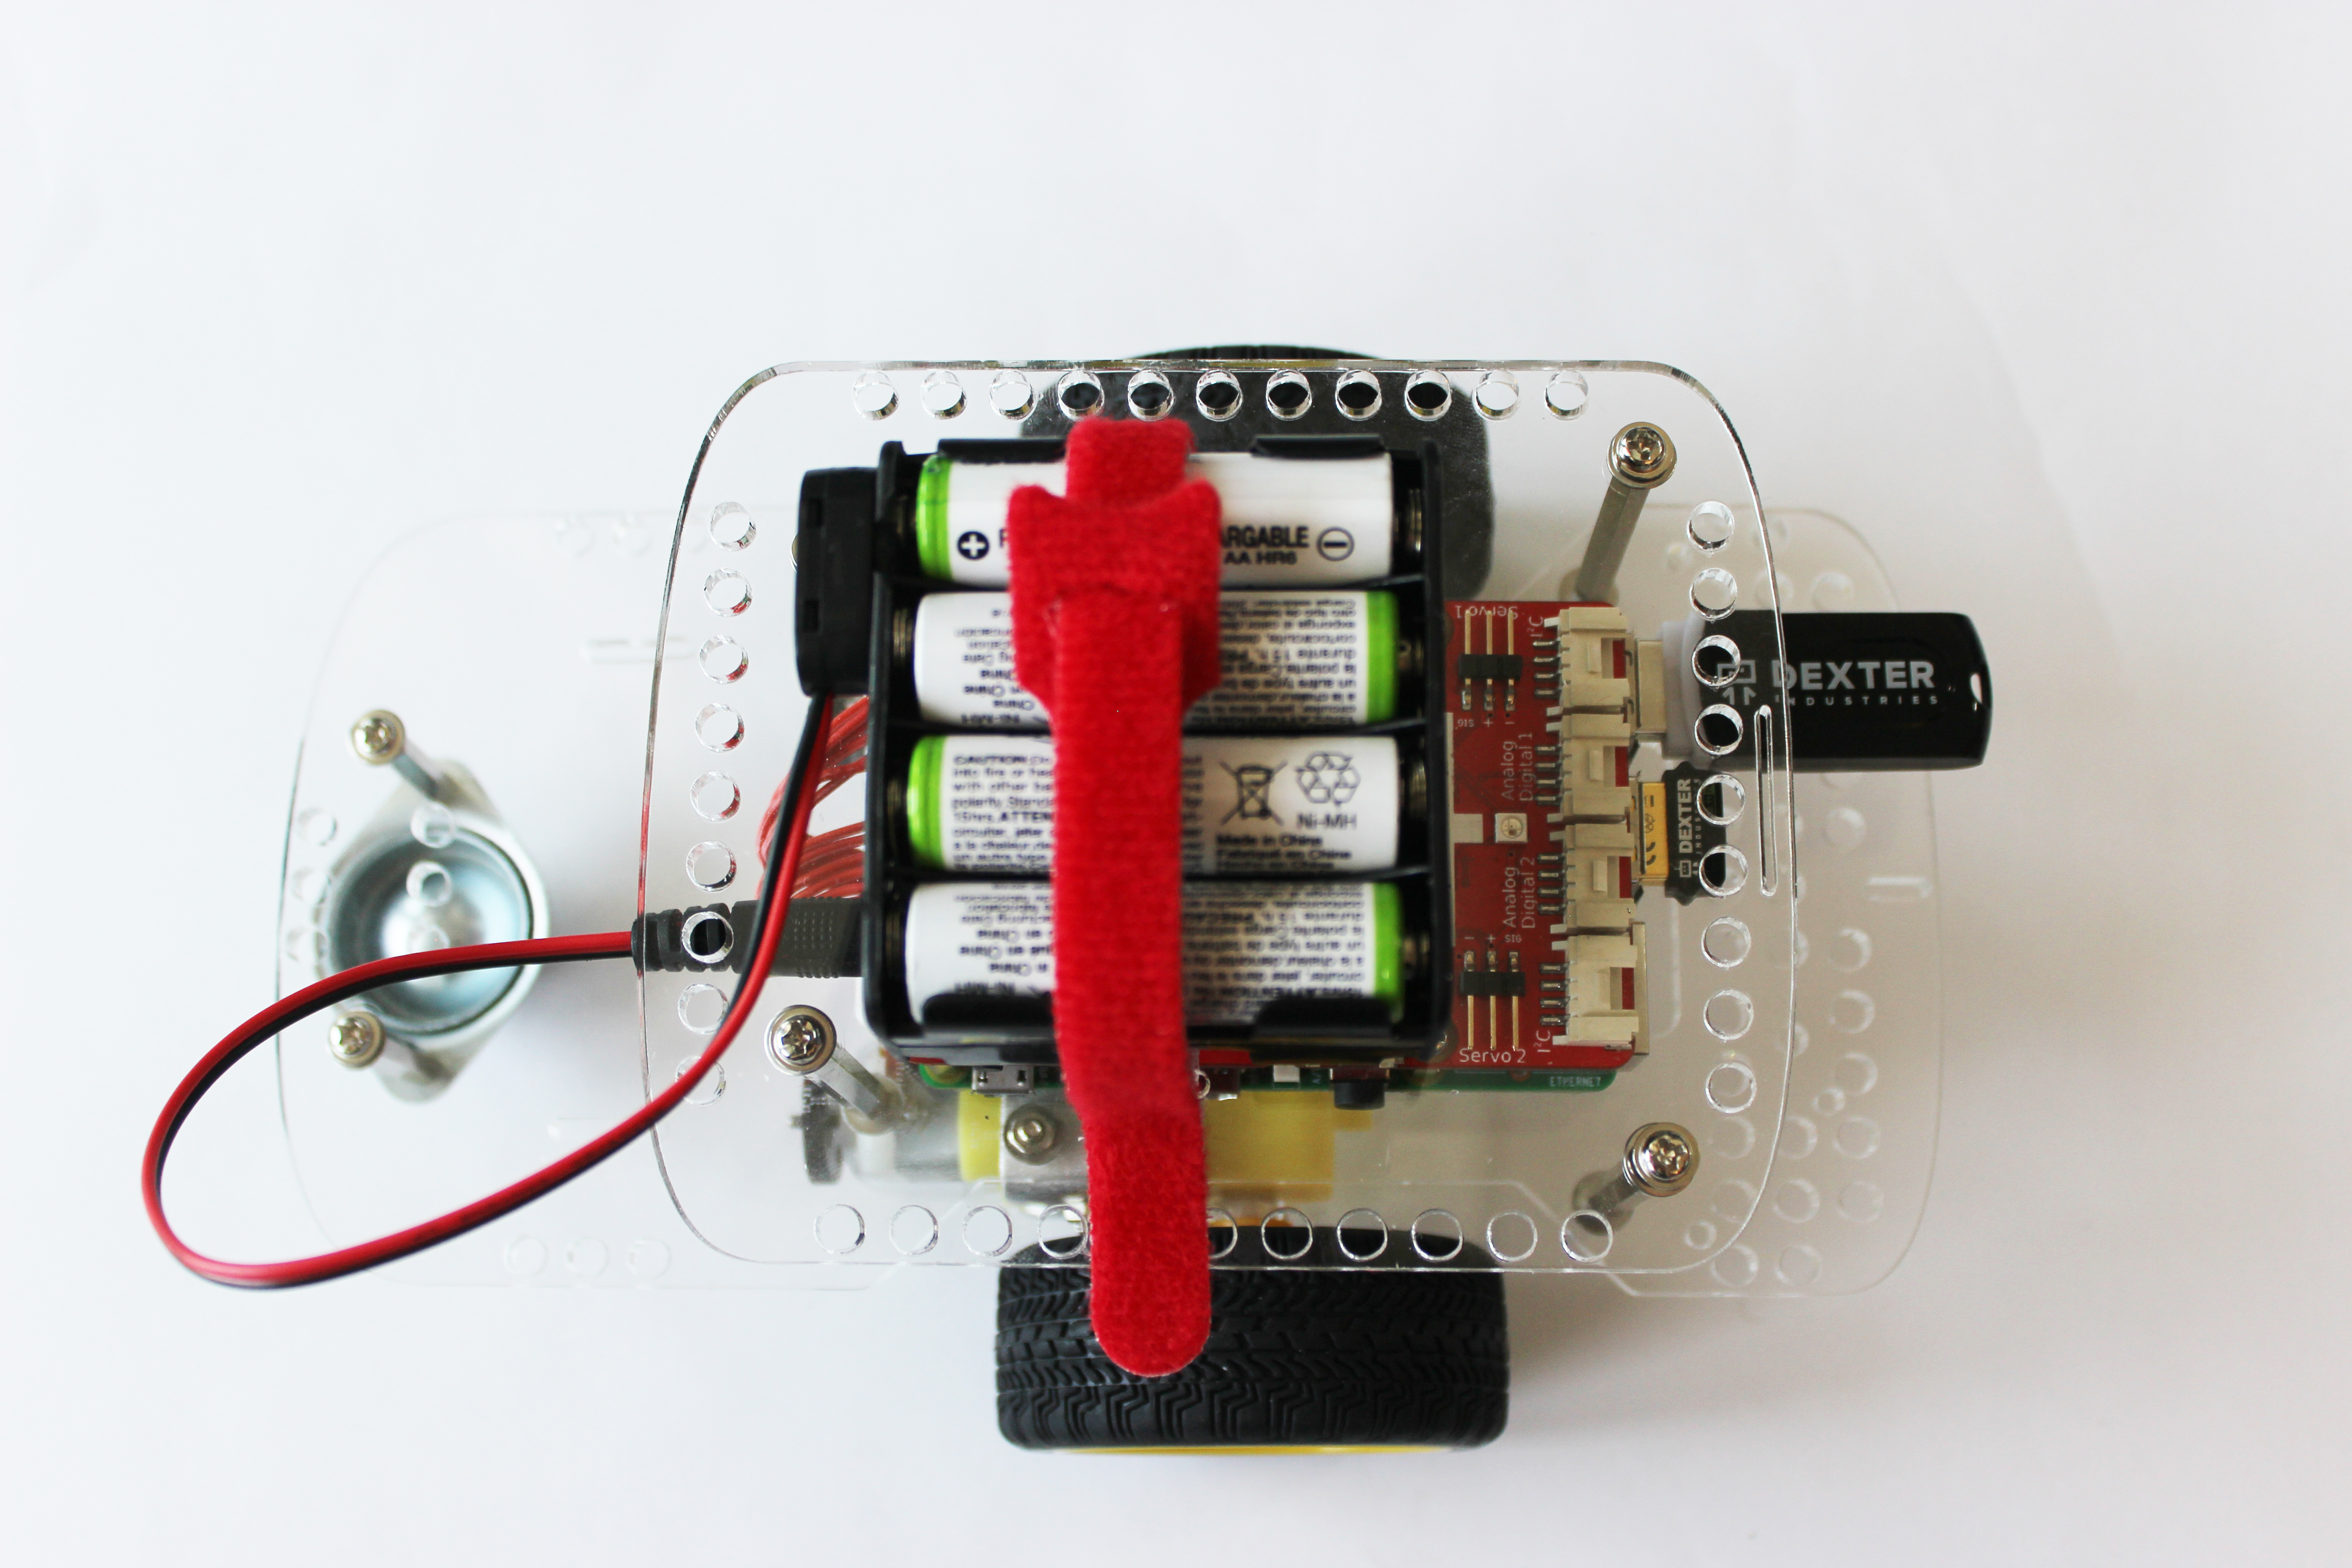
A Second Option:
The battery pack can also be placed on top of the canopy of the GoPiGo3. You can see in the picture below, there are slots on the canopy for attaching the battery pack to the canopy. This places most of the GoPiGo3 weight on the front wheels and improves performance on rough surfaces (like carpet). Below is a picture of the GoPiGo3 with the batteries attached to the canopy.
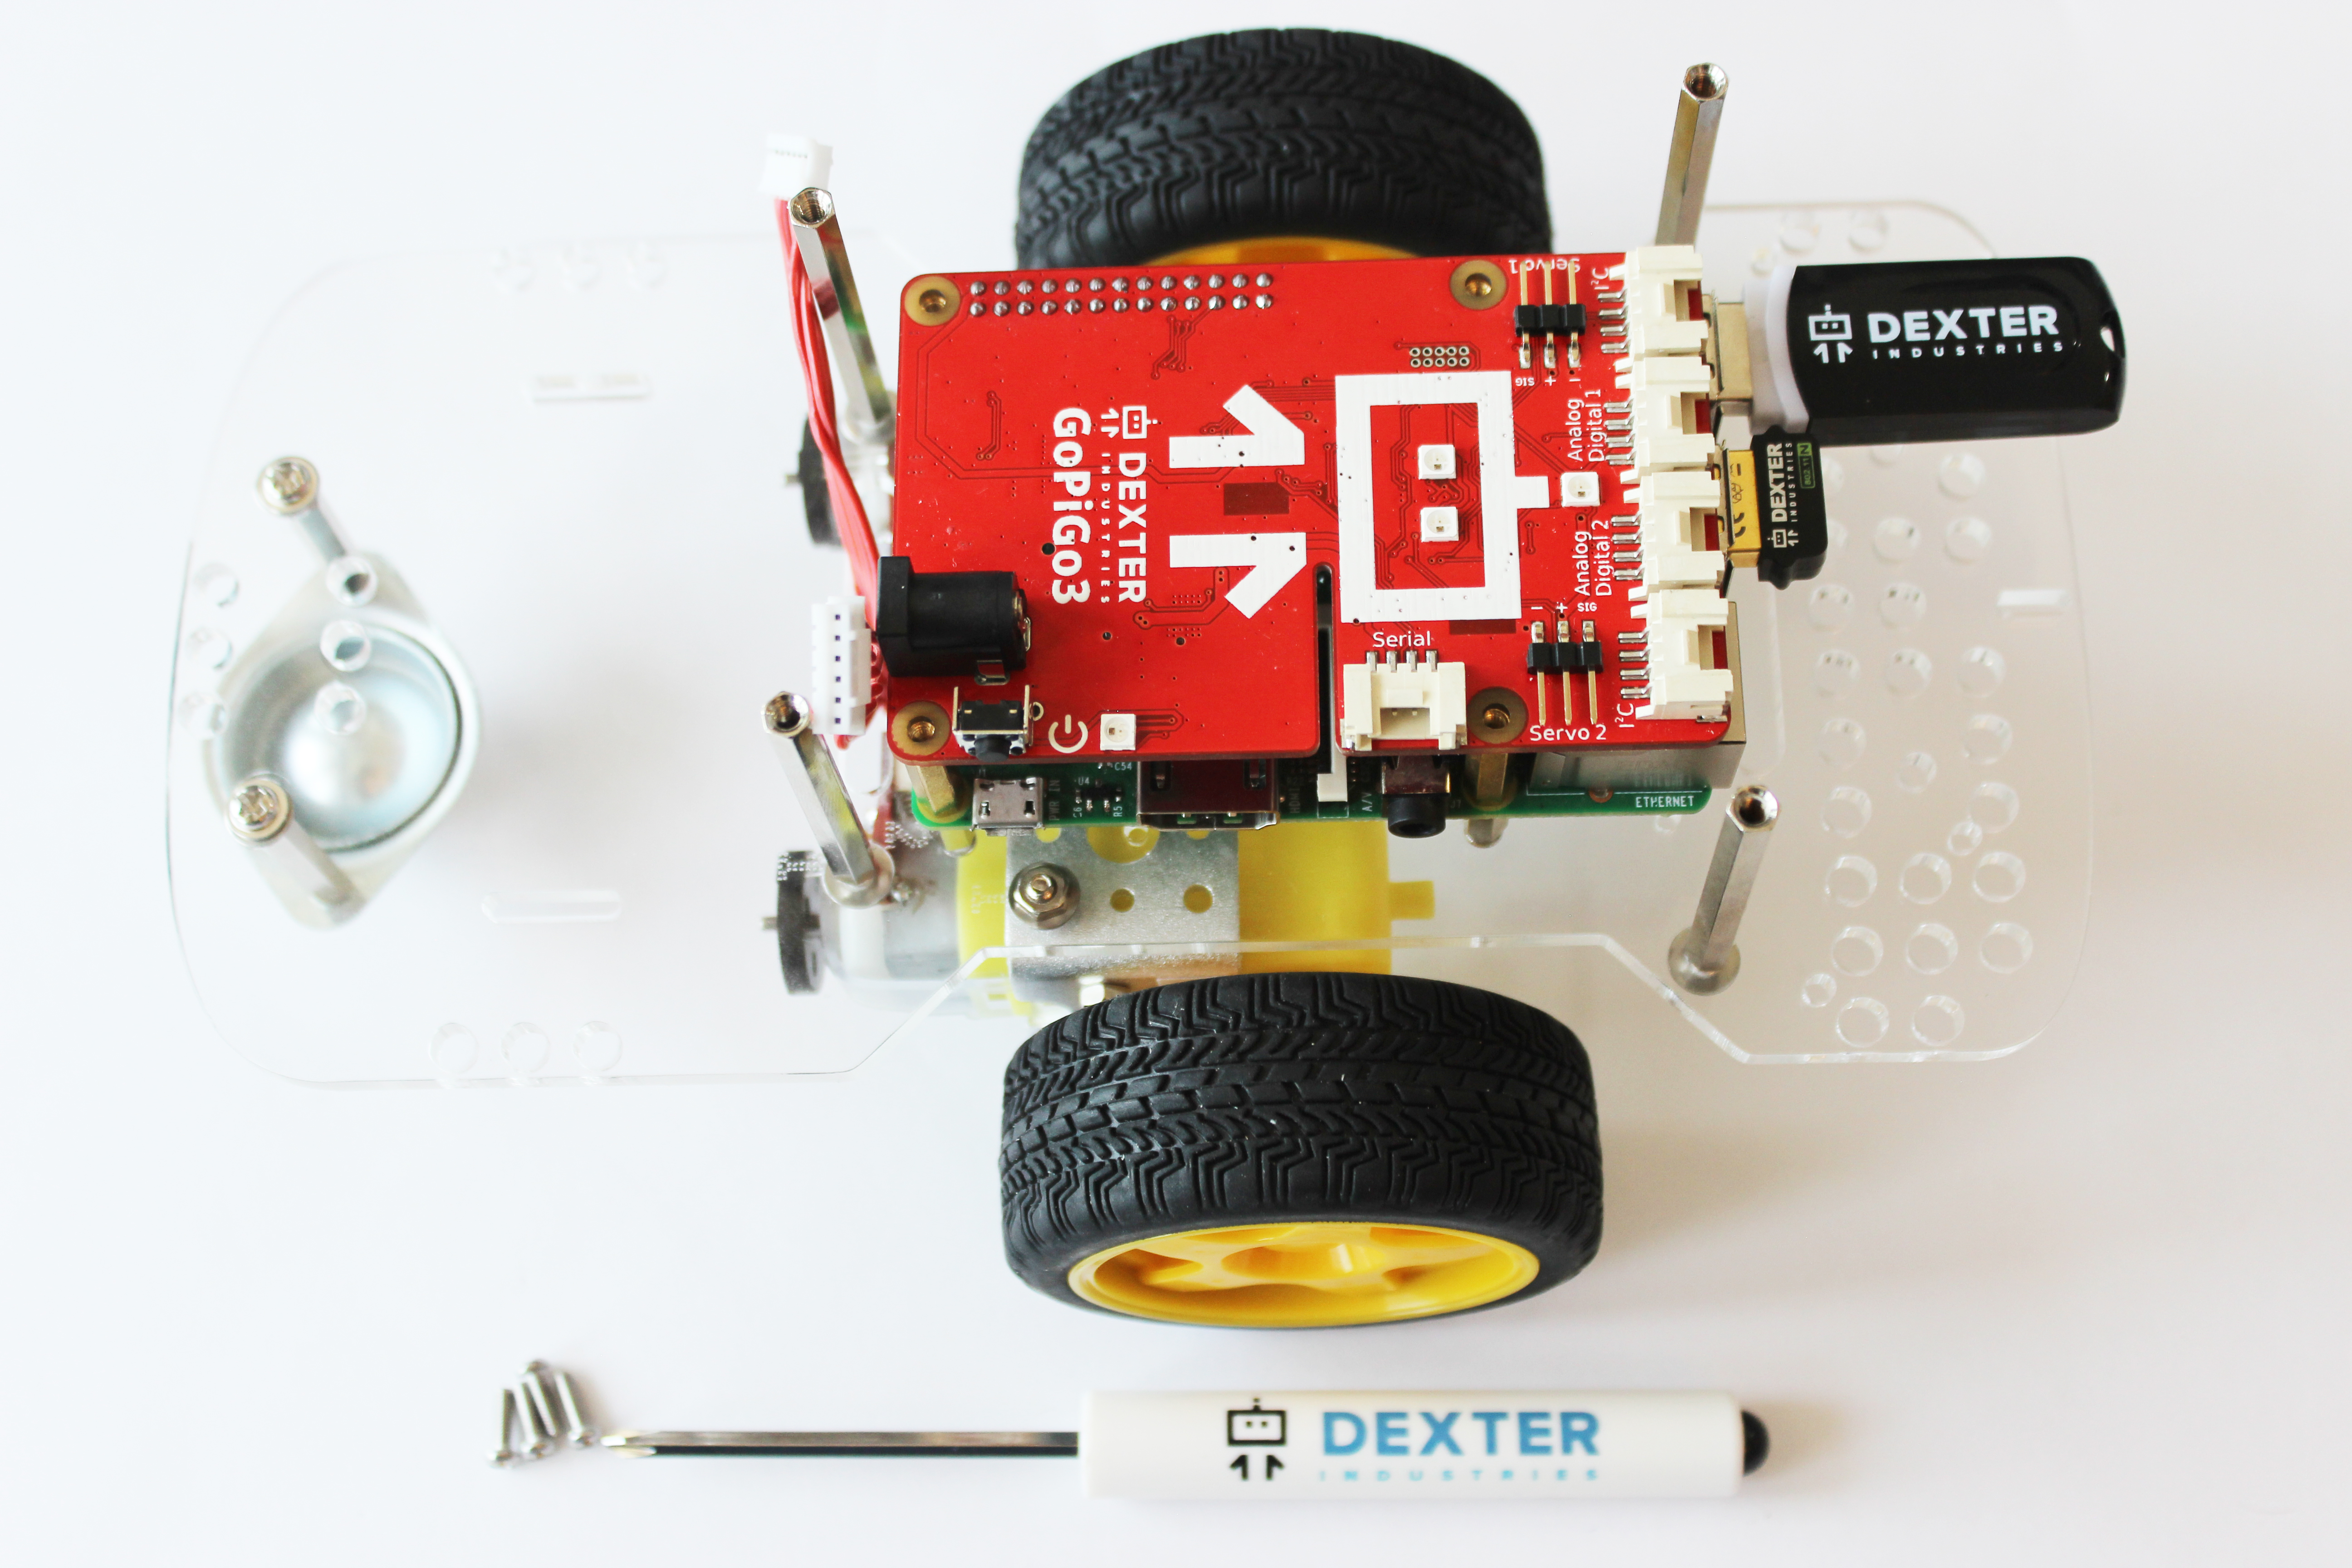
Finished! Now Connect!
Now with your GoPiGo3 assembled, you are ready to move on to connecting to your robot. Click here to learn how to connect to your robot.
Want to attach the Raspberry Pi Camera, Distance Sensor, or Ultrasonic to your GoPiGo3? Click here!
Questions?
Need some help? Have a question or a suggestion? Ask on the forums here.