BrickPi3 Technical and Design Details
Overview
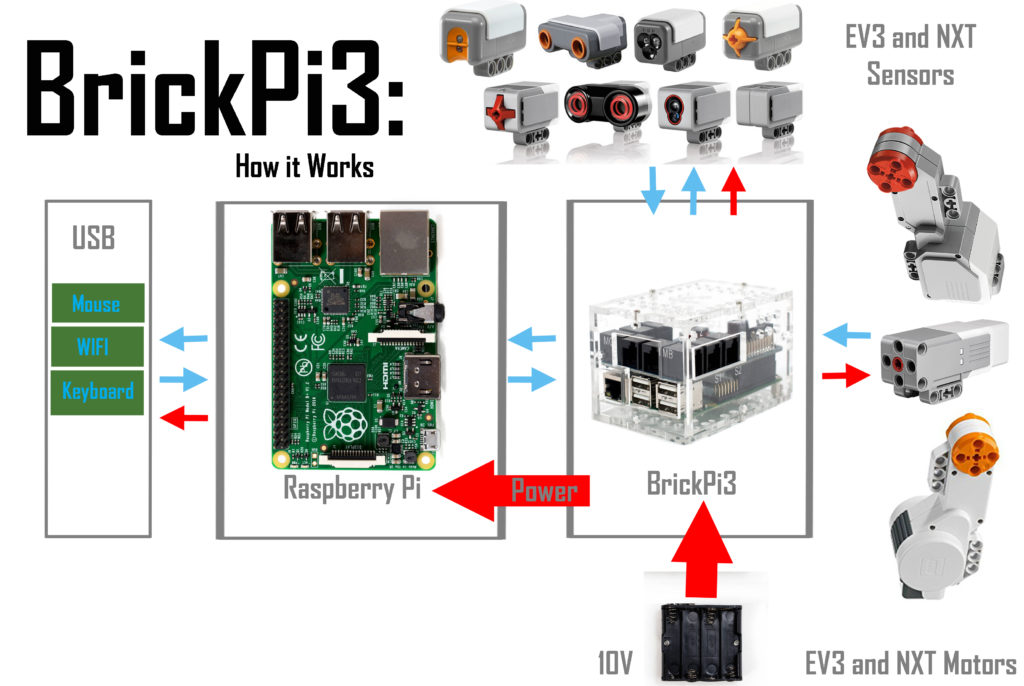
The BrickPi3 is used to control Lego Mindstorms robots using the Raspberry Pi. You can connect up to 4 NXT or EV3 motors, and up to 4 NXT or EV3 sensors. You can also connect a Grove I2C device, such as a Dexter Industries PivotPi.
You can see a schematic of the BrickPi3 hardware here.
Drivers and Software
Python and Scratch drivers and example programs are provided for programming on the Raspberry Pi.
Batteries and Power
The batteries provide power for the BrickPi3 and Raspberry Pi. The Battery power is provided though a standard 2.1mm x 5.5mm barrel jack (center positive, with diode reverse polarity protection).
There is a power switch that connects/disconnect the power from the barrel jack.
The battery voltage should be 9v nominal. 7.2v to 10v is recommended. At least 6.5v is required in order for the 5v regulator to have enough overhead to power the Raspberry Pi reliably. The voltage may never exceed 14.5v, above which there is risk of damage. Lego motors are designed for 9v, so for their sake the voltage should never exceed about 10.5v (they are thermally protected, and there is some overhead voltage loss in the drive circuits).
If the battery voltage drops below 6v or the battery voltage drops below 6.8v and the Raspberry Pi voltage drops below 4.85v, the motors will automatically be disabled in attempt to keep the Raspberry Pi from crashing. The motors will automatically resume when the voltage becomes adequate.
The 5v regulator is a buck regulator that can provide enough power to run the Raspberry Pi 3 with WiFi. It can source 1.5A continuous, with peaks of up to 3A.
There is a 9v boost regulator (powered from the 5v supply) to power sensors that require more than 5v.
There is a 3.3v linear low-dropout regulator (powered from the 5v supply) to power the BrickPi3 microcontroller.
Other than running motors, the entire BrickPi3 can be powered and run normally off of 5v through the Raspberry Pi USB-Micro 5v power input.
LEDs
The green LED indicates that the BrickPi3 is powered.
The yellow LED is normally controlled by the BrickPi3 firmware, but can be manually controlled by the user program. The user program can set the LED brightness to a level of 0-100%, or to -1 to return control of the LED back to the firmware. When the firmware is controlling the LED, it flashes it according to the status of the BrickPi3. Flashing once per second means that the battery voltage is at least 7.2v (the duty cycle will be scaled from 10% at 7.2v to 90% at 9v). Flashing twice per second means that the battery voltage is below 7.2v. Flashing four times per second means that the battery voltage is below 6v, or the battery voltage is below 6.8v and Raspberry Pi voltage below 4.85v (at which point the motors are automatically disabled). Flashing rapidly means that the BrickPi3 firmware has encountered an error. This is most likely caused by the BrickPi3 not being properly connected to the Raspberry Pi.
Motor Drivers
The motor drivers are TB6612FNG. They are rated for the full voltage range of the BrickPi3 (see above for voltage limits), and they are rated for 1.2A continuous (3.2A peak).
Grove I2C port
The grove I2C port is connected to the Raspberry Pi I2C bus through a voltage level shifter. The Raspberry Pi I2C bus runs at 3.3v, and the Grove I2C bus runs at 5v. The Raspberry Pi has built-in I2C pullups, and the BrickPi3 has 10k pullups on the 5v Grove bus.
Communication Protocol
The BrickPi3 and Raspberry Pi communicate using SPI. The Raspberry Pi is the master, and the BrickPi3 is the slave. The bus can run at up to 500kbps.
For specific details of the protocol, see here.


