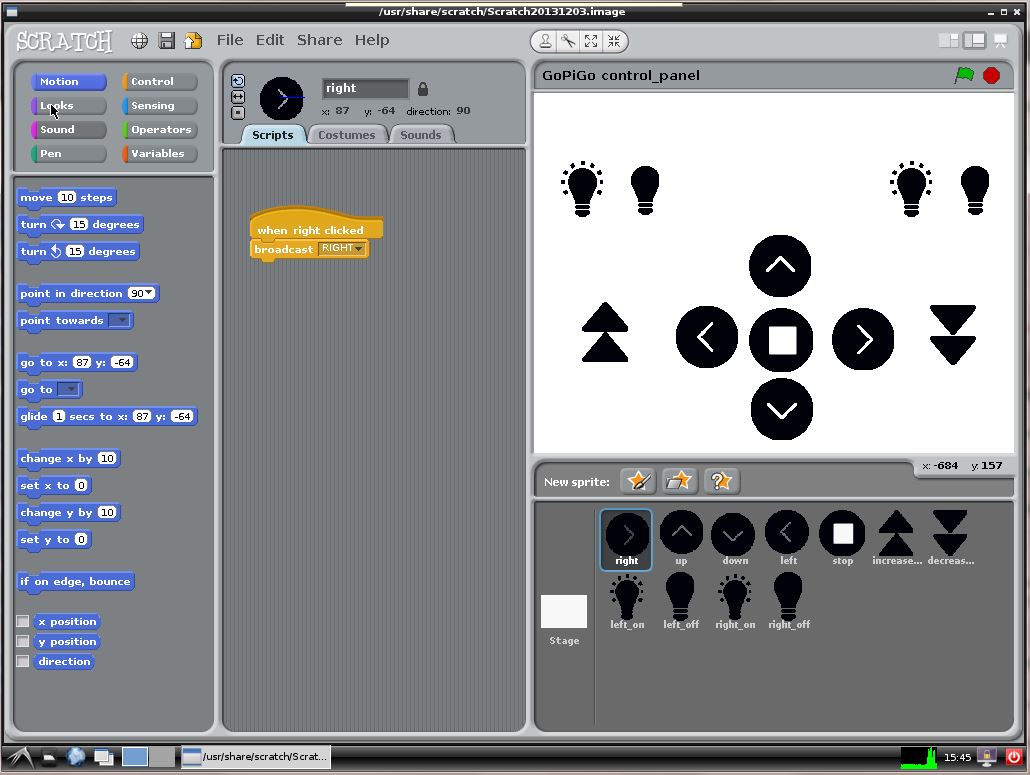
This example gives the user to control the GoPiGo using Scratch with an interactive Dashboard.
The Dexter Industries Image comes installed with Scratch and the Scratch library for the GoPiGo.
Connect to the GoPiGo
Make sure that the GoPiGo is set up properly and you have the updated software and firmware. If you are not sure about this, follow the guide here.
If the GoPiGo is properly set up, connect to the GoPiGo via the browser or VNC.
Start Scratch for Robots
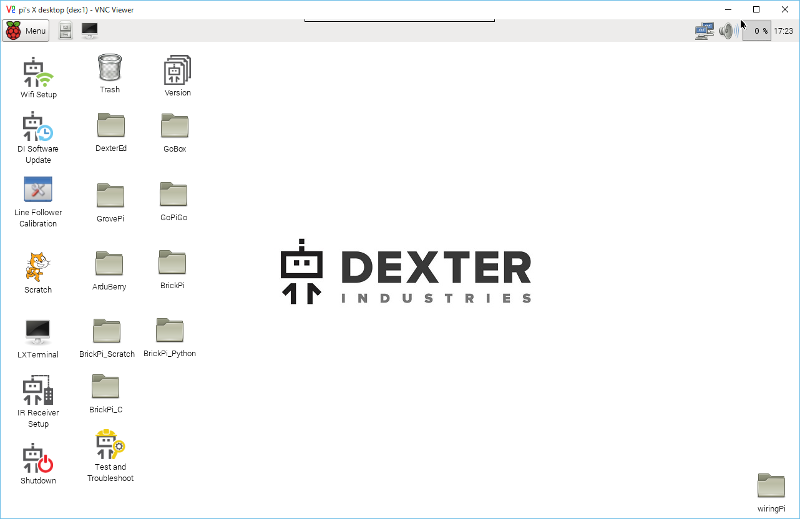
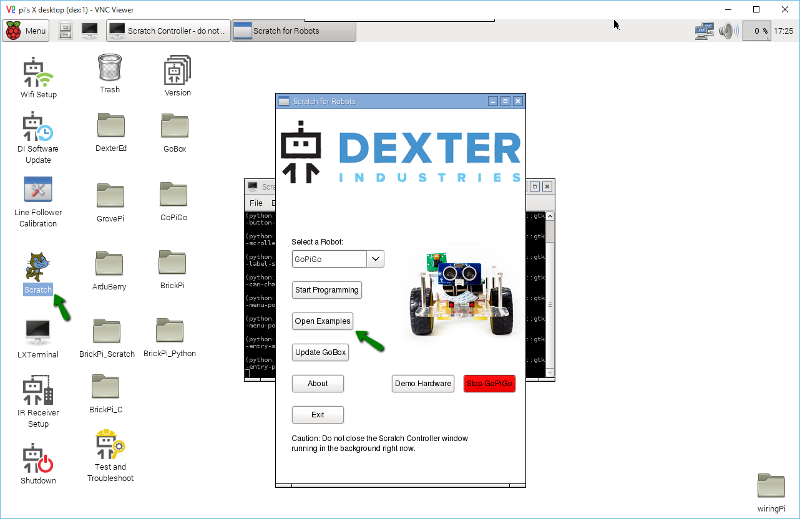
Double click the “Scratch” icon on the desktop (identified here with the green arrow) to start Scratch for Robots, the program which communicates between the GoPiGo and Scratch.
This will open two windows, a black terminal window called the Scratch Controller and the Scratch for Robotsinterface. Do NOT close the Scratch Controller, as that will kill all communications between Scratch and the robot!
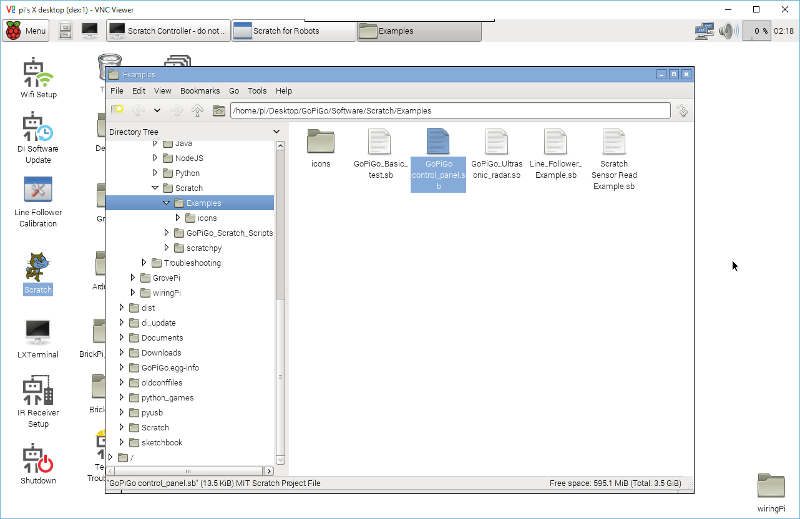
You can then click on “Open Examples” to find the GoPiGo Control Panel example.
Start the GoPiGo Control Panel
Start the control panel by double clicking the GoPiGo_control_panel.sb file.
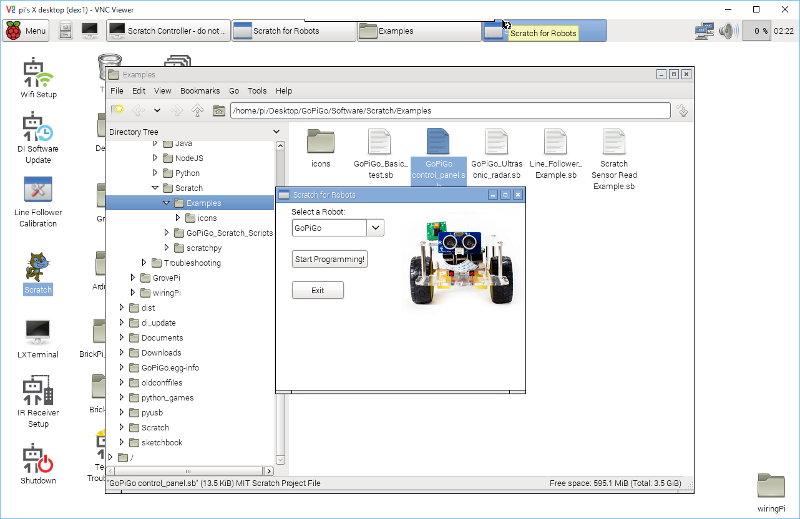
Double-clicking the control panel example will launch a confirmation window. If you already have Scratch up, now is a good time to save your work as you can only have one instance up and running. Make sure the GoPiGo robot is selected, and click on Start Programming!
Confirm the next window that will pop up and Scratch will start up!
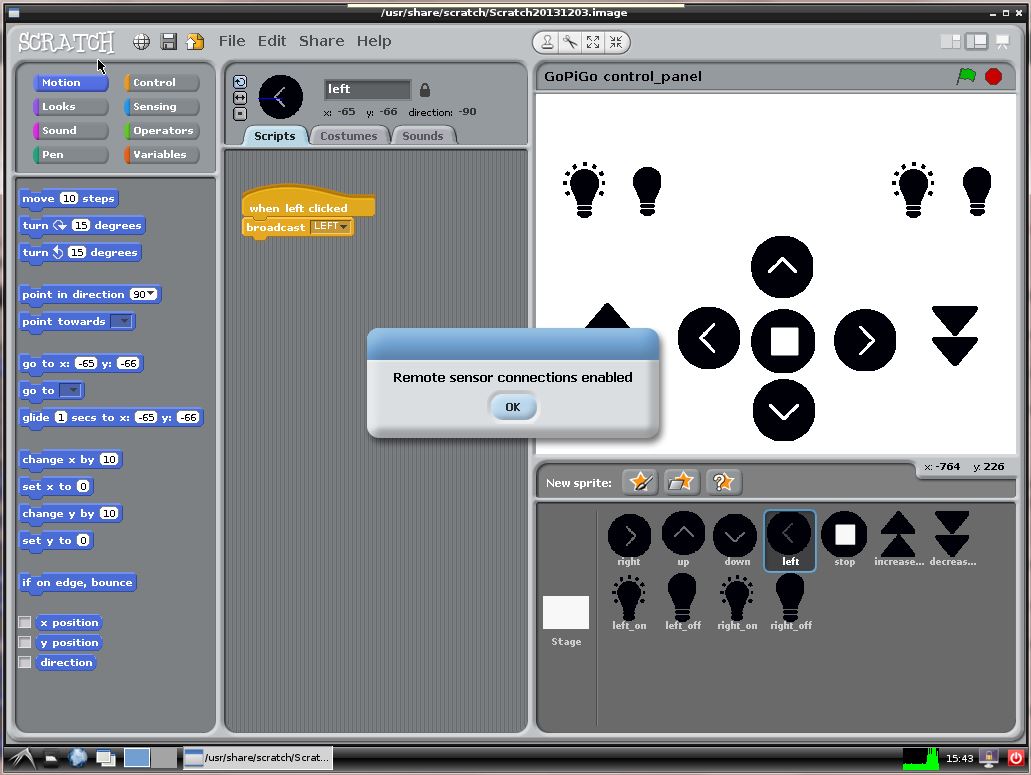
You should see Remote sensor connections enabled popup after loading the example. This means that the program is now connected to the GoPiGo.
Running the program
Press the Green Flag on the top right corner to start the program.
Press the various buttons to control the GoPiGo
Stop the program once you are done by pressing the Red Flag.
Have a question? Go check out our support page here or post it on the forums here.


