How to Flash new firmware using an Arduino
This is a tutorial on how to update the BrickPi firmware with an Arduino. If you don’t have an Arduino, you can see our other tutorial on how to update the BrickPi firmware with an AVR programmer here.
Tools Needed.
The ISP Programmer Kit includes the following, which you can also find separately:
- ISP programming ribbon cable.
- 6″ Jumper wire (male X male).
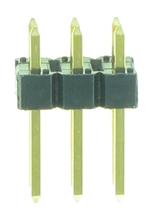
- A 6-pin 3X2 header.
Before You Begin.
- Make sure avrdude is installed on your computer. If you are using windows, you might need to install it in the PATH keywords so you can operate avrdude out of any directory.
- Mac OSX Users: Download and install AVR for Mac OSX at http://www.obdev.at/products/crosspack/index.html.
- Mac OSX Users: make your .sh files executable by using the command “chmod 777 upload1.sh”
- Compile and Upload ArduinoISP Sketch on your Arduino UNO. Sparkfun has a handy tutorial on how to configure your Arduino as an ISP programmer here.
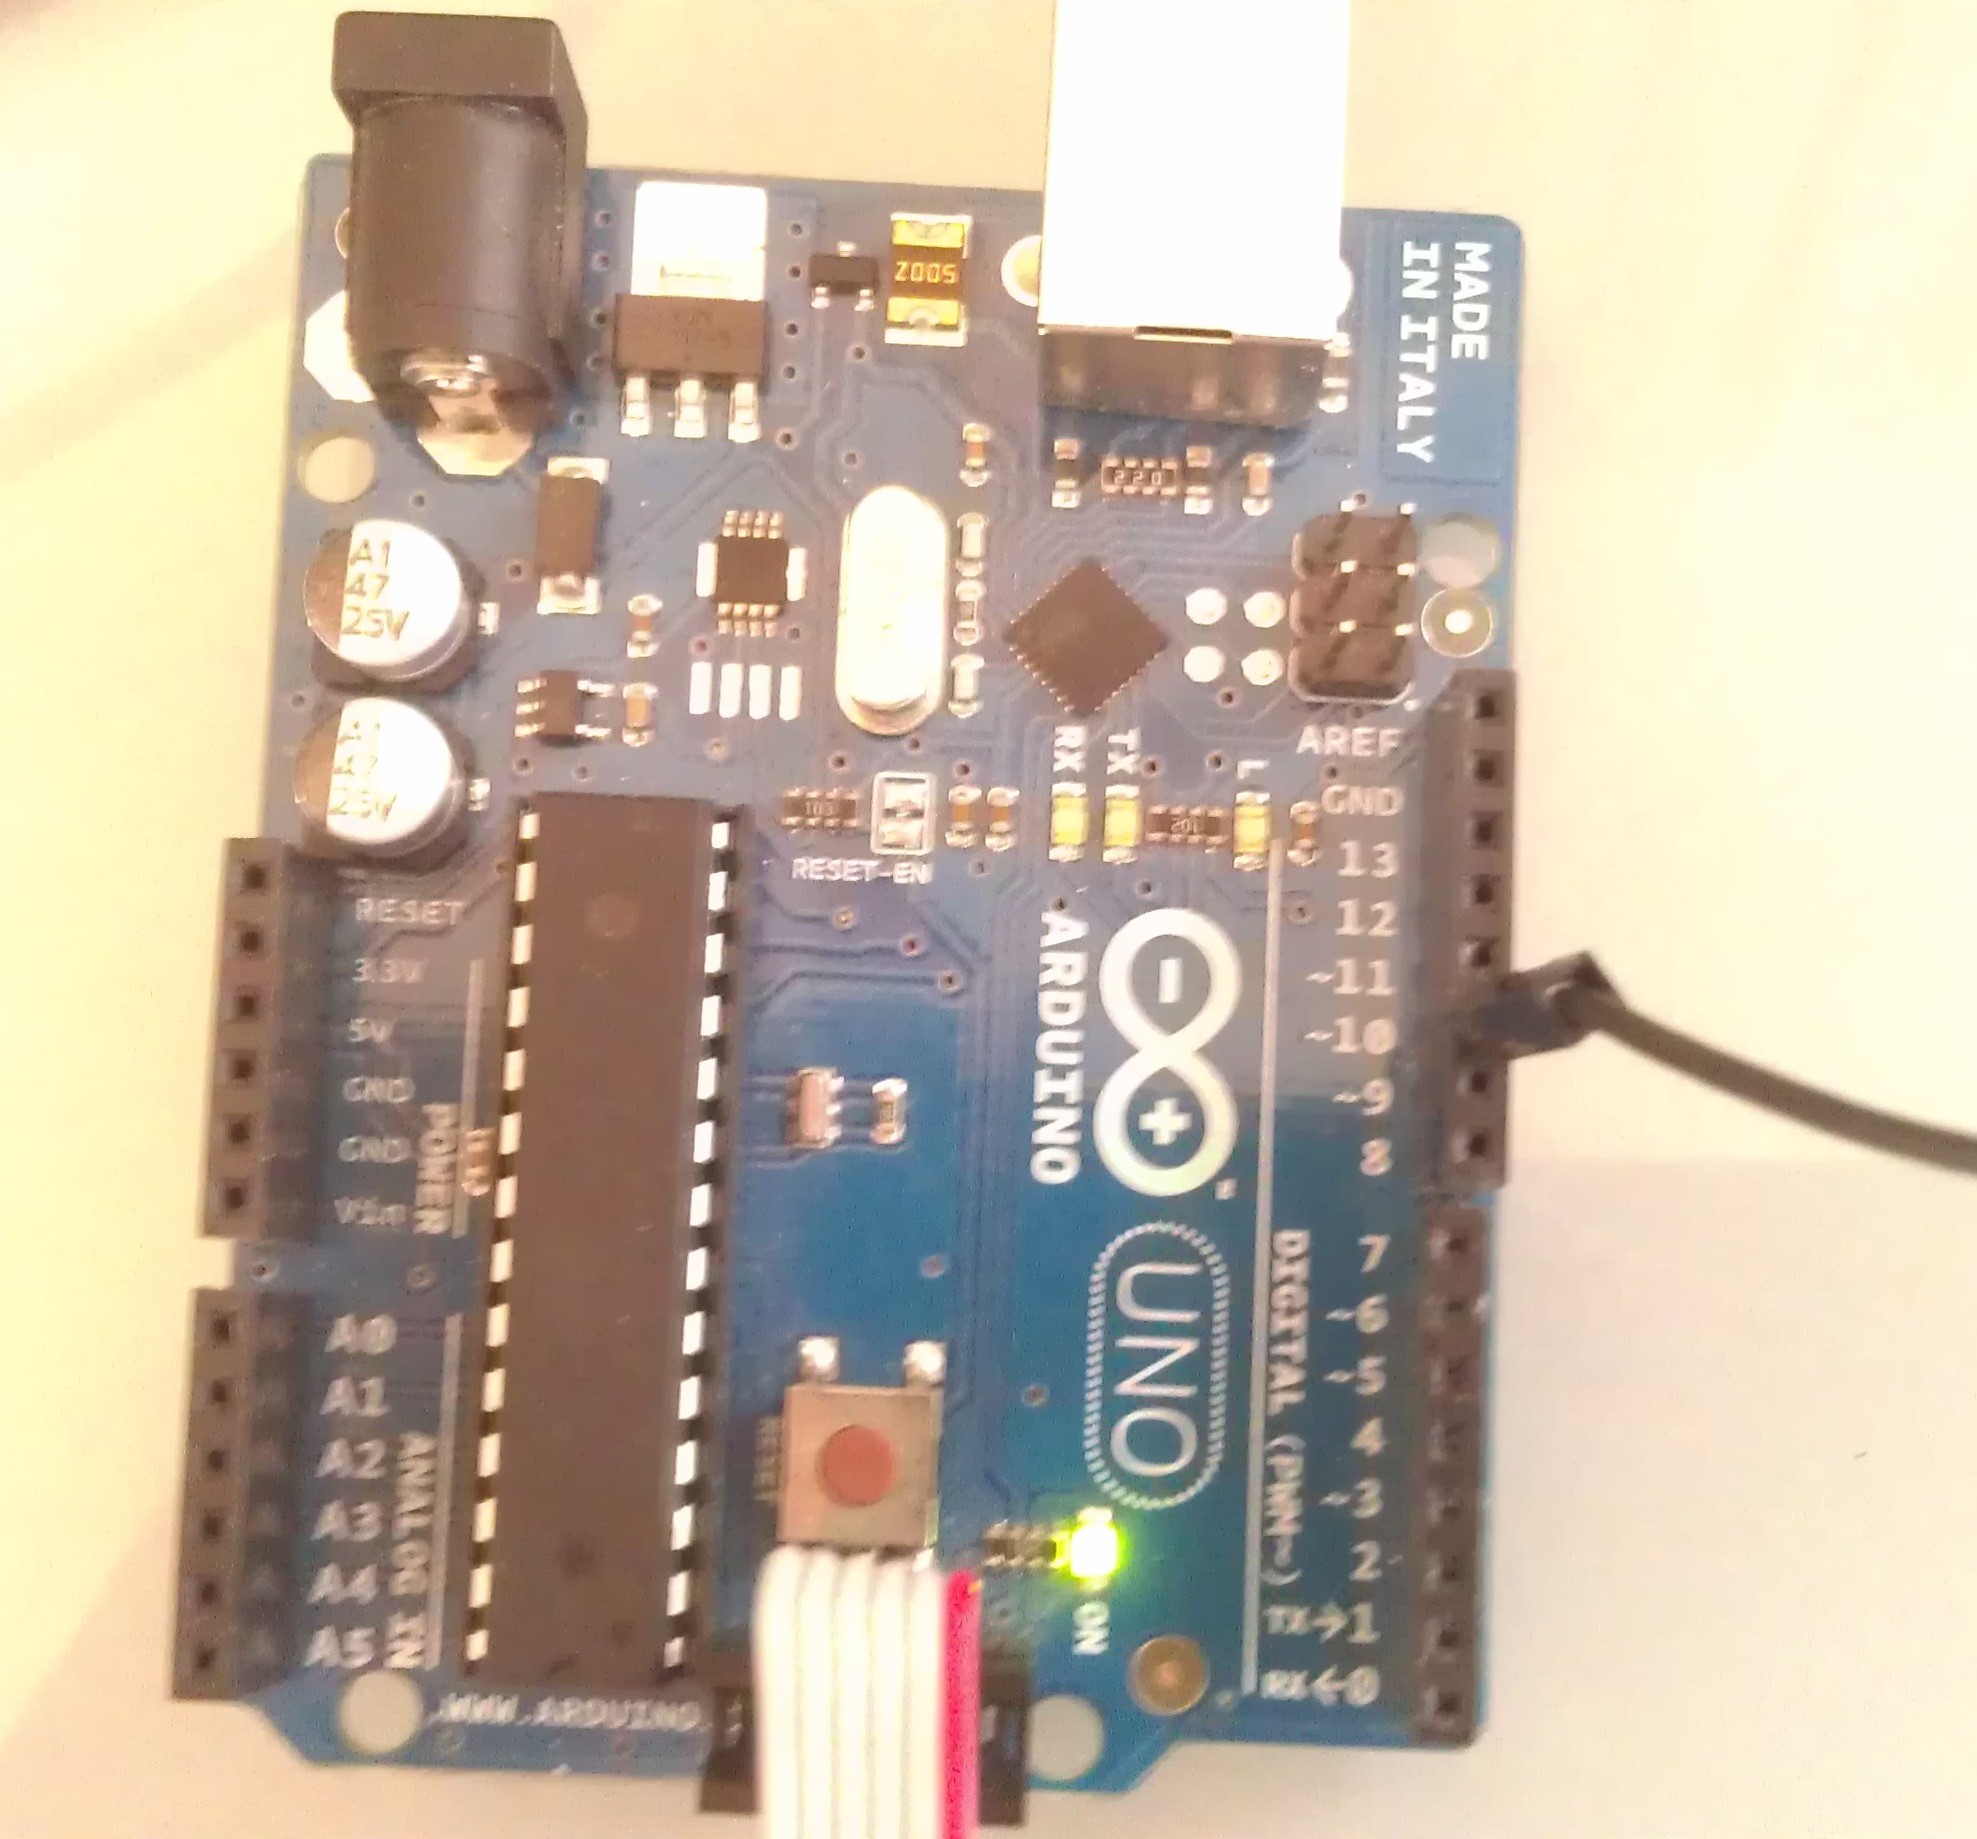
Connecting the Programmer ribbon cable and the Reset Line to D10.
- Find and note the COM port your Arduino is on when connected to your computer. In Windows, you can find it under “Devices and Printers”.
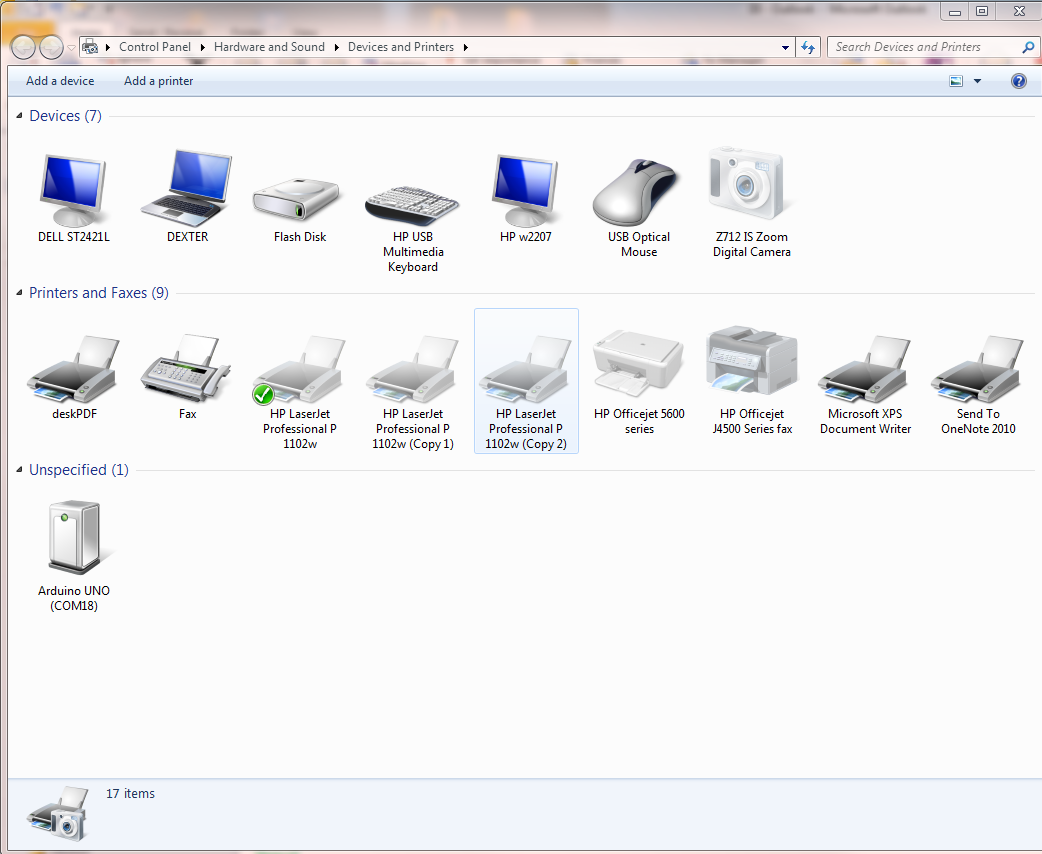
Find the COM Port your Arduino UNO in Windows.
- Download the batch files and firmware from Github here. Select the directory of the firmware you want to install, and download the contents of that directory.
- Power the BrickPi. Connect your battery pack to the BrickPi.
Program the BrickPi Firmware
There are two microcontrollers to program on the BrickPi. Both need to be programmed separately. Start with microcontroller 1, and then repeat the following steps for microcontroller 2. Be sure to verify you are programming the correct Microcontroller (UC1 vs UC2)!
- Connect the 3X2 6 pin header to your programming ribbon.
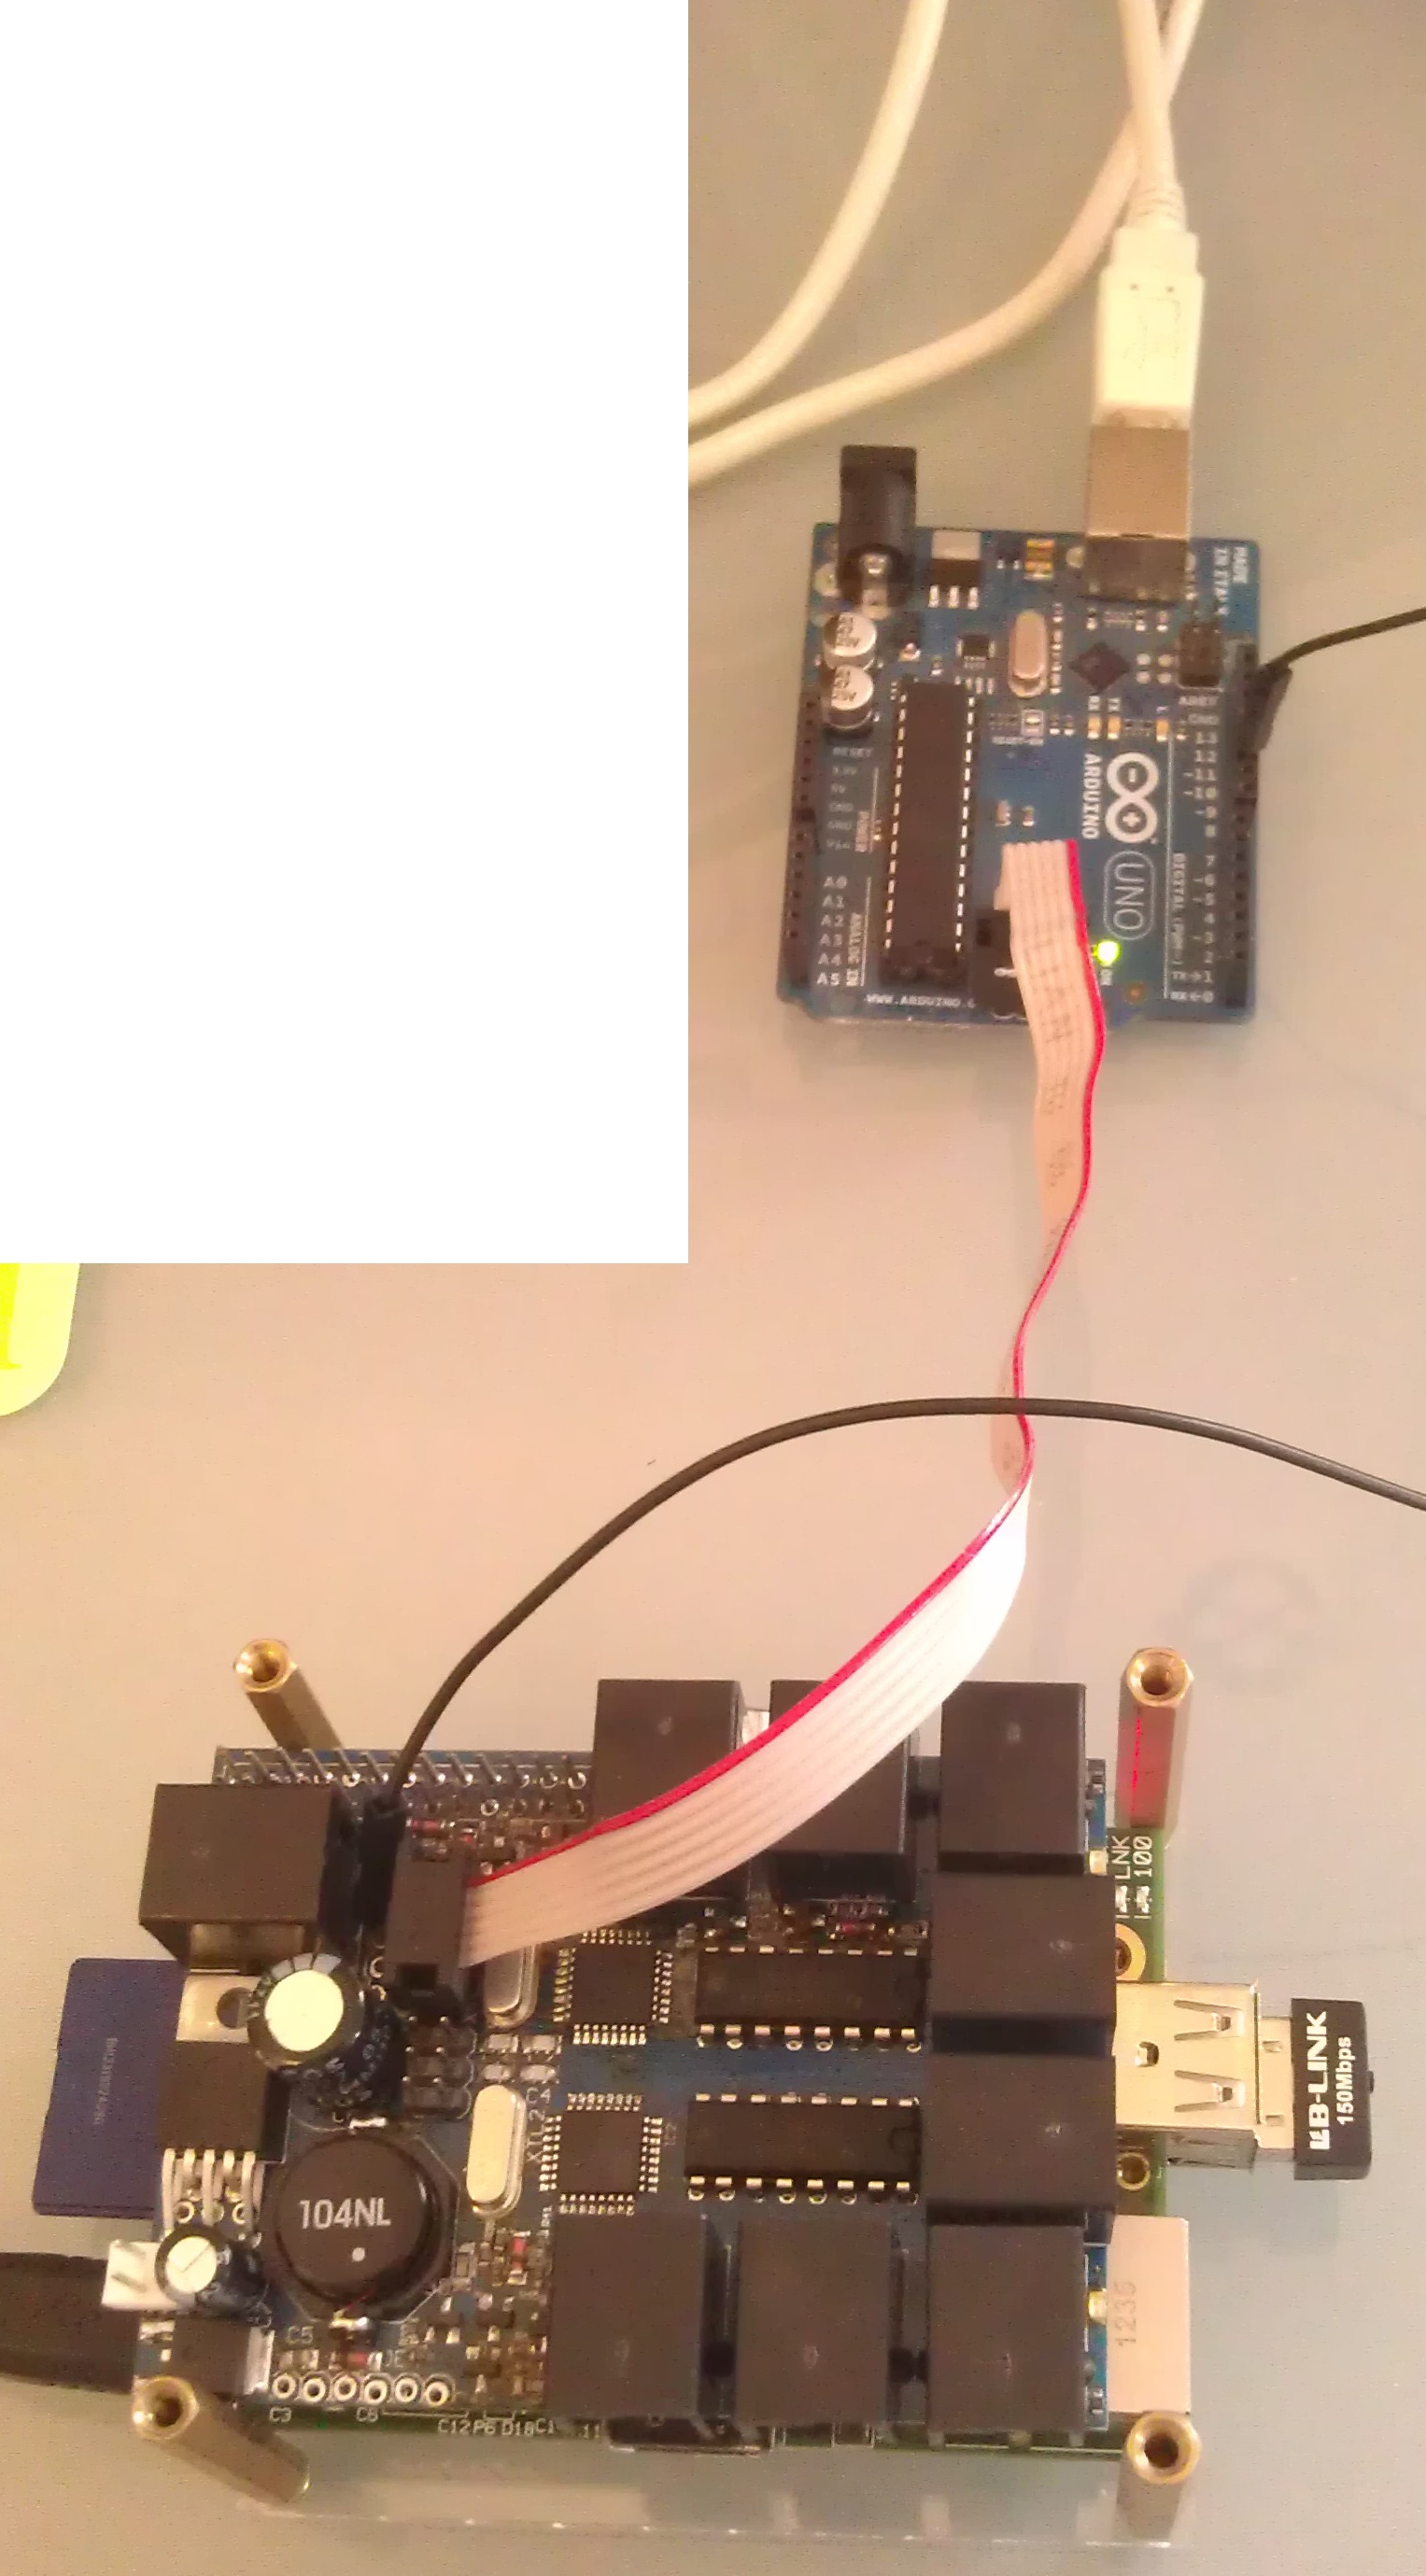
- Connect Arduino to the BrickPi microcontroller with the programming ribbon. The ribbon cable should be oriented as shown in the picture below.

Click for a closer view of the programmer locations.
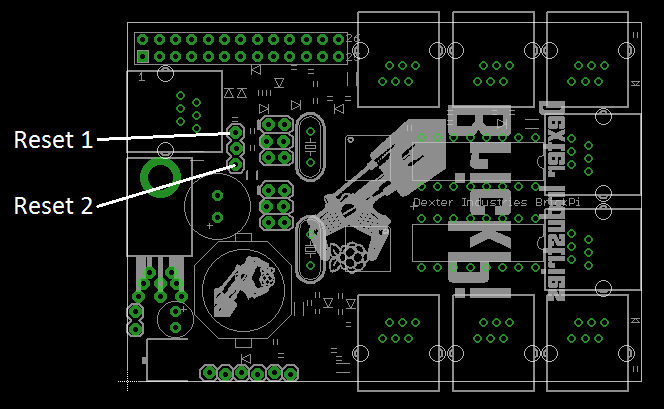
- Find the reset connection in the diagram below, for the micro-controller you are programming. “Reset 1” is for programming Micro-controller 1. Connect the reset line to D10 and the appropriate BrickPi reset connection.
- Connect D10 to the appropriate reset line on the BrickPi.
-
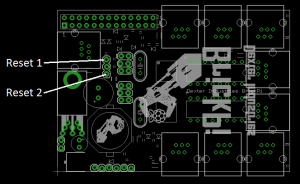
The location of the reset pins for each micro-controller.
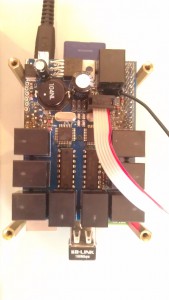
The ribbon cable and micro-controller correctly attached to the BrickPi for programming micro-controller 1.
- Check the orientation of your ribbon cable on the Arduino and on the BrickPi. Hold the 6″ jumper cable to the BrickPi board, keeping it in the reset hole you chose, and push it to the side so the metal part of the jumper makes contact.
-
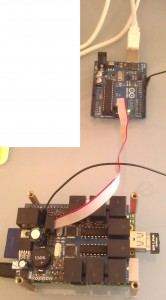
Correctly oriented ribbon cable and reset line for programming micro-controller 1 on the BrickPi.
- Double-check: you’re programming to the correct Microcontroller (UC1 vs UC2)!
- Begin the .BAT ( BrickPiFW_UC1 – Arduino Script ) file operation. You should be able to click directly on the file to run the programmer.
- Enter the appropriate port when asked for “COM#”.
- For each micro-controller there are 6 sequences: 3 fuse writes, two memory writes, and one EEPROM write. You will need to press return after each sequence.


Setting fuse and port selection
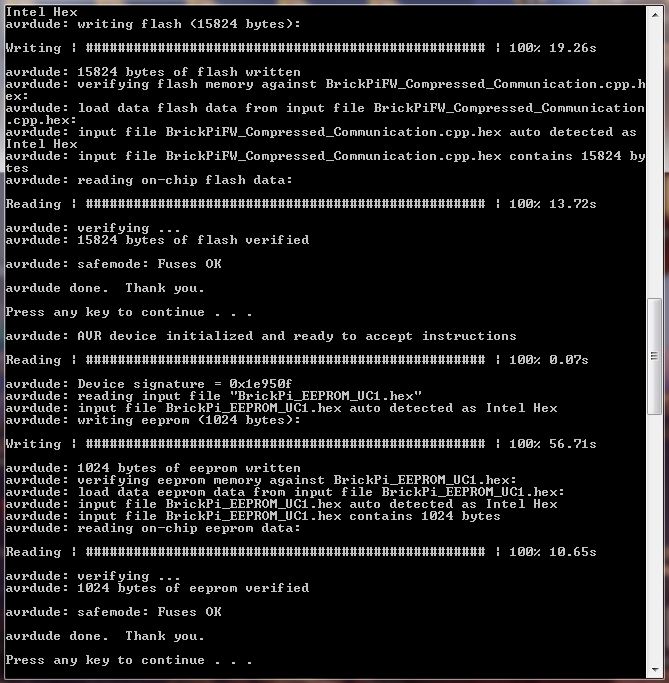
Success! Firmware is programmed!
After programming the first micro-controller (UC1), repeat steps 1-4 above for the second micro-controller (UC2) on the BrickPi. Change the ISP header to the “Programmer 2” on the BrickPi and use the script called “BrickPiFW_UC2 – MK2 Programmer“. Change the ISP header to “Programmer 2“on the BrickPi and change the reset pin to “Reset 2” and run “BrickPiFW_UC2 – Arduino Script“. Your BrickPi should have updated firmware now.